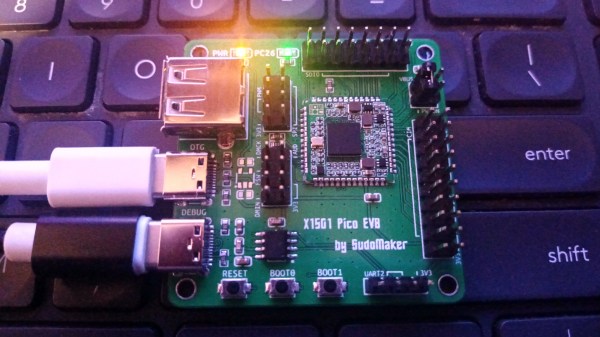
The SoM on an evaluation board, with two LEDs shining, one USB-C cable connected for power and another plugged into the OTG port

New Part Day: X1501 Makes For A Tiny And Open Linux SoM

Ever wanted to run Linux in an exceptionally small footprint? Then [Reimu NotMoe] from [SudoMaker] has something for you! She’s found an unbelievably small Linux-able chip in BGA, and designed a self-contained tiny SoM (System on Module) breakout with power management and castellated pads. This breakout contains everything you need to have Linux in a 16x16x2mm footprint. For the reference, a 16mm square is the size of the CPU on a Raspberry Pi.

This board isn’t just tiny, it’s also well-thought-out, helping you put the BGA-packaged Ingenic X1501 anywhere with minimal effort. With castellated pads, it’s easy to hand-solder this SoM for development and reflow for production. An onboard switching regulator works from 6V down to as low as 3V, making this a viable battery-powered Linux option. It can even give you up to 3.3V/1A for all your external devices.

The coolest part yet – the X1501 is surprisingly friendly and NDA-free. The datasheets are up for grabs, there are no “CONFIDENTIAL” watermarks – you get a proper 730-page PDF. Thanks to this openness, the X1501 can run mainline Linux with minimal changes, with most of the peripherals already supported. Plus, there’s Efuse-based Secure Boot if your software needs to be protected from cloning.

More after the break…

Continue reading “New Part Day: X1501 Makes For A Tiny And Open Linux SoM” →

A light blue marker with a two-pin header replacing the tip, being pressed against the back of the keypad baord that's removed from the safe

Anyone Can Be The Master Of This Master Lock Safe

[Etienne Sellan] got one of these lovely $5 logic analyzers. As with any shiny new tool, he started looking for things to investigate with it, and his gaze fell on a Sentry Safe (produced by Master Lock). On the surface level, this keypad-equipped safe is designed decently when it comes to privilege separation. You can take the keypad board off and access its backside, but the keypad doesn’t make any decisions, it merely sends the digits to a different board embedded behind the safe’s door. The solenoid-connected board receives the PIN, verifies it, and then controls the solenoid that unlocks the safe.

[Etienne] hooked up a logic analyzer to the communication wire, which turned out to be a UART channel, and logged the keypad communication packets — both for password entry and for password change. Then, he wrote some Arduino code to send the same packets manually, which worked wonders. Bruteforcing wasn’t viable, however, due to rate limitation in the solenoid controller. Something drew his attention from there – if you want to change the password, the keypad requires you enter the factory code, unique to each safe and supplied in the instruction manual. That code entry is a separate kind of packet from the “change password” one.

More after the break…

Continue reading “Anyone Can Be The Master Of This Master Lock Safe” →

Screenshot of the website, showing the sidebar with technology types on the left, and an entry about modifying LCD polarizers on the right, with a video showing an art piece using LCD polarizers

Alternative Display Technologies And Where To Find Them

[Blair Neal] has been working on an information database for artists and hackers – a collection of non-conventional display technologies available to us. We’ve covered this repository before, six years ago – since then, it’s moved to a more suitable platform, almost doubled in size, and currently covers over 40+ display technology types and related tricks. This database is something you should check out even if you’re not looking for a new way to display things right now, however, for its sheer educational and entertainment value alone.

[Blair] doesn’t just provide a list of links, like the “awesome-X” directories we see a lot of. Each entry is a small story that goes into detail on what makes the technology tick, its benefits and fundamental limitations, linking to illustrative videos where appropriate. It’s as if this guide is meant to give you an extensive learning course on all the ways you can visualize things on your creative journey. All of these categories have quite a few examples to draw from, highlighting individual artworks that have made use of any technology or trick in a particular way.

If you’re ever wondered about the current state of technology when it comes to flexible or transparent displays, or looked for good examples of volumetric projection done in a variety of ways, this is the place to go. It also talks about interesting experimental technologies, like drone displays, plasma combustion or scanning fiber optics. Overall, if you’re looking to spend about half an hour learning about all the ways there are to visualize something, this database is worth a read. And, if there’s a display technology the author might’ve missed and you know something about, contributions are welcome!

Someone setting out to compile information about an extensive topic is always appreciated, and helps many hackers on their path. We’ve seen that done with 3D printer resin settings and SMD part codes, to name just a few. What’s your favourite hacker-maintained database?

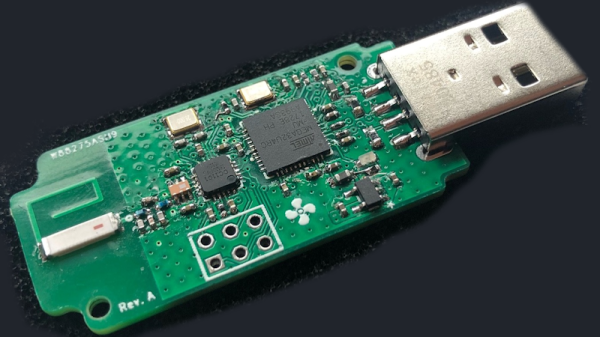
the dongle developed by Marcel, with a USB-A plug on one end and an SMD antenna on the other

Hackaday Prize 2022: House Ventilation Reverse-Engineered And Automated

[Marcel] thought – what if he had more control over his house ventilation system? You could add some nifty features, such as automatically ventilating your house in the mornings when everyone’s away, only creating noise when nobody’s around to hear it. Sadly, most ventilation systems are not automation-friendly at all – he was lucky, however, as his system came with a wireless remote. [Marcel] reverse-engineered this remote, created a USB dongle speaking the same protocol, and tied it into his Home Assistant setup!

The remote in question is Orcon R15, with an Atmel MCU talking to a CC1101 chip through SPI. He sniffed the SPI communications when pressing different buttons, figured out the protocol by comparing the recordings, and built a test setup with a spare Arduino and CC1101 module. It worked, and he set out to design a separate dongle, using an ATMega32U4. The dongle looks pretty neat, and fits a Hammond enclosure – what’s not to like?

Then he set out to develop the firmware, and didn’t disappoint on that front either. His code doesn’t just imitate the original remote perfectly in terms of control, it also has user-friendly pairing flow, keeps track of the system’s current state, and still lets the original remote be used in parallel. Eagle files for the PCB are available on the project page, with the code and a PDF schematic available in the GitHub repo. This entire journey is described in the Hackaday.io page, and we would recommend you check it out for all the insights it provides!

Ventilation systems don’t tend to be designed for automation, and it’s endearing to see hackers working on conquering this frontier. Last time we’ve seen a ventilation system hack, it had the additional challenge of being landlord-friendly, and we think the hacker nailed it!

On the left, the Thunderbolt chip as mounted on the motherboard originally. On the right, the shim installed in place of a Thunderbolt BGA chip, with the IPEX connector soldered on

Macbook Gets NVMe SSD With Help Of A BGA-Imitating PCB

Recently, we stumbled upon a video by [iBoff], adding an M.2 NVMe port to a 2011-2013 MacBook. Apple laptops never came with proper M.2 ports, especially the A1278 – so what’s up? The trick is – desoldering a PCIe-connected Thunderbolt controller, then soldering a BGA-like interposer PCB in place of where the chip was, and pulling a cable assembly from there to the drive bay, where a custom adapter PCB awaits. That adapter even lets you expose the PCIe link as a full-sized PCIe 4x slot, in case you want to connect an external GPU instead of the NVMe SSD!

The process is well-documented in the video, serving as an instruction manual for anyone attempting to install this specific mod, but also a collection of insights and ideas for anyone interested in imitating it. The interposer board ships with solder balls reballed onto it, so that it can be installed in the same way that a BGA chip would be – but the cable assembly connector isn’t installed onto the interposer, since it has to be soldered onto the mainboard with hot air, which would then melt the connector. The PCB that replaces the optical drive makes no compromises, either, tapping into the SATA connector pins and letting you add an extra 2.5mm SATA SSD.

Adding an NVMe drive is an underappreciated way to speed up your old laptop, and since they’re all PCIe under the hood, you can really get creative with the specific way you add it. You aren’t even limited to substituting obscure parts like Thunderbolt controllers – given a laptop with a discrete GPU and a CPU-integrated one, you could get rid of the discrete GPU and replace it with an adapter for one, or maybe even two NVMe drives, and all you need is a PCB that has the same footprint as your GPU. Sadly, the PCB files for this adapter don’t seem to be open-source, but developing a replacement for your own needs would be best started from scratch, either way.

We’ve seen such an adapter made for a Raspberry Pi 4 before, solderable in place of a QFN USB 3.0 controller chip and exposing the PCIe signals onto the USB 3 connector pins. However, this one takes it up a notch! Typically, without such an adapter, we have to carefully solder a properly shielded cable if we want to get a PCIe link from a board that never intended to expose one. What’s up with PCIe and why is it cool? We’ve talked about that in depth!

Continue reading “Macbook Gets NVMe SSD With Help Of A BGA-Imitating PCB” →

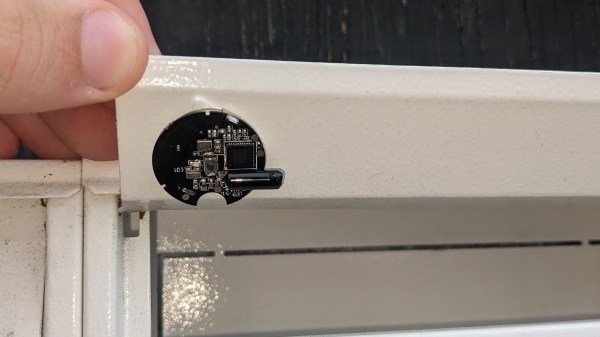
A small round NRF51822 board glued to the underside of a mailbox lid, with a small vibration sensor attached

Check Your Mailbox Using The AirTag Infrastructure

When a company creates an infrastructure of devices, we sometimes subvert this infrastructure and use it to solve tricky problems. For example, here’s a question that many a hacker has pondered – how do you detect when someone puts mail into your mailbox? Depending on the availability of power and wireless/wired connectivity options, this problem can range from “very easy” to “impractical to solve”. [dakhnod] just made this problem trivial for the vast majority of hackers, with the FakeTag project – piggybacking off the Apple’s AirTag infrastructure.

This project uses a cheap generic CR2032-powered NRF51822 board, sending the mailbox status over the FindMy system Apple has built for the AirTag devices. For the incoming mail detection, he uses a simple vibration sensor, glued to the flap lid – we imagine that, for flap-less mailboxes, an optical sensor or a different kind of mechanical sensor could be used instead. Every time someone with a FindMy-friendly iPhone passes by [dakhnod]’s mailbox, he gets an update on its status, with a counter of times the sensor has been triggered. [dakhnod] estimates that the device could run for up to a year on a single battery.

Continue reading “Check Your Mailbox Using The AirTag Infrastructure” →

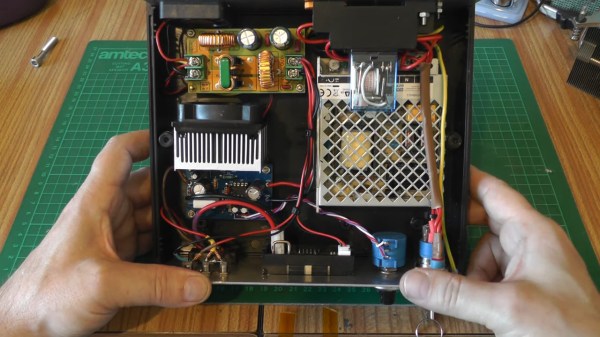
The laser driver's internals, showing the custom PCB, the PSU, connectors and the interlocks.

Laser Driver Design Keeps Safety First

[Les] from [Les’ Lab] has designed a driver for laser diodes up to 10 watts, and decided to show us how it operates, tells us what we should keep in mind when designing such a driver, and talks about laser safety in general. This design is an adjustable current regulator based on the LM350A, able to provide up to 10 watts of power at about 2 volts – which is what his diode needs. Such obscure requirements aren’t easily fulfilled by commonly available PSUs, which is why a custom design was called for.

He tells us how he approached improving stability of the current regulation circuit, the PCB design requirements, and planning user interface for such a driver. However, that’s just part of the battle – regulating the current properly is important, but reducing the potential for accidental injuries even more so. Thus, he talks extensively about designing the driver circuit with safety in mind – using various kinds of interlocks, like a latching relay circuit to prevent it from powering up as soon as power is applied.

Continue reading “Laser Driver Design Keeps Safety First” →