Computer Built Into A Board Uses Only 10 Watts

In the realm of low-powered desktop computers, there are some options such as the Raspberry Pi that usually come out on top. While they use only a few watts, these tend to be a little lackluster in the performance department and sometimes a full desktop computer is called for. [Emile] aka [Mux] is somewhat of an expert at pairing down the power requirements for desktop computers, and got his to run on just 10 watts. Not only that, but he installed the whole thing in a board and mounted it to his wall. (Google Translated from Dutch)

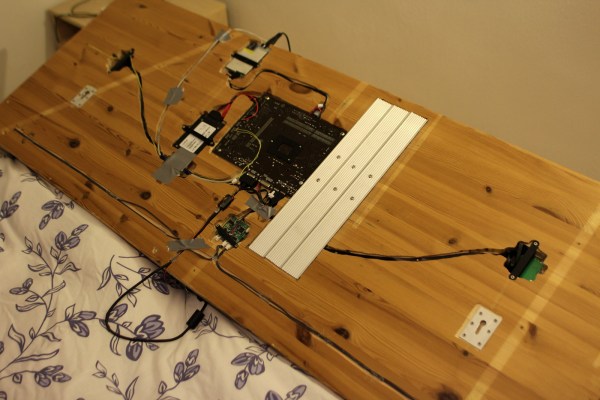
The computer itself is based on a MSI H81M-P33 motherboard and a Celeron G1820 dual-core processor with 8GB RAM. To keep the power requirements down even further, the motherboard was heavily modified. To power the stereo custom USB DAC, power amplifier board, and USB volume button boards were built and installed. The display is handled by an Optoma pico projector, and the 10-watt power requirement allows the computer to be passively cooled as well.

As impressive as the electronics are for this computer, the housing for it is equally so. Everything is mounted to the backside of an elegant piece of wood which has been purposefully carved out to hold each specific component. Custom speakers were carved as well, and the entire thing is mounted on the wall above the bed. The only electronics visible is the projector! It’s even more impressive than [Mux]’s first low-power computer.
Chinese Temperature/Humidity Sensor Is Easily Hacked

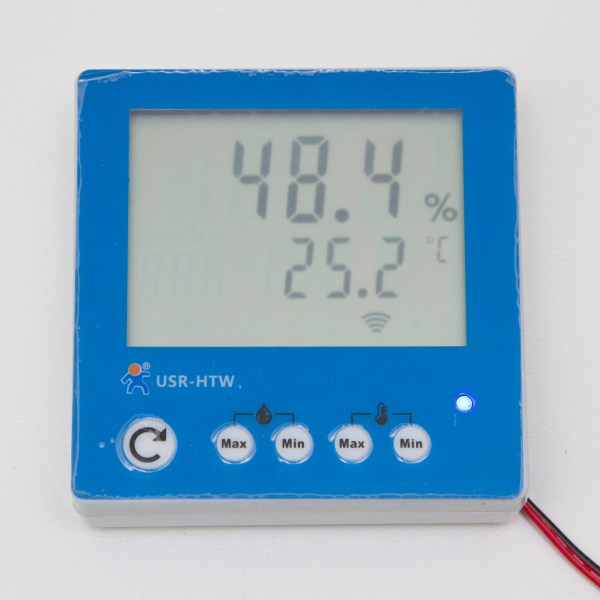
There’s a new piece of electronics from China on the market now: the USR-HTW Wireless Temperature and Humidity Sensor. The device connects over Wi-Fi and serves up a webpage where the user can view various climate statistics. [Tristan] obtained one of these devices and cracked open the data stream, revealing that this sensor is easily manipulated to do his bidding.

Once the device is connected, it sends an 11-byte data stream a few times a minute on port 8899 which can be easily intercepted. [Tristan] likes the device due to the relative ease at which he could decode information, and his project log is very detailed about how he went about doing this. He notes that the antenna could easily be replaced as well, just in case the device needs increased range.

There are many great reasons a device like this would be useful, such as using it as a remote sensor (or in an array of sensors) for a homemade thermostat, or a greenhouse, or in any number of other applications. The sky’s the limit!

Pico-Kubik Quadruped Fits In The Palm Of Your Hand

Most of the legged robots we see here are of the hexapod variety, and with good reason. Hexapods are very stable and can easily move even if one or more of the legs has been disabled. [Radomir] has taken this a step farther and has become somewhat of an expert on the more technically difficult quadruped robot, building smaller and smaller ones each time. He has been hard at work on his latest four-legged creation called the Pico-Kubik, and this one will fit in the palm of your hand.

The Pico-Kubik runs Micropython on a VoCore board, which allows for it to have a small software footprint to complement its small hardware footprint. It accomplishes the latter primarily through the use of HK-282A Ultra-Micro Servos, an Arduino Pro Mini, and a tiny lithium ion battery. It’s still a work in progress, but the robot can already crawl across the tabletop.

This isn’t [Radomir]’s first time at the tiny quadruped rodeo, either. He has already built the Nano-Kubik and the µKubik, all of which followed the first (aptly-named) Kubik quadruped. Based on the use of SI prefixes, we can only assume the next one will be the hella-Kubik!

Extremely Detailed FMCW Radar Build

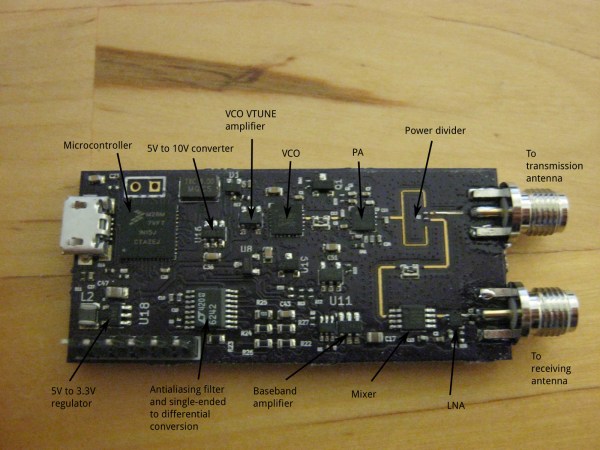
A lot of hackers take the “learn by doing” approach: take something apart, figure out how it works, and re-purpose all of the parts. [Henrik], however, has taken the opposite approach. After “some” RF design courses, he decided that he had learned enough to build his own frequency-modulated continuous wave radar system. From the level of detail on this project, we’d say that he’s learned an incredible amount.

[Henrik] was looking to keep costs down and chose to run his radar in the 6 GHz neighborhood. This puts it right in a frequency spectrum (at least in his area) where radar and WiFi overlap each other. This means cheap and readily available parts (antennas etc) and a legal spectrum in which to operate them. His design also includes frequency modulation, which means that it will be able to determine an object’s distance as well as its speed.

There are many other design considerations for a radar system that don’t enter into a normal project. For example, the PCB must have precisely controlled trace widths so that the impedance will exactly match the design. In a DC or low-frequency AC system this isn’t as important as it is in a high-frequency system like this. There is a fascinating amount of information about this impressive project on [Henrik]’s project page if you’re looking to learn a little more about radio or radar.

Too daunting for you? Check out this post on how to take on your first radar project.

Augmented Reality Pinball

Pinball machines are fascinating pieces of mechanical and electrical engineering, and now [Yair Moshe] and his students at the Israel Institute of Technology has taken the classic game one step further.  Using computer vision and a projector, this group of engineers has created an augmented reality pinball game that takes pinball to a whole new level.

Once the laptop, webcam, and projector are set up, a course is drawn on a whiteboard which the computer “sees” to determine the rules of the game. Any course you can imagine can be drawn on the whiteboard too, with an interesting set of rules that no regular pinball game could take advantage of. Most notably, the ball can change size when it hits certain types of objects, which makes for a very interesting and unconventional style of play.

The player uses their hands to control the flippers as well, but not with buttons. The computer watches the position of the player’s hands and flips the flippers when it sees a hand in the right position. [Yair] and his students recently showed this project off at DLD Tel Aviv and even got [Shimon Perez], former President of Israel, to play some pinball at the conference!

Easy And Effective Way To Measure PWM… Without A Scope!

Sometimes when a project is coming together, you need to cobble a tool together to get it completed. Whether it’s something very involved, like building a 3D printer to fabricate custom parts, or something relatively simple, like wiring a lightbulb and a battery together to create a simple continuity checker, we’ve all had to come up with something on the fly. Despite having access to an oscilloscope, [Brian] aka [schoolie] has come up with his own method for measuring PWM period and duty cycle without a scope, just in case there’s ever a PWM emergency!

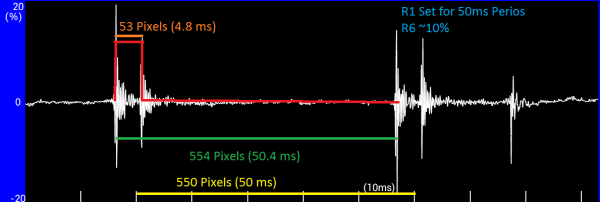
The system he has come up with is so simple it’s borderline genius. The PWM signal in question is fed through a piezo speaker in parallel with a resistor. The output from the speaker is then sent to an FFT (fast fourier transform) app for Android devices, which produces a picture of a waveform. [schoolie] then opens the picture in MS Paint and uses the coordinates of the cursor and a little arithmetic to compute the period and the duty cycle.

For not using a scope, this method is pretty accurate, and only uses two discrete circuit components (the resistor and the speaker). If you’re ever in a pinch with PWM, this is sure to help, and be a whole lot cheaper than finding an oscilloscope!

Bluetooth Boombox For That 80s Nostalgia

Sure, anyone can go buy a bluetooth speaker for their portable music needs. But for something a little more unique, at least in this decade, [Daniel] aka [speedfox] went with an 80s-style boombox and outfitted it with a bluetooth module.

The retro boombox was delivered with a few scratches and a broken radio, but the tape decks were still in decent shape so it was ready to be hacked. [speedfox] tied the Bluetooth audio output to the tape reader on one of the boombox’s tape decks, but this revealed a problem: the bass was overwhelming the rest of the sound. [speedfox] fixed this by adding a filter which worked until the power was tied in to the Bluetooth module and produced a lot of RF noise in the audio output. THIS problem was finally resolved with an audio transformer on both sides of the stereo signal. Finally!

After putting all of the new electronics in the case (and safely out of the way of the 120V AC input!) [speedfox] now has a classy stereo that’s ready to rock some Run-D.M.C. or Heavy D. He notes that the audio filter could use a little tweaking, and he’d also like to restore the functionality of the original buttons on the boombox, but it’s a great start with more functionality than he’d get from something off-the-shelf!