Small, Detailed Nixie Clock Build

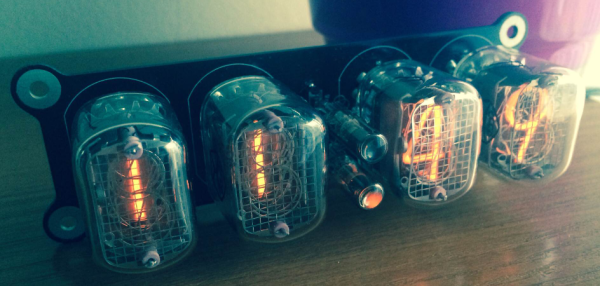
Nixie tubes, while built during the vacuum tube era of the mid-20th century, still exist in a niche among hackers. It’s quite the task to get them up and running due to a number of quirks, so getting an entire clock to work with Nixie tubes is a badge of honor for those who attempt the project. For anyone thinking about trying, [Tomasz] has written an extremely detailed write-up of his Nixie clock which should be able to help.

There is a lot of in-depth theory behind Nixie tubes on [Tomasz]’s page that he covers in the course of describing his clock. As far as the actual project is concerned, this is a simplified design which uses one board for the entire clock, including circuits for the lamps, drivers, microcontroller, power supply, and DC/DC conversion. This accomplishes his goal of making this project as small as possible. The Nixies he chose were IN-12 which are popular in his Eastern European home, but could be sourced from eBay and shipped anywhere in the world.

There is a lot of documentation on the project site, including schematics, microcontroller code, PCB design, and even screenshots of the oscilloscope for various points in the circuit. While this might not be the simplest Nixie clock ever, it is certainly close, more easily readable, and the most detailed build we’ve seen in a while!
Reading Power Use Data With A Webcam And Python

As any hacker will attest to, whenever an important tool is missing, you might as well just build a new one! That’s the position that [Matt] found himself in when he was attempting to measure the power consumption at his parents’ house. He left the transmitter for the power meter at home, and so the logical thing to do was to set up a webcam and a python script to monitor his dad’s power meter instead of going back to get his.

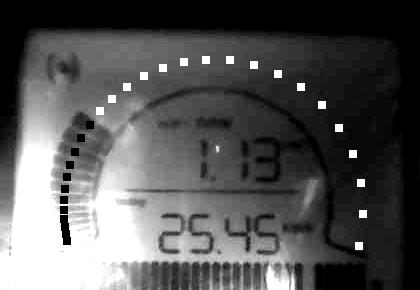
The power meter that he had handy was a GEO Minim Electricity Monitor. He found it very difficult to extract the data directly from this particular meter, so instead of digging into any of the communications protocols int he meter, he set up a webcam in a box with an LED and monitored it with a specially-written Python script. The script is able to see the particulars of the meter, and then reports back to the computer with all of the relevant data. [Matt] has put this code up on his project site for anyone to use.

This is a great workaround that doesn’t involve delving too deep into the inner workings of the meter in question. You could always build your own power monitoring system though, if that’s more of your style!

ZX81 Emulated On An Mbed

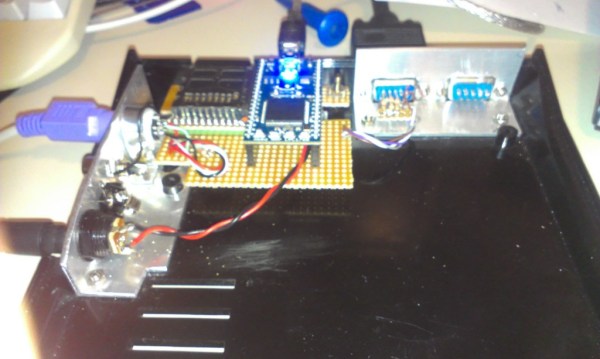
This is a wonderful example of the phenomenon of “feature creep”. [Gert] was working on getting a VGA output running on an mbed platform without using (hardly) any discrete components. Using only a few resistors, the mbed was connected to a VGA display running at 640×480. But what could he do with something with VGA out? He decided to emulate an entire Sinclair ZX81 computer, of course.

With more than 1.5 million units sold, the Sinclair ZX81 was a fairly popular computer in the early ’80s. It was [Gert]’s first computer, so it was a natural choice for him to try to emulate. Another reason for the choice was that his mbed-VGA device could only output monochrome color, which was another characteristic of the ZX81.

[Gert] started by modifying a very lean Z80 emulator to make the compiled code run as efficiently as possible on the mbed. Then he went about getting a picture to display on the screen, then he interfaced an SD card and a keyboard to his new machine. To be true to the original, he built everything into an original ZX81 case.

This isn’t the first time we’ve seen a ZX81, but it is one of the better implementations of an emulated version of this system we’ve seen.

Thanks to [Jeroen] for the tip!

DRM Protection Removed For… Coffee?

Keurig, the manufacturer of a single-serve coffee brewing system, has a very wide following amongst coffee drinkers. Their K-cup (pre-packaged coffee grounds with a coffee filter, all in a plastic container) is an interesting concept and makes brewing a single cup of coffee much more efficient over making a whole pot. Their newer line of coffee makers, the Keurig 2.0, has some interesting (and annoying) security features though, which [Kate Gray] has found an interesting and simple way around.

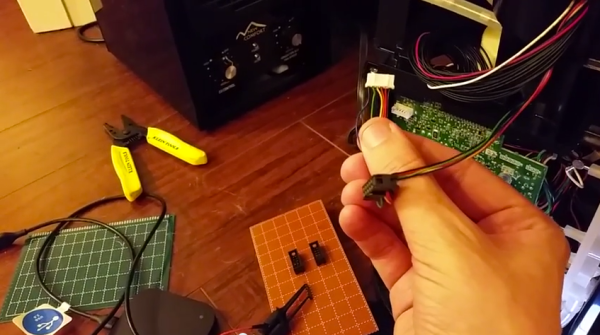
The DRM security in these coffee makers is intended to keep third-party “cups” from being used in the Keurig. It can recognize an authentic Keurig cup, and can stop the operation of the coffee pot if a knockoff is placed in the machine. We can only assume that this is because Keurig makes a heap of cash by selling its canisters of coffee. One simple solution was already covered a few days ago by taping an authentic lid to the machine. This one doesn’t require any authentic pods but just removes one wire from a wiring harness inside of the case.

There are other ways around the security on these devices, but when [Kate Gray] actually investigated, she found the security decidedly lacking. With something this simple, one can only speculate how much Keurig has really invested in making sure users don’t use third-party cups of coffee in their machines, but it also brings up the classic question of who really owns hardware if we can’t use it in the way we want, rather than the way the manufacturer wants.

You can read more about the project on its Reddit page. Thanks to [MyOwnDemon] for the tip!

Create An Inclinometer Using A Raspberry Pi

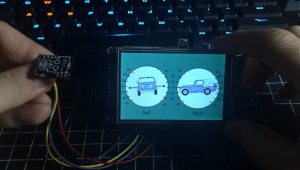
The latest gizmo that you can make using the cheap and easy Raspberry Pi is here courtesy of [Mark Williams]. He has hooked up an inertial measurement unit (IMU) to the Pi and built an inclinometer to use to measure the various angles of an off-road vehicle.

This particular guide goes through the setup of SDL to control the video output to a small screen. Then, a function is created to rotate the images based on input from the IMU so that the vehicle position can be shown graphically on the screen. Now, when your truck is about to roll over on a hill, you’ll get advance warning!

Of course, this whole project is predicated on installing the IMU and getting it up and running on the Raspberry Pi in the first place. [Mark] has you covered on a guide for setting that up as well. This delves into setting up the IMU over I2C to get it talking to the Raspberry Pi, and then converting the raw data from the IMU into data that is more usable. Be sure to check out [Mark]’s page for all of the code and details!

Quadcopter Beer Delivery System

One of the major design challenges when it comes to building an efficient quadcopter is weight. The idea here is that the more you can trim down the weight of the frame, motors, and circuitry, the longer the batteries will last. Or, in [dalbyman]’s case, the more beer it can carry.

[Dalbyman]’s housemate built the actual quadcopter, but then [dalbyman] got a little inebriated and decided that, while the quadcopter was exciting on its own, it would be even better with this modification. The actual device is a modified Pringles can with two servo motors on the bottom with arms that hold the beer. A parachute is attached to the beverage can and the assembly is loaded in. With a simple press of a button, the servos turn the arms and the beer falls out of the tube. Hopefully the parachute deploys and gently (and accurately) floats the beer to the thirsty person on the ground!

This project is a simple step that goes a long way towards a beer delivery system even Amazon could be proud of, and also shows off the capabilities of quadcopters in general. Perhaps the next step could be to automate the beer delivery system!


A Calculator With Free Software And Open Hardware

We’re fond of open source things here. Whether it’s 3D printers, circuit modeling software, or a global network of satellite base stations, the more open it is the more it improves the world around us. [Pierre Parent] and [Ael Gain] have certainly taken these values to heart with their open handheld graphing calculator.

While the duo isn’t giving away the calculators themselves, they are releasing all of the hardware designs so that anyone can build this calculator. It’s based on a imx233 processor because this chip (and most everything else about this calculator) is easy to source and easy to use. That, and there is a lot of documentation on it that is in the public domain. All of the designs, including the circuit board and CAD files for the case, are available to anyone who is curious, or wants to build their own.

The software on the calculator (and the software that was used to design the calculator) is all free software too. The calculator runs Linux (of course) and a free TI simulator environment in the hopes of easing the transition of anyone who grew up using TI’s graphing calculators. The project is still in a prototype phase, but it looks very promising. Even though the calculator can already run Pokemon, maybe one day it will even be able to run Super Smash Bros as well!