Scott Shawcroft Is Programming Game Boys With CircuitPython

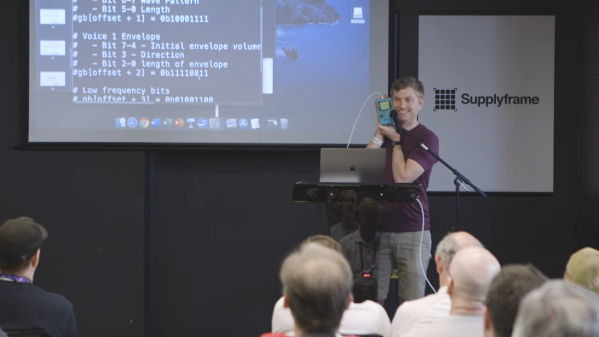
Some people like to do things the hard way. Maybe they drive a manual transmission, or they bust out the wire wrap tool instead of a soldering iron, or they code in assembly to stay close to the machine. Doing things the hard way certainly has its merits, and we are not here to argue about that. Scott Shawcroft — project lead for CircuitPython — on the other hand, makes a great case for doing things the easy way in his talk at the 2019 Hackaday Superconference.

In fact, he proved how easy it is right off the bat. There he stood at the podium, presenting in front of a room full of people, poised at an unfamiliar laptop with only the stock text editor. Yet with a single keystroke and a file save operation, Scott was able make the LEDs on his Adafruit Edge Badge — one of the other pieces of hackable hardware in the Supercon swag bag — go from off to battery-draining bright.

Code + Community

As Scott explains, CircuitPython prides itself on being equal parts code and community. In other words, it’s friendly and inviting all the way around. Developing in CircuitPython is easy because the entire environment — the code, toolchain, and the devices — are all extremely portable. Interacting with sensors and other doodads is easy because of the import and library mechanics Python is known for, both of which are growing within the CircuitPython ecosystem all the time.

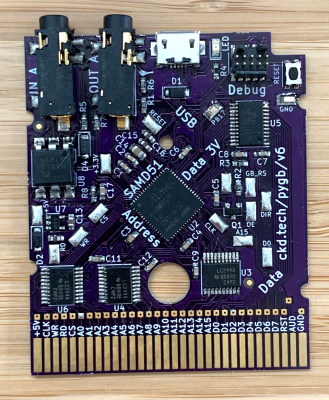
CircuitPython is so friendly that it can even talk to old hardware relatively easily without devolving into a generational battle. To demonstrate this point, Scott whipped out an original Nintendo Game Boy and a custom cartridge, which he can use to play fun sounds via the Game Boy’s CPU.
Now You’re Playing With Python

It’s interesting to see the platforms on which Scott has used the power of CircuitPython. The Game Boy brings the hardware for sound and pixel generation along with some logic, but he says it’s the code on the cartridge that does the interesting stuff.

The CPU communicates with carts at a rate of 1MHz. As long as you can keep this rate up and the CPU understands your instructions, you can get it to do anything you want.

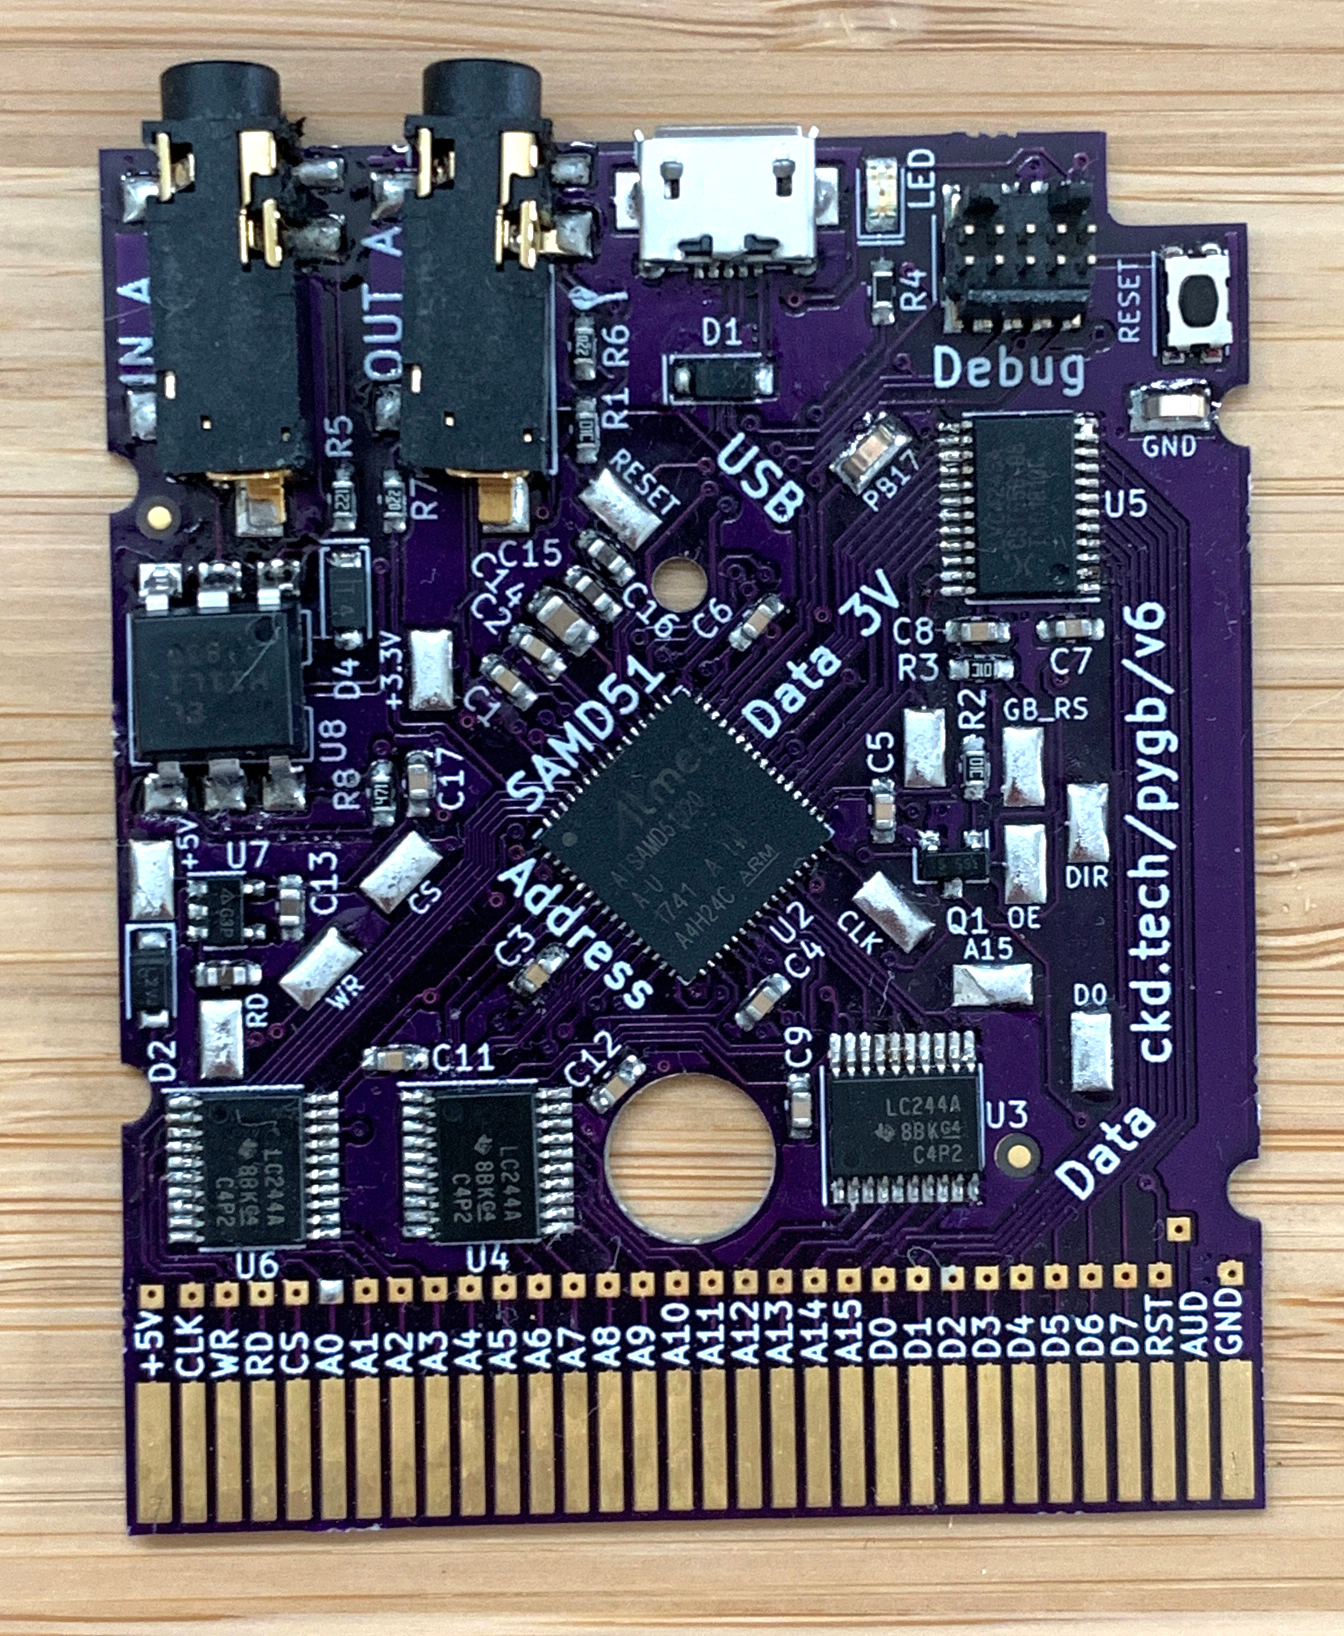
Scott’s custom cart has a 120MHz SAMD51. He spends a second explaining how he gets from Python libraries down to the wire that goes to the Game Boy’s brain — basically, the C code underneath CircuitPython accesses direct structs defined within the SAMD to do Direct Memory Access (DMA), which allows for jitter-free communication at 1MHz.

He’s using the chip’s lookup tables to generate a 1MHz signal out of clock, read, and A15 in order to send music-playing instructions to the sound register of the Game Boy’s CPU. It sounds like a lot of work, but CircuitPython helps to smooth over the dirty details, leaving behind a simpler interface.

If you want easy access to hardware no matter how new or nostalgic, the message is clear: snake your way in there with CircuitPython.

Continue reading “Scott Shawcroft Is Programming Game Boys With CircuitPython”

Giant Clock Made In The Nick Of Time

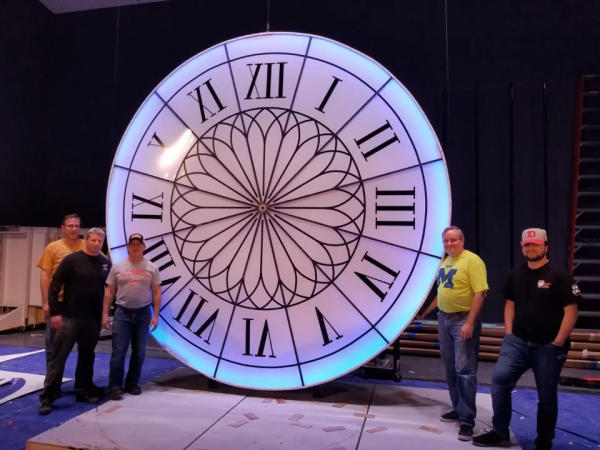
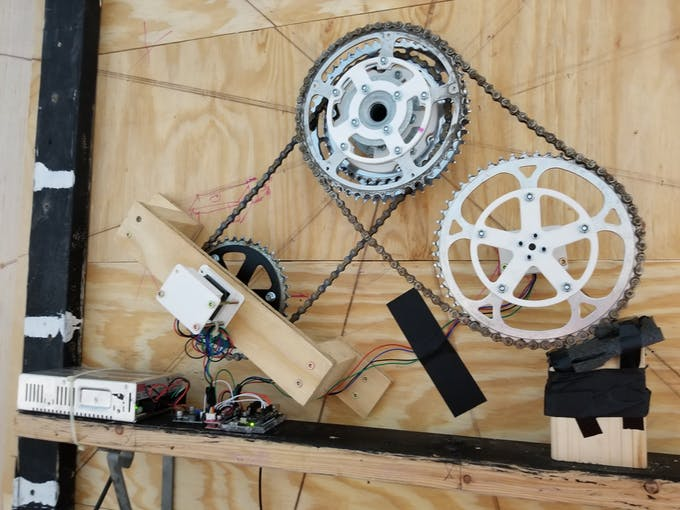
When [tnjyoung] was asked to build a huge lighted clock for a high school theater’s production of Cinderella with only two weeks before opening night, he probably wished for a fairy godmother of his own to show up and do it for him. But he and his team pulled it off, and it looks amazing. That medallion in the middle? It was laid out painstakingly by hand, using electrical tape.

This thing is 12 feet wide and weighs more than 500 pounds. Even so, it isn’t a permanent set piece, so it has to move up and down throughout the show on airplane cables. Now for the minutiae: there’s an Arduino Uno with built-in Wi-Fi that receives UDP commands from a phone to raise and lower the clock at the appropriate times. The ‘duino is also controlling two stepper motors, one for the hour hand and one for the minute hand.

Time is almost a minor character in the story of Cinderella, since she has to get back by midnight. Because of this, [tnjyoung] programmed a dozen or so time cues that move the steppers at various speeds to achieve different effects, like time flying by as she dances the night away with the Prince. Hour you still just sitting there? Sweep past the break to watch the build process fly by in a matter of minutes.

Got all the time in the world? Make a clock out of clocks. Clocks all the way down.

Continue reading “Giant Clock Made In The Nick Of Time”

Adora-BLE Synth Wails Without Wires

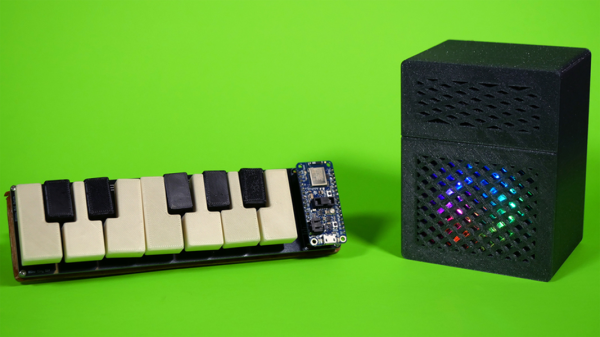
Isn’t this the cutest little synth you ever saw? The matching sparkly half-stack amp really makes it, visually speaking. But the most interesting part? There’s not a wire in sight, ’cause [Blitz City DIY]’s futuristic rig sends the bleep boops over Bluetooth LE.

Hardware-wise, both the synth and the amp are fairly simple. Underneath each of those cute little printed keys is one of those clicky momentaries that usually come with bright button caps in primary colors — the keys themselves just press-fit over the tops. All twelve ebonies and ivories are connected up to an Adafruit Feather, which communicates over Bluetooth LE to a CircuitPlayground Bluefruit (CPB) in the amp. Each time a note is played on the synth, its corresponding color circles comet-like around the CPB’s NeoPixels, which shine through the amp’s speaker grille.

The super interesting part is that all the hard work is happening in the code. Both boards have the same array of colors in rainbow order, and the CPB has an array of tone frequencies that match up one for one with the colors. For every note played, the CPB looks up the color, swirls it, and plays the note. If you want to build one, this project is wide open — [Blitz City DIY] even made a learn guide with all the dirty details. Be sure to check out the demo and extended walk-through after the break.

More in the market for making a computer keyboard? Just grab the nearest ESP32.

Continue reading “Adora-BLE Synth Wails Without Wires”

What Time Is It? Infinity Time

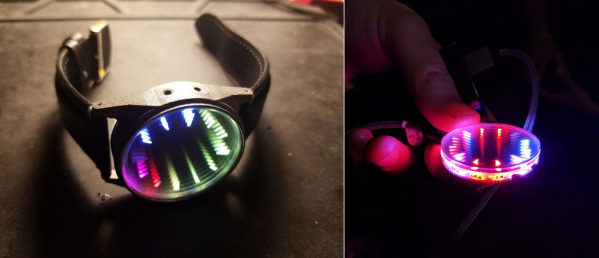
Since the dawn of the infinity craze, we’ve seen all kinds of projects — mirrors, smart mirrors, coffee tables, clocks, you name it. Unfortunately all of these cool projects sit at home, unappreciated by the public. Well, not anymore. [nolandoktor] is taking infinity to the streets with this beautiful and functional vortex watch.

Though this project is pretty darned advanced, it’s all open source and completely within reach for anyone who has the tools and the time. The watch is based around an ATmega32u4 and uses a DS3231 real-time clock to keep accurate time on the WS2812 LEDs that represent the numbers. The time is displayed using R, G, and B assigned to hour, minute, and second. Actually reading the time is bit tricky until you understand how the colors work together, but something this lovely deserves to maintain a slight air of mystery.

The watch’s case parts are all printed — metal for the bezel, and SLA for the white inner ring that lets a bit of light leak out the side in order to illuminate the USB port and the two stainless steel screws that act as touch contacts. In the future, [nolandoktor] wants to add flashlight mode that turns all the LEDs white, some gaskets to resist water, and wake-on-gesture functionality with an IMU. Take a second to check out the demo after the break.

If you prefer a more traditional timepiece of infinite interest, this clock moves more mundanely, but still looks cool.

Continue reading “What Time Is It? Infinity Time”

MIL-SPEC Keyboard Now Salutes USB

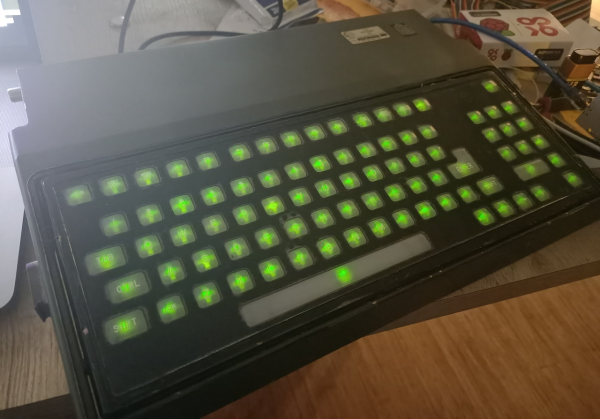
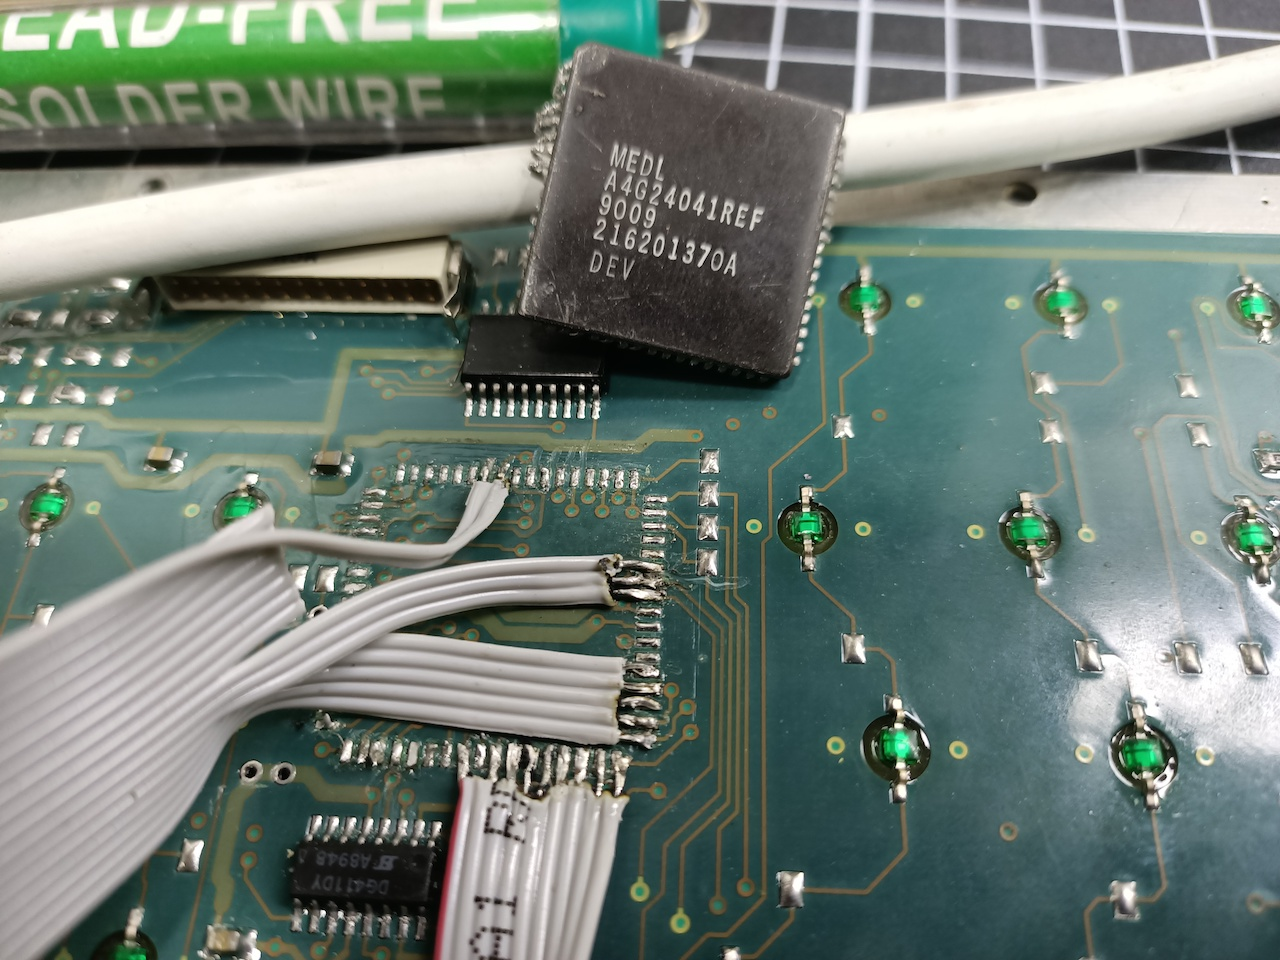
When [easyjo] picked up this late ’80s Marconi mil-spec keyboard for cheap, he knew it wouldn’t be easy to convert it to USB — just that it would be worth it. Spoiler alert: those LEDs aren’t a mod, they’re native. They get their interesting shape from the key traces, which are in the four corners.

Despite having way-cool buttons such as WPNS HOLD, and the fact that Control is on the home row where it belongs, this keyboard does not look fun to type on at all for any length of time. Of course, the point of this keyboard is not comfort, but a reliable input device that keeps out dust, sweat, liquids, and the enemy.

This is probably why the controller is embedded into the underside of the key switch PCB instead of living on its own board.  [easyjo] tried to analyze the signals from the existing 26-pin connector, but it didn’t work out.

So once he was able to decode the matrix, he removed the controller chip and wired the rows and columns directly to an Arduino Leonardo. Fortunately, the LEDs were just a matter of powering their columns from the front side of the board.

The availability of certain kinds of military surplus can make for really interesting modernization projects, like adding POTS to a field telephone.

Via r/duino

Magnets Make Prototyping E-Textiles A Snap

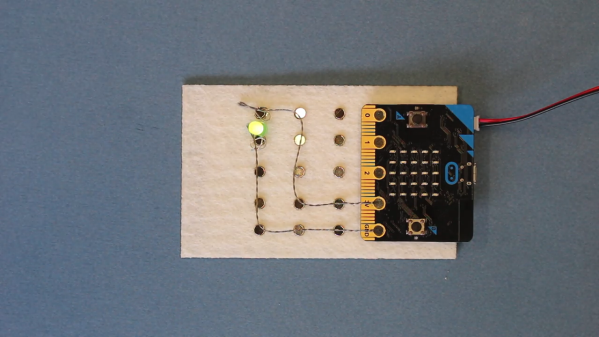
How do you prototype e-textiles? Any way you can that doesn’t drive you insane or waste precious conductive thread. We can’t imagine an easier way to breadboard wearables than this appropriately-named ThreadBoard.

If you’ve never played around with e-textiles, they can be quite fiddly to prototype. Of course, copper wires are floppy too, but at least they will take a shape if you bend them. Conductive thread just wants lay there, limp and unfurled, mocking your frazzled state with its frizzed ends. The magic of ThreadBoard is in the field of magnetic tie points that snap the threads into place wherever you drape them.

The board itself is made of stiff felt, and the holes can be laser-cut or punched to fit your disc magnets. These attractive tie-points are held in place with duct tape on the back side of the felt, though classic double-stick tape would work, too. We would love to see somebody make a much bigger board with power and ground rails, or even make a wearable ThreadBoard on a shirt.

Even though [chrishillcs] is demonstrating with a micro:bit, any big-holed board should work, and he plans to expand in the future. For now, bury the needle and power past the break to watch [chris] build a circuit and light an LED faster than you can say neodymium.

The fiddly fun of e-textiles doesn’t end with prototyping — implementing the final product is arguably much harder. If you need absolutely parallel lines without a lot of hassle, put a cording foot on your sewing machine.

Continue reading “Magnets Make Prototyping E-Textiles A Snap”

Self-Playing Kalimba V2 Thanks To Readers Like You

Would you like to know the great thing about this community we have here? All the spitballing that goes on every day in the comments, the IO chat rooms, and in the discussion threads of thousands of projects. One of our favorite things about the Hackaday universe is that we help each other out, and because of that, our collective curiosity pushes so many designs forward.

[Gurpreet] knows what we’re talking about. He’s back with version two of his self-playing kalimba, driven as strongly as ever by the dulcet tones of the Avatar theme. Now the robo-kalimba is rocking two full octaves, and thanks to your comments and suggestions, has relocated the servos where they can’t be picked up by the soundboard.

We gasped when we saw the new mechanism — a total of 15 rack and pinion linear actuators that make the kalimba look like a tiny mechanical pipe organ. Now the servos float, fixed into a three-part frame that straddles the sound box. [Gurpreet] melted servo horns to down to their hubs rather than trying to print something that fits the servos’ sockets.

Thumb your way past the break to check out the build video. [Gurpreet] doesn’t shy away from showing what went wrong and how he fixed it, or from sharing the 3D printering sanity checks along the way that kept him going.

Plucking kalimba tines is a difficult problem to solve because they’re stiff, but with timbre sensitive to many degrees of pressure. A slightly easier alternative? Make a toy player piano.

Continue reading “Self-Playing Kalimba V2 Thanks To Readers Like You”