Second Skin Synth Fits Like A Glove

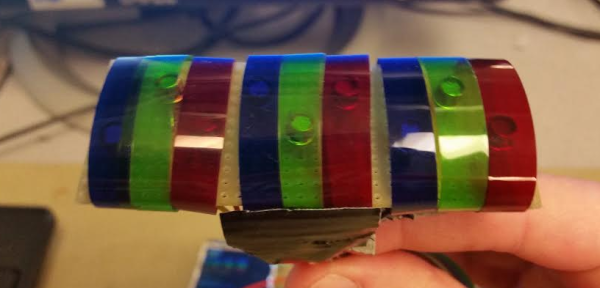
California textiles artist and musician [push_reset] challenged herself to make a wearable, gesture-based synth without using flex-sensing resistors. In the end, she designed almost every bit of it from the ground up using conductive fabric, resistive paint, and 3-D printed parts.

A couple of fingers do double duty in this glove. Each of the four fingertips have a sensor made from polyurethane, conductive paint, and conductive fabric that is connected to wires using small rivets. These sensors trigger different samples on an Edison that are generated with Timbre.js. The index and middle fingers also have knuckle actuators made from 3-D printed pin-and-slot mechanisms that turn trimmer pots. Bending one knuckle changes the delay timing while the other manipulates a triangle wave.

On the back of the glove are two sensors made from conductive fabric. Touching one up and down the length will alter the reverb. Sliding up and down the other alters the frequency of a sine wave. [push_reset] has kindly provided everything necessary to re-create this build from the glove pattern to the STL files for the knuckle actuators. Check out a short demonstration of the glove after the break. If you love a parade, here’s a wearable synth that emulates a marching band.

Continue reading “Second Skin Synth Fits Like A Glove”

Warm Up Your Small Talk With A Thermometer Scarf

Just how cold is it out there? This giant thermometer scarf is a fantastic entry-level wearables project. It’s sure to strike up conversations that move past the topic of weather.

The scarf is built around a FLORA, a Neopixel ring that represents the bulb, and a short length of Neopixels to show the temperature in Fahrenheit and Celsius. Temperature sensing is done with a poorly documented DHT11 that gave [caitlinsdad] the fits until he found Adafruit’s library for them.To make the scarf, [caitlinsdad] used a nice cozy micro-fleece. He built a pocket for the electronics and padded it with polyester fiber fill to diffuse the LEDs. This makes the lights blur and run together, resembling a mercury thermometer.

Once it was up and running, [caitlinsdad] figured out the temperature scale based on the DHT11 readings and marked it out on the scarf with a permanent marker. [caitlinsdad] has a few mods in mind for this project. For instance, it would be easy to add haptic feedback to keep you from being exposed for too long. Another wearable in the same spirit is this hat that has a sunblock reminder system.

Continue reading “Warm Up Your Small Talk With A Thermometer Scarf”

FM 101 And Transmitter Build With Afroman

One of our favorite purveyors of electronics knowledge is at it again. This time, [Afroman] explains how frequency modulation works while building up a short-range FM transmitter on a board he has available at OSH Park.

The design is based on a MAX2606 voltage-controlled oscillator (VCO) chip that can do 70-150MHz. [Afroman] sets it up to oscillate at about 100MHz using a 390nH inductor. He also put a potentiometer voltage divider on the 2606’s tuning pin. Voltage changes issued through the pot alter the transmitting frequency in small increments, making it easy to dial in a suitable channel for your broadcast. Add an electret mic and about a meter’s worth of solid-core wire and you have yourself an FM transmitter that is good for around 20 meters.

There are plenty of ways to build a small FM transmitter that allow for some experimentation and don’t involve placing SMD components. We covered a build last summer that uses a couple of 3904s and rides a 9V connector salvaged from a dead battery. The downside is that transistor-based transmitters tend to be less frequency-stable than a VCO chip.

Continue reading “FM 101 And Transmitter Build With Afroman”

Pump Up The Volume With Lead Shot And LEDs

One of the redeeming qualities of many modern cheap keyboards is the built-in volume control buttons. But this is Hackaday, and many of us (and you) have Model Ms or newfangled mechanical keyboards that only have the essential keys. Those multimedia buttons only adjust the system volume anyway. We would bet that a lot of our readers have sweet sound systems as part of their rig but have to get up to change the volume. So, what’s the solution? Build a color-changing remote USB volume knob like [Markus] did.

Much like the Instructable that inspired him, [Markus] used a Digispark board and a rotary encoder. The color comes from a WS2812 LED ring that fits perfectly inside a milky plastic tub that once held some kind of cream. When the volume is adjusted, the ring flashes white at each increment and then slowly returns to whatever color it’s set to. Pushing the button mutes the volume.

The components are pretty lightweight, and [Markus] didn’t want the thing sliding all over the desk. He took an interesting approach here and filled the base with the lead from a shotgun round and some superglue. The rotating part of the button needed some weight too, so he added a couple of washers for a satisfying feel. Be sure to check out the demonstration after the break.

Digispark board not metal enough for you? Here’s a volume knob built around a bare ATtiny85 (which is the same thing anyway).

Continue reading “Pump Up The Volume With Lead Shot And LEDs”

Henry Smolinski And The Flying Pinto

Anyone who has ever been stuck in gridlock has probably daydreamed about pushing a button on the dashboard that turns their car into a plane. Imagine how much more relaxing a weekend getaway would be if you could take to the open sky instead hitting the congested highway. For as long as there have been aircraft and automobiles, man has tried to combine the two. The proper term for this marriage is ‘roadable aircraft’, and a successful one requires attention to the aerodynamics of flight as well as the rigors of motoring.

One promising attempt at a roadable aircraft came from Henry Smolinski, an aeronautical engineer in Van Nuys, California. He along with his friend Harold Blake started a company in 1971 called Advanced Vehicle Engineers (AVE) to produce the AVE Mizar. This flying car combined the lightweight Ford Pinto with the wings and partial fuselage of a Cessna Skymaster.

Continue reading “Henry Smolinski And The Flying Pinto”

Desoldering Doesn’t Necessarily Suck

What’s your favorite way to fix soldering mistakes or get usable components off that board you found in a Dumpster? I’ve always been partial to desoldering braid, though I’ve started to come around on the vacuum pump depending on the situation. [Proto G] sent in an Instructable that outlines nine different ways to desolder components that take varying amounts of time and skill.

He starts with one that is often overlooked if you don’t have a solder pot. [Proto G] recommends this method only when you don’t want to keep the board. Cover the solder joints of the components you want to keep with flux and hold it over the solder pot while pulling out the components with pliers. The flux isn’t critical, but it makes removal faster and easier.

For boards in need of repair, [Proto G] uses a manual pump or copper desoldering braid that comes coated with flux. If you can afford one, a desoldering machine seems like the way to go—it combines the heat of a soldering iron with the vacuum of a manual pump. Desoldering tweezers and hot air rework stations look like great ways to remove surface mount components.

If you enjoyed this, check out [Bil Herd’s] guide on component desoldering. There are also few ways that [Proto G] doesn’t mention, like holding the board over an alcohol flame. Let us know your favorite desoldering method in the comments.

Continue reading “Desoldering Doesn’t Necessarily Suck”

Color Sonification Could Be Key To Rainbow Connection

Have you seen any loud sweaters this holiday season? Now there is a way to quantify their vibrancy and actually hear them at the same time. Cornell engineering students [Mengcheng Qi] and [Ryan Land] focused on the sonification of color and translated the visible spectrum into audible sounds.

They originally planned to use pixel samples from an OV7670 camera module, but weren’t able to extract any useful color data from it. We prefer their Plan B anyway, which was to use CdS photo resistors and the plastic color filters used for photography in red, blue, and green. The varying intensity of light falling on the photo resistors creates different patterns according to the voltage levels. The actual sound generation was done with FM sound synthesis.

There wasn’t a lot of natural sound variation between different RGB values, so in order to make it more fun, they created different instruments which play different patterns at variable speeds and pitch according to the colors. In addition to the audio feedback, the RGB values are displayed in real-time on a small TFT. Below those are dynamic bar graphs that show the voltages of each color.

Check out the demo after the break; they walk through the project and try it out on different things to hear their colors.

Continue reading “Color Sonification Could Be Key To Rainbow Connection”