It became something of a cliché a few years ago in online discussions, whenever a new single board computer was mentioned someone would pop up and say something like “Imagine a Beowulf cluster…“. Back then it was said largely in jest, but with the current generation of boards it’s a distinct possibility. Who hasn’t looked at a Raspberry Pi and idly thought about a cluster of them, or even created one!
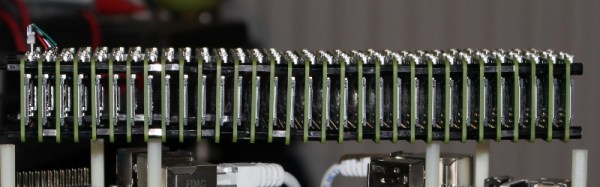
[Electronoob] did just that, creating a variety of Raspberry Pi cluster configurations, the most impressive of which is a stack of 32 Pi Zeros mounted together with stand-offs. The plan was to network it via USB, for which he initially considered building a backplane, but was put off by the cost of vertical USB connectors and instead went for a wired approach. If there is a lesson to be learned from his experiences it is that buying very cheap USB cables is a minefield: his pile of eBay specials turned out to have significant numbers of faults. He’s now faced with a stark choice, solder 32 sets of USB pads on the base of each Zero or buy better cables.
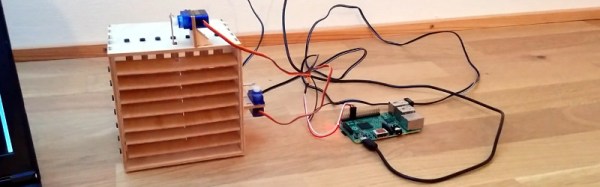
The stack of Zeros is pretty impressive, but so what, you think. It’s still not working properly. But the Zero cluster isn’t his only work. He’s also created a set of very nicely executed Ethernet clusters using the larger Pi boards, and the way he’s mounted them on top of compact Ethernet switches sets them apart from some of the more spaghetti-like Pi clusters.
It’s true a Pi cluster won’t cut it in the world of supercomputers, you could almost certainly buy more bang for your buck without too much effort. But it does represent a very accessible way to learn about cluster computing, and you have to admit it a stack of Zeros does look rather impressive.
We’ve seen quite a few Pi clusters here since 2012, the biggest of which is probably this 120 node behemoth, complete with screens.

![The front of the Soviet jet train on a monument in Tver, Russia. By Eskimozzz [PD], via Wikimedia Commons.](https://hackaday.com/wp-content/uploads/2016/09/576px-d181d182d0b5d0bbd0b0.jpg)