HackRF PortaPack Firmware Spoofs All The Things

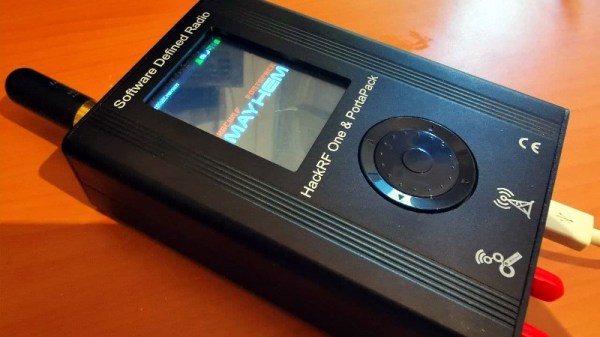
The HackRF is an exceptionally capable software defined radio (SDR) transceiver, but naturally you need to connect it to a computer to actually do anything with it. So the PortaPack was developed to turn it into a stand-alone device with the addition of a touchscreen LCD, a few buttons, and a headphone jack. With all the hardware in place, it’s just a matter of installing a firmware capable enough to do some proper RF hacking on the go.

Enter MAYHEM, an evolved fork of the original PortaPack firmware that the developers claim is the most up-to-date and feature packed version available. Without ever plugging into a computer, this firmware allows you to receive, decode, and re-transmit a dizzying number of wireless protocols. From firing off the seating pagers at a local restaurant to creating a fleet of phantom aircraft with spoofed ADS-B transponders, MAYHEM certainly seems like it lives up to the name.

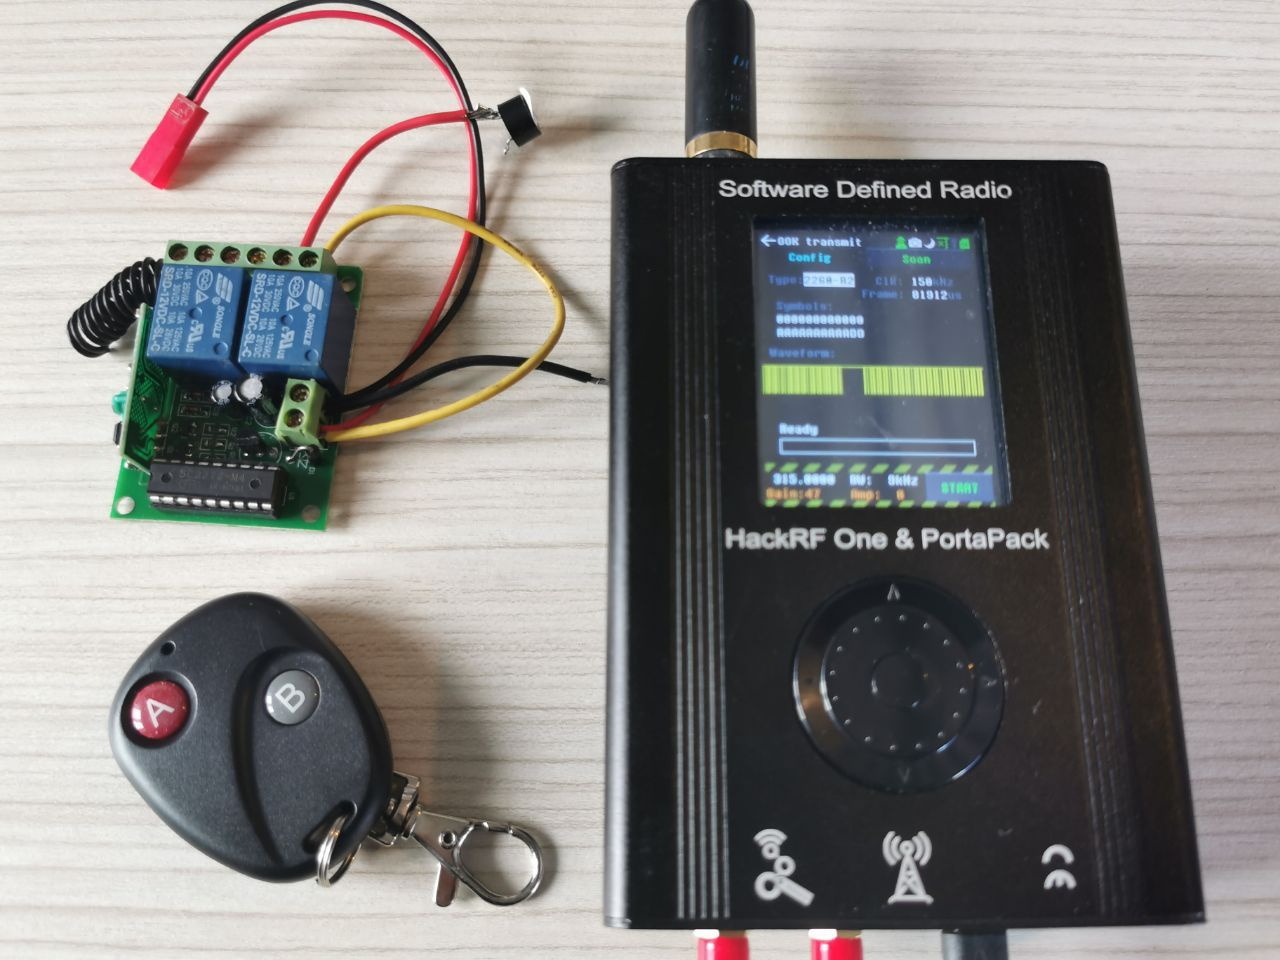
[A. Petazzoni] recently put together a detailed blog post about installing and using MAYHEM on the HackRF/PortaPack, complete with a number of real-world examples that show off just a handful of possible applications for the project. Jamming cell phones, sending fake pager messages, and cloning RF remotes is just scratching the surface of what’s possible.

It’s not hard to see why some have already expressed concern about the project, but in reality, none of these capabilities are actually new. This firmware simply brings them all together in one easy-to-use package, and while there might be an argument to be made about proliferation, we all know that the responsibility to behave ethically rests on the user and not the tools.

Repurposing Large Electronic Price Tags

If you’ve recently braved the pandemic long enough to make a trip to a big box retailer, you may have spotted a few massive e-paper price tags affixed to large items like appliances. These seven inch displays were likely designed to be used in e-readers such as the Kindle, but through some surplus deal, are now shouting out clearance savings on last year’s washing machine. After checking out a particularly good price for a Samsung refrigerator at the local Home Depot, [YodaLogic] got to wondering if they could be bent to the hacker’s will.

Now to be clear, [YodaLogic] didn’t steal any of these tags. It turns out you can pick them up on eBay for less than $15 a pop, or at least that’s what they cost before this article went out. It’s an exceptionally good price when you realize that these displays are actually capable of color…albeit only two. Apparently when the retailer orders the so-called “Chroma 74” tags, they can pick between either yellow or red as the secondary color. While not quite as exciting as a full-color display, it certainly sets them apart from most of the e-paper panels we’ve seen used in DIY projects thus far.

The panel gets mighty close to the HaD color scheme

We’d like to tell you that [YodaLogic] cracked one of these things open and was able to wire it right up to a Pi or microcontroller, but the truth is a bit more complicated. Connecting the Chroma 74’s panel to the control board intended for a similar Waveshare 7.5 inch display didn’t seem to do anything. After some poking and prodding, it became clear that the WFD0750BF19 e-paper panel used in the Chroma needed a custom software profile to bring it to life. Unfortunately, there doesn’t seem to be a datasheet available for this particular panel.

By combining what could be gleaned from the datasheets of similar displays with a bit of experimentation, [YodaLogic] came up with a configuration profile that mostly works. It doesn’t seem like the yellow is as vibrant as it should be, and a refresh can take as long as 20 seconds, but it’s certainly a start. Perhaps the code can be tightened up with some input from the community, or even better, maybe somebody out there knows where we can get our hands on the datasheet for this panel.

While we’ve started to see more projects use e-paper displays, their high price still keeps many hackers away. Being able to repurpose cheap hardware like this could really spur some interesting development, so we’re excited to see [YodaLogic] put the finishing touches on this project and opened it up to a wider audience.

Alfa Romeo Gauge Cluster Gets A Fresh Set Of LEDs

On older vehicles, if you noticed that the lights had gone out behind one of your gauges, you knew it was time to snake your hand back there and replace the little incandescent bulb that had given up the ghost. But what are you supposed to do if you’re seeing the same problem on a modern vehicle that’s already made the leap to LED dash lighting? That’s what [Tysonpower] recently had to find out when the fuel indicator on his Alfa Romeo Giuletta QV went dark.

In the video after the break, [Tysonpower] details how to remove the instrument cluster from the Giuletta’s dash, which we imagine would be a useful little tutorial for anyone who owns the same vehicle. Once he has it out on the bench, he strips it down to the bare PCB and starts (literally) poking around.

He eventually noticed that if he pushed on the board near the fuel indicator he could get the appropriate 3528 SMD LED to light up, but touching up the solder joints didn’t seem to fix the issue. Assuming the LED must be defective internally, he simply replaced it and all was good again.

Well, not exactly. The light produced by the new part didn’t match the color or brightness of the other dozen or so white LEDs that were installed on the board, so [Tysonpower] decided to just dive in and replace them all. While it obviously took a lot more time and effort, he says the end result is that the instrument cluster looks noticeably brighter and crisper when driving at night. Not bad for an afternoon’s work and a couple bucks worth of LEDs.

Most of the time, when we see somebody messing around behind the dash it’s because they intend on replacing the original instruments with something more capable. But projects like this, which add just a touch of refinement to the existing hardware, prove that stock components aren’t always a disappointment.

Continue reading “Alfa Romeo Gauge Cluster Gets A Fresh Set Of LEDs”

Literally Tearing Apart A SpaceX Starlink Antenna

While SpaceX’s constellation of Starlink satellites is nowhere near its projected final size, the company has enough of the birds zipping around in low Earth orbit to start a limited testing period they call the Better Than Nothing Beta. If you’re lucky enough to get selected, you have to cough up $500 for the hardware and another $100 a month for the service. Despite the fairly high bar for getting your hands on one, [Kenneth Keiter] decided to sacrifice his Starlink dish to the teardown Gods.

We say sacrifice because [Kenneth] had to literally destroy the dish to get a look inside. It doesn’t appear that you can realistically get into the exceptionally thin antenna array without pulling it all apart, thanks in part to preposterous amount of adhesive that holds the structural back plate onto the PCB. The sky-facing side of the phased array, the key element that allows the antenna to track the rapidly moving Starlink satellites as they pass overhead, is also laminated to a stack-up comprised of plastic hexagonal mesh layers, passive antenna elements, and the outer fiberglass skin. In short, there are definitely no user-serviceable parts inside.

The dish hides many secrets under its skin.

Beyond attempting to analyze the RF magic that’s happening inside the antenna, [Kenneth] also takes viewers through a tour of some of the more recognizable components of the PCB; picking out things like the Power over Ethernet magnetics, a GPS receiver, some flash storage, and the H-Bridge drivers used to control the pan and tilt motors in the base of the dish.

It also appears that the antenna is a self-contained computer of sorts, complete with ARM processor and RAM to run the software that aims the phased array. Speaking of which, it should come as no surprise to find that not only are the ICs that drive the dizzying array of antenna elements the most numerous components on the PCB, but that they appear to be some kind of custom silicon designed specifically for SpaceX.

In short, there’s still plenty we don’t know about how this high-tech receiver actually works. While [Kenneth] does a respectable job of trying to make sense of it all, and we admire the dedication required to rip apart such a rare and expensive piece of kit, it’s still going to be awhile before the hacker community truly masters the tech that SpaceX is putting into their ambitions global Internet service.

Continue reading “Literally Tearing Apart A SpaceX Starlink Antenna”

Digispark Spoofs IR To Get Speakers Under Control

The Microlab 6C are a pretty nice pair of speakers, but [Michał Słomkowski] wasn’t too thrilled with the 8 watts they consume when on standby. The easy fix is to just unplug them when they aren’t in use, but unfortunately the digital controls on the front panel mean he’s got to turn them on, select the correct input, and turn the volume up to the appropriate level every time they’re plugged back in. Surely there must be a better way.

His solution was to use a Digispark to fire off the appropriate IR remote codes so they’d automatically be put back into a usable configuration. But rather than putting an IR LED on one of the GPIO pins, he simply spliced it into the wire leading back from the speaker’s IR receiver. All his code needs to do is generate the appropriate pulses on the line, and the speaker’s electronics think its a signal coming in from the remote.

Distinctive patterns on the IR sensor wires.

Power for the Digispark is pulled from the speaker itself, so it turns on once [Michał] plugs them back in. The code waits five seconds to make sure the hardware has had time to start up, then proceeds with the “Power On”, “Change Input”, and “Volume Up” commands with a few seconds in between each for good measure.

Not only was it easier to skip the IR and inject the signals directly, but it also made for a cleaner installation. Since the microcontroller doesn’t need line of sight to the IR receiver, [Michał] was able to hide it inside the speaker’s enclosure. From the outside, the modification is completely invisible.

We’ve seen similar code injection tricks used before, and it’s definitely one of those techniques you should file away mentally for future reference. Even though more and more modern devices are embracing WiFi and Bluetooth control, the old school IR remote doesn’t seem like it’s going away anytime soon.

Trashed Tablet Lives Again Thanks To New Charger IC

Have you ever pulled a piece of electronics from the trash that looked like nothing was wrong with it, only to take it home and find out it really is dead? Since you’re reading Hackaday, we already know the answer. Trash picking is an honored hacker tradition, and we all know it’s a gamble every time you pull something from the curb. But when the Samsung Galaxy Tab S that [Everett] pulled from the e-waste bin wouldn’t take a charge, he decided to crack it open and see if it was really beyond repair.

The first step was using a USB power meter to see if the tablet was actually pulling any current when plugged in. With just 10 mA on the line, [Everett] knew the device wasn’t even attempting to charge itself. So his next step was to pull the battery and charge it from a bench supply. This got the tablet to wake up, and as far as he could tell, everything else worked as expected. It seemed like the only issue was a blown charging circuit.

Where we’re going, we don’t need ribbon cables.

Now at this point, [Everett] could have just gone online and bought a new motherboard for the tablet and called it a day. But where’s the fun in that? Instead, he wired up a simple charging circuit using a TP4056 IC on a scrap of flexible PCB and mounted it to a square of Kapton tape. He then used 34 AWG magnet wire to connect it between the tablet’s USB port and the battery, bypassing the tablet’s electronics entirely.

The fix worked, but there was a slight problem. Since the TP4056 only goes up to 4.2 V and the battery maxes out at 4.35 V, [Everett] says his hacked charger can only bring the tablet up to 92% capacity according to Android. But considering the alternative, we think its more than a worthy trade-off.

It’s easy to dismiss tablets as largely disposable devices, but this isn’t the first time we’ve seen somebody save one with little more than solder and patience. Of course, what you do with that old tablet once you get it fired back up is another story entirely.

High-Speed Spectrometer Built With Cheap Linear CCD

If you’ve ever dreamed of building a proper spectrometer, it looks like the ESPROS epc901 CCD sensor is absolutely worth your attention. It’s fast, sensitive, easy to interface with, and at just $24 USD, it won’t break the bank. There’s only one problem: implementing it in your project means either working with the bare 2×16 0.5 mm pitch BGA device, or shelling out nearly $1,400 USD for the development kit.

Thankfully, [Adrian Studer] has come up with a compromise. While you’ll still need to reflow the BGA to get it mounted, his open hardware breakout and adapter boards for the ESPROS epc901 make the sensor far easier to work with.

It’s not just a hardware solution either, he also provides firmware code for the STM32L4 based Nucleo development board and some Python scripts that make it easy to pull data from the sensor. The firmware even includes a simple command line interface to control the hardware that you can access over serial.

With the sensor successfully wrangled, [Adrian] partnered with [Frank Milburn] to build an affordable spectrometer around it. The design makes use of a 3D printed chamber, a simple commercial diffraction grating, and an array of entrance slits ranging from 0.5 to 0.0254 millimeters in width that were laser-cut into a sheet of stainless steel.

In the videos after the break, you can see the finished spectrometer being used to determine the wavelength of LEDs, as well as a demonstration of how the high-speed camera module is able to study the spectral variations of a CFL bulb over time. [Adrian] tells us that he and [Frank] are open to suggestions as to what they should point their new spectrometer at next, so let them know in the comments if you’ve got any interesting ideas.

We’ve seen an incredible number of spectrometer builds over the years, and some of the more recent ones are really pushing the envelope in terms of what the DIY scientist is capable of doing in the home lab. While they’re still fairly niche, these instruments are slowly but surely finding their way into the hands of more curious hackers.

Continue reading “High-Speed Spectrometer Built With Cheap Linear CCD”