As a project gets more complicated, some kind of internal communication network is often used to that all of the various modules and sensors can talk with each other. For hardware hackers like us, that usually means SPI, I2C, or maybe even good old fashioned UART. But if you’re pushing a lot of data around, like live video feeds from multiple cameras, you’ll need something a bit faster than that.
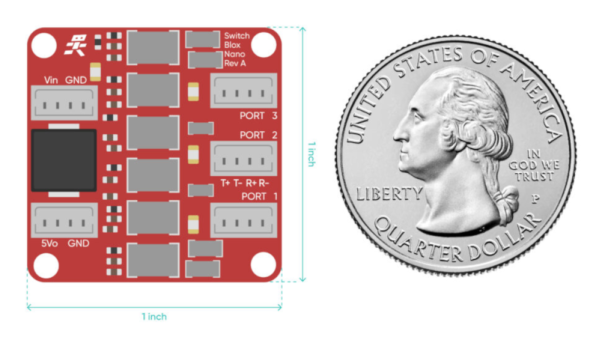
Which is why [Josh Elijah] has created the SwitchBlox Nano, a three port 10/100 Ethernet switch that fits on a one inch square PCB. All you need to do is provide it with power, with a generous input range of 5 to 50 volts, connect your devices to the Molex Picoblade connectors on the board, and away you go. There’s even a 5 V 1 A regulated output you can use to run your downstream devices.
If you’ve got a feeling that you’ve seen something very similar on these pages earlier in the year, you’re not imagining things. Back in April we covered the original five port SwitchBlox in a post that garnered quite a bit of attention. In fact, [Josh] tells us that the design of this new switch was driven largely by the feedback he got from Hackaday readers. The Nano is not only smaller and cheaper than the original, but now maintains full electrical isolation between each port.
The average Hackaday reader is as knowledgeable as they are opinionated, and we’re glad [Josh] was able to put the feedback he received to practical use. We’re proud that our community has had a hand in refining successful commercial products like the Arduboy handheld game system and the Mooltipass hardware password keeper. Now it looks like we can add a tiny Ethernet switch to the list of gadgets we’ve helped push up the hill. Maybe we should get a stamp or something…