Kepler Closes Eyes After A Decade Of Discovery

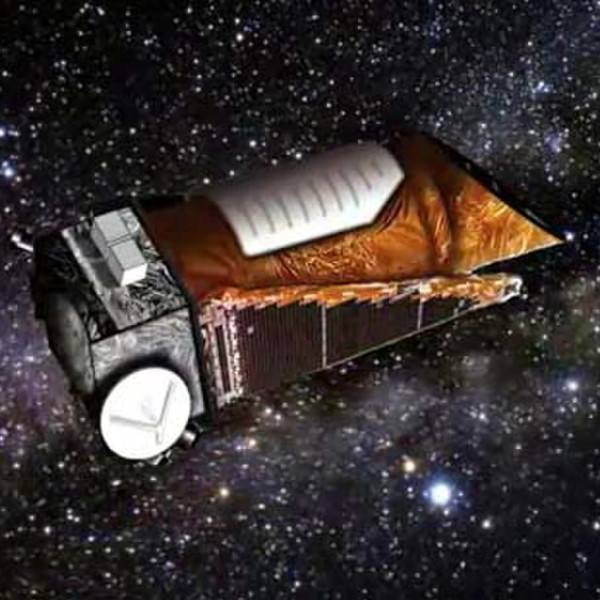
Since its launch in March 2009, the Kepler Space Telescope has provided us with an incredible amount of data about exoplanets within our galaxy, proving these worlds are more varied and numerous than we could ever have imagined. Before its launch we simply didn’t know how common planets such as ours were, but today we know the Milky Way contains billions of them. Some of these worlds are so hot they have seas of molten rock, others experience two sunsets a day as they orbit a pair of stars. Perhaps most importantly, thousands of the planets found by Kepler are much like our own: potentially playing host to life as we know it.

Kepler lived a fruitful life by any metric, but it hasn’t been an easy one. Too far into deep space for us to repair it as we did Hubble, hardware failures aboard the observatory nearly brought the program to a halt in 2013. When NASA announced the spacecraft was beyond hope of repair, most assumed the mission would end. Even by that point, Kepler was an unqualified success and had provided us with enough data to keep astronomers busy for years. But an ingenious fix was devised, allowing it to continue collecting data even in its reduced capacity.

Leaning into the solar wind, Kepler was able to use the pressure of sunlight striking its solar panels to steady itself. Kepler’s “eyesight” was never quite the same after the failure of its reaction wheels, and it consumed more propellant than originally intended to maintain this careful balancing act, but the science continued. The mission that had already answered many of our questions about our place in the galaxy would push ahead in spite of a failure which should have left it dead in space.

As Kepler rapidly burned through its supply of propellant, it became clear the mission was on borrowed time. It was a necessary evil, as the alternative was leaving the craft tumbling through space, but mission planners understood that the fix they implemented had put an expiration date on Kepler. Revised calculations could provide an estimate as to when the vehicle would finally run its tanks dry and lose attitude control, but not a definitive date.

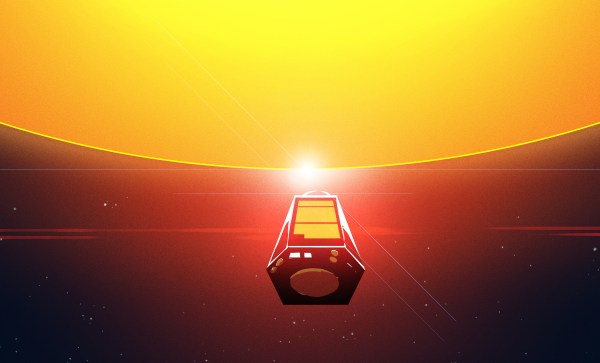
For the last several months NASA has known the day was approaching, but they decided to keep collecting data until the vehicle’s thrusters sputtered and failed. So today’s announcement that Kepler has at long last lost the ability to orient itself came as no surprise. Kepler has observed its last alien sunset, but the search for planets, and indeed life, in our corner of the galaxy doesn’t end today.

Continue reading “Kepler Closes Eyes After A Decade Of Discovery”

Relativity Space’s Quest To 3D Print Entire Rockets

While the jury is still out on 3D printing for the consumer market, there’s little question that it’s becoming a major part of next generation manufacturing. While we often think of 3D printing as a way to create highly customized one-off objects, that’s a conclusion largely based on how we as individuals use the technology. When you’re building something as complex as a rocket engine, the true advantage of 3D printing is the ability to not only rapidly iterate your design, but to produce objects with internal geometries that would be difficult if not impossible to create with traditional tooling.

SpaceX’s SuperDraco 3D Printed Engine

So it’s no wonder that key “New Space” players like SpaceX and Blue Origin make use of 3D printed components in their vehicles. Even NASA has been dipping their proverbial toe in the additive manufacturing waters, testing printed parts for the Space Launch System’s RS-25 engine. It would be safe to say that from this point forward, most of our exploits off of the planet’s surface will involve additive manufacturing in some capacity.

But one of the latest players to enter the commercial spaceflight industry, Relativity Space, thinks we can take the concept even farther. Not content to just 3D print rocket components, founders Tim Ellis and Jordan Noone believe the entire rocket can be printed. Minus electrical components and a few parts which operate in extremely high stress environments such as inside the pump turbines, Relativity Space claims up to 95% of their rocket could eventually be produced with additive manufacturing.

If you think 3D printing a rocket sounds implausible, you aren’t alone. It’s a bold claim, so far the aerospace industry has only managed to print relatively small rocket engines; so printing an entire vehicle would be an exceptionally large leap in capability. But with talent pulled from major aerospace players, a recently inked deal for a 20 year lease on a test site at NASA’s Stennis Space Center, and access to the world’s largest metal 3D printer, they’re certainly going all in on the idea. Let’s take a look at what they’ve got planned.

Continue reading “Relativity Space’s Quest To 3D Print Entire Rockets”

Burn Some Time With This Arduino Reddit Browser

If you’re like us, you probably spend more time browsing Reddit than you’d like to admit to your friends/family/boss/therapist. A seemingly endless supply of knowledge, wisdom, and memes; getting stuck on Reddit is not unlike looking something up on Wikipedia and somehow managing to spend the next couple hours just clicking through to new pages. But we’re willing to bet that none of us love browsing Reddit quite as much as [Saad] does.

He writes in to tell us about the handheld device he constructed which lets him view random posts from the popular /r/showerthoughts sub. Each press of the big red button delivers another slice of indispensable Internet wisdom, making it a perfect desk toy to fiddle with when you need a little extra push to get you through the day. Like one of those “Word a Day” calendars, but one that you’ll actually read.

For those curious as to how [Saad] is scraping Reddit with an Arduino, the short answer is that he isn’t. Posts are pulled from Reddit using an online tool created for the project by his wife (/r/relationshipgoals/), and dumped into a text file that can be placed on the device’s SD card. With 1500 of the all-time highest rated posts from /r/showerthoughts onboard, he should be good on content for awhile.

[Saad] has done an excellent job documenting the hardware side of this build, providing plenty of pictures as well as a list of the parts he used and a few tips to help make assembly easier. Overall it’s not that complex a project, but his documentation is a big help for those who might not live and breathe this kind of thing.

For the high-level summary: it uses an Arduino Pro Mini, a ILI9341 screen, and a 3.3 V regulator to step down 5 V USB instead of using batteries. A bit of perfboard, a 3D printed case, and a suitably irresistible big red button pulls the whole thing together.

We’ve seen a similar concept done in a picture frame a couple of years back, but if that’s not interactive enough you could always build yourself a Reddit “controller”.

Low-cost Autonomous Rover Will Drive Your Projects

[Miguel] wanted to get more hands-on experience with Python, so he created a small robotic platform as a testbed. But as such things sometimes go, it turns out the robot he created is a worthy enough project in its own right. With a low total cost and highly flexible design, it might be exactly what you’re looking for. Who knows, it might even bootstrap that rover project that’s been wandering around the back of your mind.

The robot makes use of an exceptionally simple 3D printed frame. No complicated suspension to worry about, no fasteners to hold together multiple printed parts. It’s just a single printed “L” shaped piece that has mounts for the motors and front sensor board. As designed it simply drags its tail around, which should work fine on smooth surfaces, but might need a bit of tweaking if you plan on taking your new robotic friend on an outdoor adventure.

There’s a big open area on the “tail” to mount a Raspberry Pi, but you could really put whatever board or microcontroller you wish here. In the nose is an HC-SR04 ultrasonic sensor, which [Miguel] is using to perform obstacle avoidance in his Python code. A dual H-Bridge motor driver controls the pair of gear motors in the front to provide propulsion and steering, and a buck converter steps down the 7.4V from the 2S LiPo battery to power the electronics. He’s even included a mini breadboard so you can add circuits or sensors as experimental payloads.

If you’re looking for a slightly more advanced 3D printed robotics platform, we’ve seen our fair share. From the nearly fully printed Watney to a tank that looks like it’s ready for front-line combat.

Seth Molson Is Designing The Future, One Show At A Time

From the banks of levers and steam gauges of 1927’s Metropolis to the multicolored jewels that the crew would knowingly tap on in the original Star Trek, the entertainment industry has always struggled with producing imagery of advanced technology. Whether constrained by budget or imagination, portrayals usually go in one of two directions: they either rely too heavily on contemporary technology, or else they go so far in the opposite direction that it borders on comical.

Seth Molson

But it doesn’t always have to be that way. In fact, when technology is shown properly in film it often serves as inspiration for engineers. The portrayal of facial recognition and gesture control in Minority Report was so well done that it’s still referenced today, nearly 20 years after the film’s release. For all its faults, Star Trek is responsible for a number of “life imitating art” creations; such as early mobile phones bearing an unmistakable resemblance to the flip communicators issued to Starfleet personnel.

So when I saw the exceptional use of 3D printing in the Netflix reboot of Lost in Space, I felt it was something that needed to be pointed out. From the way the crew made use of printed parts to the printer’s control interface, everything felt very real. It took existing technology and pushed it forward in a way that was impressive while still being believable. It was the kind of portrayal of technology that modern tech-savvy audiences deserve.

It left such an impression that we decided to reach out to Seth Molson, the artist behind the user interfaces from Lost in Space, and try to gain a little insight from somebody who is fighting the good fight for technology in media. To learn how he creates his interfaces, the pitfalls he navigates, and how the expectations of the viewer have changed now that we all have a touch screen supercomputer in our pocket.

Continue reading “Seth Molson Is Designing The Future, One Show At A Time”

Creating A 3G Raspberry Pi Smartphone

It’s hard to believe, but the Raspberry Pi has now been around long enough that some of the earliest Pi projects could nearly be considered bonafide vintage hacks at this point. A perfect example are some of the DIY Raspberry Pi smartphone projects that sprung up a few years back. Few of them were terribly practical to begin with, but even if you ignore the performance issues and bulkiness, the bigger problem is they relied on software and cellular hardware that simply isn’t going to cut it today.

Which was exactly the problem [Dylan Radcliffe] ran into when he wanted to create his own Pi smartphone. There was prior art to use as a guide, but the ones he found were limited to 2G cellular networks which no longer exist in his corner of the globe. He’s now taken on the quest to develop his own 3G-capable Pi smartphone, and his early results are looking very promising.

Inside the phone, which he calls the rCrumbl, [Dylan] has crammed a considerable amount of hardware. A Raspberry Pi 3B+ with attached Adafruit touchscreen LCD is the star of the show, but there’s also a Pi camera module, battery charging circuit, and Adafruit FONA 3G modem (which also provides GPS). Powering the device is a 2500 mAh 3.7V battery, which reportedly delivers a respectable 8 to 12 hour runtime.

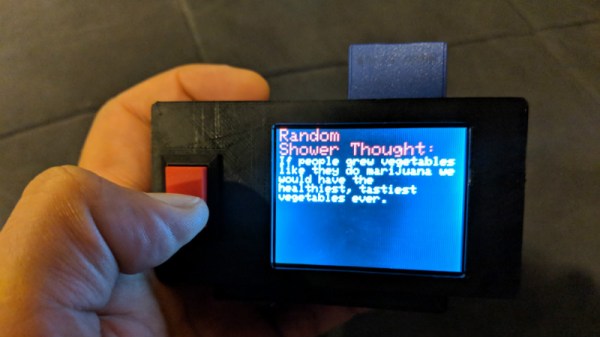
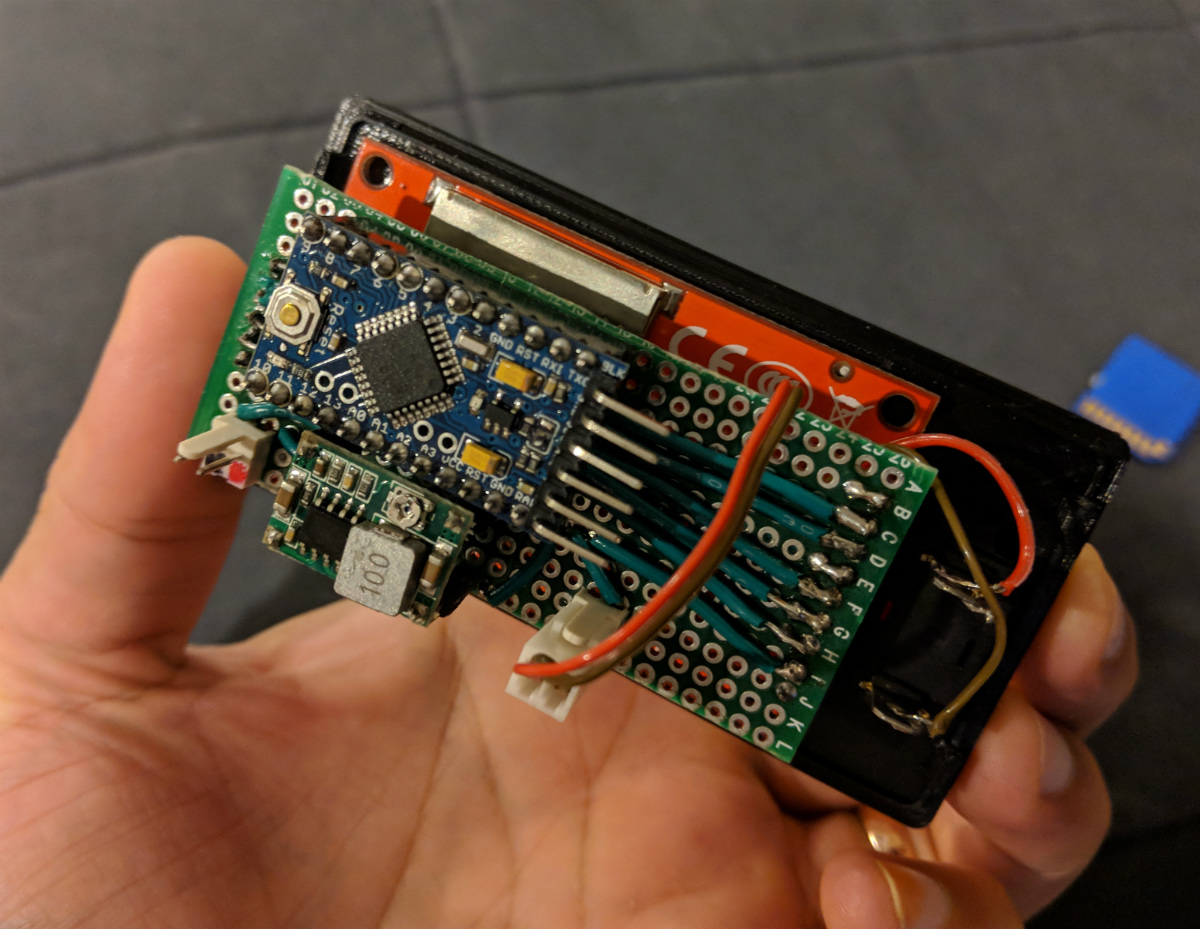
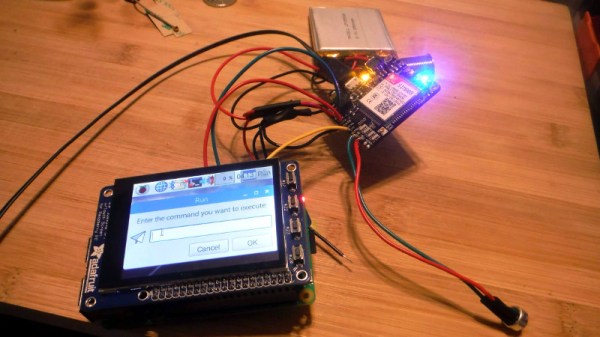
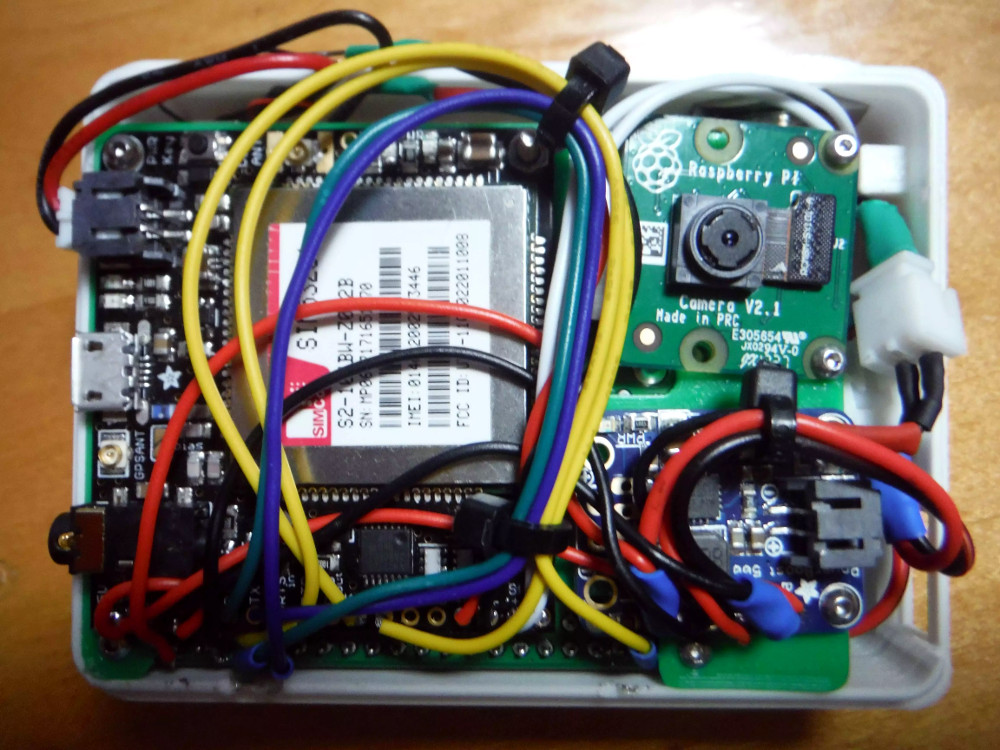
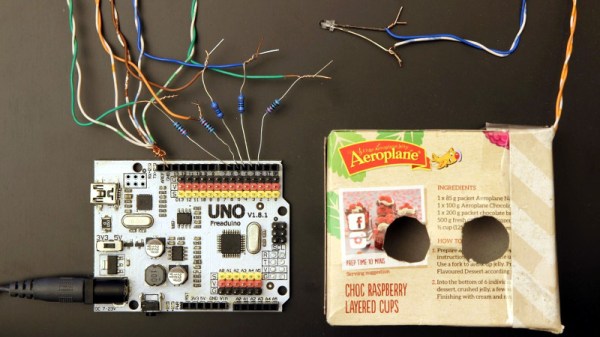
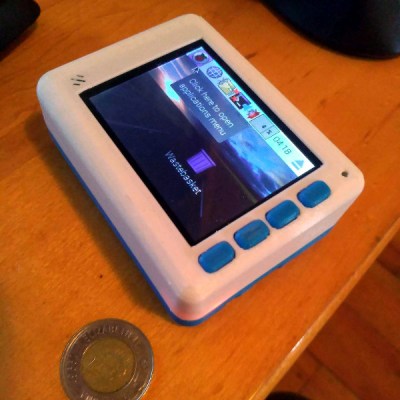
The case is 3D printed, and [Dylan] says it took a long time to nail down a design that would fit all of his hardware, keep things from shifting around, and still be reasonably slim. Obviously DIY phones like this are never going to be as slim as even the chunkiest of modern smartphones, but the rCrumbl looks fairly reasonable for a portable device. We especially like the row of physical buttons he’s included along the bottom of the screen, which should help with the device’s usability.

Speaking of usability, that’s where [Dylan] still has his work cut out for him. The existing software he’s found won’t work on 3G, so he’s going to have to come up with his own software stack to provide a proper phone interface. As it stands he’s made a call on the rCrumbl using command line tools, but while that might score you some extra geek points at the next hacker meetup, it’s not exactly going to fly for daily use. He mentions he would love to talk to any developers out there that would like to team up on the software side of the project.

We’ve covered one of the 2G Pi smartphones in the past, and of course the ZeroPhone is a very interesting project if you don’t mind the “dumb phone” interface. But if you’re looking for something that’s fairly close to commercial devices in terms of usability, you might just want to roll your own Android phone.

Easy Blinking LED Eyes For Halloween

There’s not much time left now. If you’re going to put something together to give the youngsters some night terrors in exchange for all that sweet candy, you better do it quick. This late to the game you might not have time to do anything too elaborate, but luckily we’ve come across a few quick Halloween hacks that can get you some pretty cool effects even if it’s only a few hours before the big night.

As a perfect example, these LED “blinking eyes” were created by [Will Moser]. Using nothing more exotic than some bare LEDs, an Arduino, and a cardboard box, these little gadgets can quickly and easily be deployed in your windows or bushes to produce an unsettling effect after the sun goes down. Thanks to the pseudorandom number generator in the Arduino code, the “eyes” even have a bit of variability to them, which helps sell the idea that your Halloween visitors are being watched by proper creatures of the night.

The hardware side of this project is very simple. [Will] takes a container such as a small cardboard box and cuts two holes in it to serve as the eyes. He notes that containers which are white or reflective on the inside work best. You’ll want to get a little artistic here and come up with a few different shaped sets of eyes, which is demonstrated in the video after the break. Inside each box goes a colored LED, wired back to the Arduino.

For the software, [Will] is using a floating analog pin as a source of random noise, and from there comes up with how often each LED will blink on and off, and for how long. Both the hardware and software sides of this project are perfect for beginners, so it might be a good way to get the Little Hackers involved in the festivities this year; if you’re the type of person who enjoys replicating small humans in addition to creeping them out.

LEDs seem to be the hacker’s decoration of choice come Halloween, from wearable LED eyes to remote controlled illuminated pumpkins.

Continue reading “Easy Blinking LED Eyes For Halloween”