Building A UV Curing Station For Resin Prints

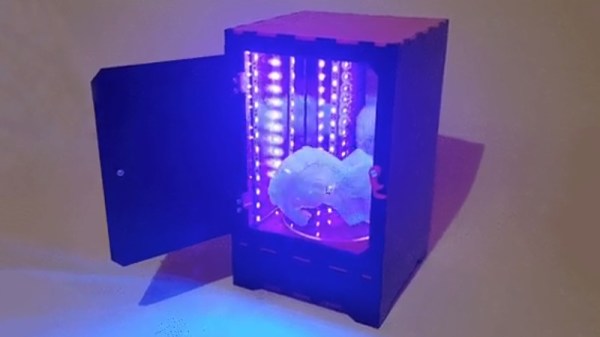
Resin printers have a lot going for them – particularly in regards to quality surface finishes and excellent reproduction of fine details. However, the vast majority rely on UV light to cure prints. [douwe1230] had been using a resin printer for a while, and grew tired of having to wait for sunny days to cure parts outside. Thus, it was time to build a compact UV curing station to get the job done.

The build consists of a series of laser-cut panels, assembled into a box one would presume is large enough to match the build volume of [douwe1230’s] printer.  UV LED strips are installed in the corners to provide plenty of light, and acrylic mirrors are placed on all the walls. The use of mirrors is key to evenly lighting the parts, helping to reduce the likelihood of any shadows or dead spots stopping part of the print from curing completely. In the base, a motor is installed with a turntable to slowly spin the part during curing.

[Douwe1230] notes that parts take around about 10 minutes to cure with this setup, and recommends a flip halfway through to make sure the part is cured nice and evenly. We’ve seen other similar DIY builds too, like this one created out of a device aimed at nail salons. If you’re struggling with curing outside, with the weather starting to turn, this might just be the time to get building!
S400 Scanner Modified For Finding Hidden Watermarks

Computer hardware is by and large compromised out of the box. Whether it’s sloppy factory code, or government-installed backdoors, it’s difficult to trust anything. A great example is that of color laser printers, the vast majority of which place hidden watermarks on printed pages. It’s a somewhat forgotten issue these days, but back in 2005, [bunnie] set out to modify a scanner to help better image and investigate these watermarks.

The watermarks in question have been investigated by the EFF, and often, but not always, consist of tiny yellow dots printed on the page. They can store data such as the name of the computer that printed the document, as well as the serial number and model of the printer used. With this functionality baked into the firmware, all prints made on such a printer are compromised.

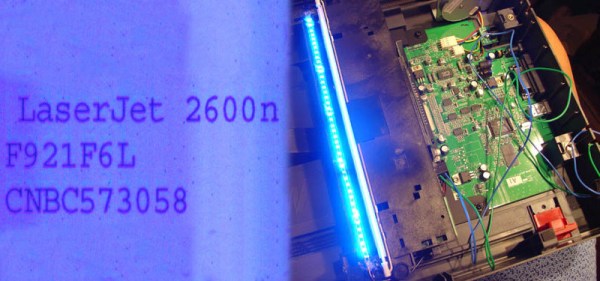
The easiest way to see these watermarks is with blue light, which is reflected by the white paper, but causes yellow dots to show up as dark spots. To make scanning affected documents quick and easy, [bunnie] whipped up a linear LED light array, installing it in a spare slot in his scanner’s light assembly, next to the stock white CCFL. Usage is a little more complex, with the scanner’s automatic calibration getting confused if the blue LEDs are left on at the start of a scan. Instead, the LEDs must be turned off initially, and then powered up once the calibration is complete.

Results are good, with the tiny dots made much clearer in the test scans [bunnie] performed. Unfortunately, the watermarking technology has moved on, and it’s likely that modern printers use a variety of techniques that are even harder to detect. By and large, ransom notes are best made the old fashioned way – by cutting up some old magazines.

A 3D Printed Magnetic Stirrer For Your DIY Chemistry Projects

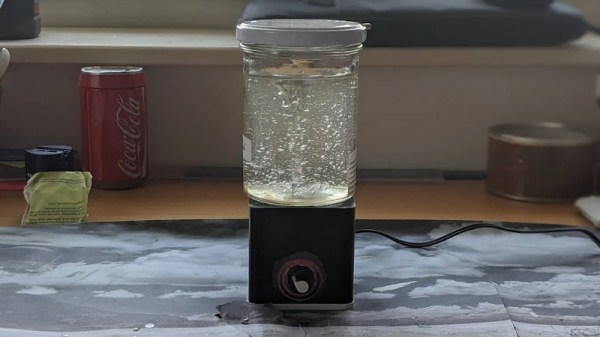
When mixing or agitating delicate solutions in the chemistry lab, a magnetic stirrer is often the tool of choice. They’re able to be easily sterilized and cleaned, while maintaining isolation between the mechanical parts and the solutions in question. While they can be purchased off the shelf, [Max Siebenschläfer] whipped up a design that can easily be built at home.

The build consists of a 3D printed base, containing a simple brushed motor. This is hooked up to a motor controller fitted with a simple potentiometer for adjusting the speed of rotation. The motor is then fitted with a small 3D printed spinner containing two magnets. A similar 3D printed part acts as a stirrer, and is fitted with a matching pair of magnets, and dropped into the solution. The magnets in the stirrer are attracted to the ones on the end of the motor, and so when the motor spins, the stirrer spins in the solution, with no physical contact required.

It’s a simple way to build a magnetic stirrer at home without having to shell out big money for a laboratory grade unit. We imagine this could be put to fun use for stirring coffee or cocktails, too – if built with a food-grade spinner. More advanced designs are also possible for the eager home scientist. Video after the break.

Continue reading “A 3D Printed Magnetic Stirrer For Your DIY Chemistry Projects” →

WiiBoy Color Is Exactly What It Sounds Like

Anyone can go out and buy a handheld console, and if you want to be the cool kid on the school bus, you can always ask your parents to take you out to get one. But if you want real street cred that lasts through your adult years, you’ve gotta put something together yourself. [GingerOfMods] has done just that with the Wiiboy Color. 

Yes, it’s another home-console-turned-portable, and it’s perfomed with exquisite execution. The Wii motherboard is cut and sliced to the absolute bare minimum, as the aim was to build the entire system to the rough form factor of the original Game Boy Color. Custom PCBs were then used to link the chopped ‘board to peripherals, such as the USB drive used to load games and the circuitry from a Gamecube controller. The screen is a beautiful looking 3.5″ IPS LCD, running at 480p and originally intended for use as an automotive backup camera. Battery life is around 2-3 hours, with a USB-C port included for easy charging. More details are included on the forum build log.

It’s a tidy build, and the 3D printed case, Switch joysticks and DS Lite buttons give it a near-production quality finish. [GingerOfMods] intends to build more for commissions, though expect a hefty price tag given the labor and custom work involved. We’ve seen other portable Wiis before too, like this tightly-packed Kapton-heavy build. Video after the break.

Continue reading “WiiBoy Color Is Exactly What It Sounds Like” →

Potential Contenders For Battery Supremacy

Lithium ion batteries have been a revolutionary technology. Their high energy and power density has made the electric car a practical reality, enabled grid storage for renewable energy, and put powerful computers in the palm of the hand. However, if there’s one thing humanity is known for, it’s always wanting more.

Potential contenders for the title of ultimate battery technology are out there, but it will take a major shift to dethrone lithium-ion from the top of the tree.

Dominant For Good Reason

Lithium-ion batteries were first developed by Stanley Whittingham, working at Exxon, who were looking to diversify away from oil in the midst of the major energy crises of the 1970s. Over the years, the technology was developed further, with work by John Goodenough (a superb hacker name if we’ve ever heard one) and Akira Yoshino increasing performance with improved cathode and anode materials. Commercialization was first achieved by Keizaburo Tozawa, working at Sony to develop a better battery for the company’s line of camcorders. Continue reading “Potential Contenders For Battery Supremacy” →

RC HalfTrack Is Lasercut Masterpiece

The half-track is a vehicle design that has gradually fallen out of favour in the decades since World War II. Combining the benefits of easy driving and handling of wheeled vehicles with the strong mud and snow performance of a tracked vehicle, they served a niche before largely being phased out with the rise of the armoured personnel carrier. [JackCarter] wished to build his own, so whipped up a lasercut RC version of the SdKfz 251 22.

The work is impressive, with [JackCarter] creating the design in Solidworks from photos and illustrations of the vehicle. The moving parts are lasercut, including the tracks themselves, assembled from many tiny lasercut MDF parts. The benefit of using lasercutting to make the model is that it was easy for [Jack Carter] to create simple jigs to ease the process of putting the tracks together. A NodeMCU with a motor shield controls the gear motors used to drive the tracks, and drives a servo for steering. Control is via a smartphone, thanks to the Blynk framework which makes building apps for custom projects easy.

The finished product really shows off [JackCarter]’s 3D design skills, and looks like great fun to build and drive. We’d love to see it with a lick of paint and some period decals to really complete the look. Hackers love a good tracked vehicle, and we’ve seen some impressive builds before. Video after the break.

Continue reading “RC HalfTrack Is Lasercut Masterpiece” →

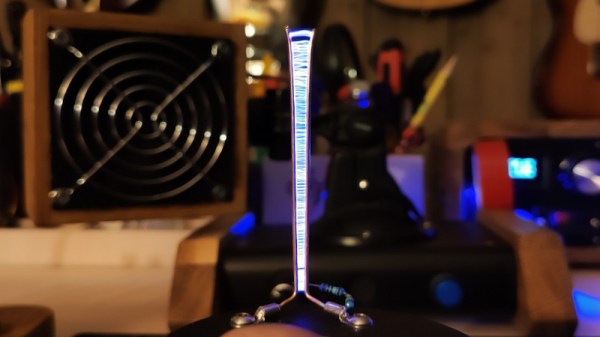
A Tiny Jacob’s Ladder You Can Build At Home

Big fizzing electrical arcs are fun, and handled properly, not too dangerous either. The Jacob’s Ladder is one such piece of arc-generating equipment, one that featured heavily in vintage sci-fi films. It remains a charming demonstration of high-voltage electrical principles, and you can easily build your own mini version at home.

The build starts with a basic high-voltage step-up kit that turns 4V DC into 15 kV at the output. At this voltage level, it’s possible to generate an arc in air. To create the Jacob’s ladder, the kit is wired up to a pair of closely-spaced electrodes that slowly get farther apart as they go up vertically. When an arc jumps from one electrode to the other, it ionises the air, and the voltage sags due to the current flow. The flowing current heats up the air, which begins to rise, taking the current path with it, causing the familiar climbing arc we all know and love. As the distance between the electrodes increases towards the top, the arc can eventually no longer be sustained. With no current flowing, the voltage rises again, and a new arc forms at the bottom of the device, repeating the process.

It’s a fun build that would make an excellent desk toy, albeit best shown under glass to avoid accidental electric shocks. You can even build a larger one out of microwave parts if you’re so inclined. Video after the break.

Continue reading “A Tiny Jacob’s Ladder You Can Build At Home” →