Bluetooth Shock Collar Keeps Wearer On Task

Like a lot of us [Liam Kloppers] had a problem with doomscrolling. Unwilling to go cold-turkey because he does find some utility in social media. He tried a number of things before deciding to say “Screw it” and just go full Pavlov on himself with some old-fashioned classical conditioning. Who needs willpower when you have electric shocks to dissuade you?

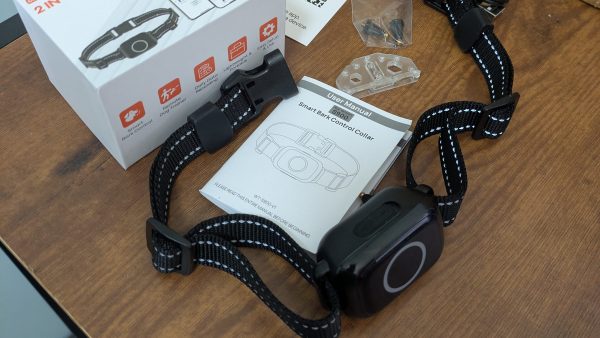
The key here was finding an electric-shock dog collar that could be controlled via a smartphone application, which meant he could reverse-engineer its Bluetooth protocol and get it linked up to his own software. The initial implementation ties his quick-and-dirty Python control program with a web server living on his laptop, which he’s configured MacroDroid to call on when his personal criterion for ‘doomscrolling’ is met.

With the shock collar wrapped around his leg, [Liam] was ready to test. It turns out dogs are a lot tougher than people, because even when set to a low level, the shock from the device made him toss his phone across the room and had him hesitant to even pick it up again.

Since he couldn’t bring himself to put the shock collar back onto his leg, he’s now thinking of an audible alarm, something we’ve seen work before. If you’re as unhappy with your habits as [Liam], perhaps consider a device like Commodore’s social-media-free phone before resorting to self-electrocution.

So, You Found A Foden Steam Lorry In A Field. What Next?

It’s quite likely that many readers will have harbored dreams of owning, or at least driving, a steam engine of some kind. [James Hervey-Bathurst] was lucky enough to do so in a time when it was still possible to find scrap steam-powered machinery for restoration, and at the recent Electromagnetic Field event in the UK he took the time to describe his journey from finding an abandoned steam lorry in a Buckinghamshire field in 1975, to a few years later, taking it to the road.

The talk starts with the story of its retrieval, then the long process of rebuilding, and finally its first run. He’s the owner of Eastnor Castle, the ancestral pile that serves as venue for EMF Camp, so we’re guessing that having somewhere spacious for such a project must have helped. Along the way, we get a comprehensive run through the workings of a 1920s steam vehicle, from its double-expansion compound engine to its three-speed gearbox, stopping for small details like its injectors, and a curious exhaust steam heater designed to reduce the clouds of visible steam.

Most of us will never get the chance to take the wheel of a Foden such as this one, but at least we’ve had a chance for a closer look thanks to EMF. The full video is below the break, meanwhile if you’d like more on steam injectors we have you covered.

Continue reading “So, You Found A Foden Steam Lorry In A Field. What Next?”

Turning Corroded, Bug-Loving WiiMotes Into A Working One

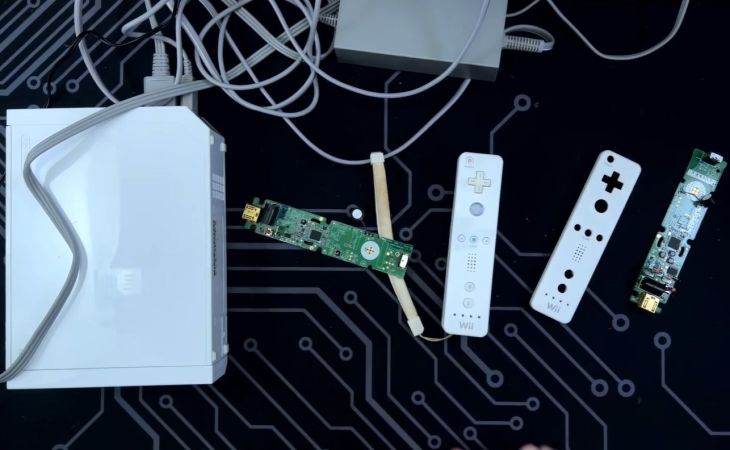
A time-honored tradition in the electronics repair business is to make many into one, specifically a stack of broken devices into one that works. So too with a triplet of heavily corroded and bug-infested WiiMote controllers that [eWastelander] dug out of a box of e-waste. After suffering abuse like leaving in leaky alkaline cells, bugs and general corrosion the task was to see whether at least one working WiiMote could be assembled from these three. (Video, embedded below.)

Adding to the fun was that the PCBs in these WiiMotes spanned at least two hardware revisions, and on one board the battery corrosion had caused an IC to fall off. After an initial assessment, neutralizing the battery acid and a deep clean of all the disassembled parts, it was time to give it a shot at reassembly into something resembling a Wii controller you could use and even want to touch without washing your hands afterwards.

Ultimately at least one working WiiMote was put together, with still an open question whether the remaining two  units in much worse conditions could be revived in some way. An interesting idea here is to use the WiiMote shells for a custom OpenMote board, which replaces the guts with an ESP32-S3-based system for more general non-Wii things around the house.

Continue reading “Turning Corroded, Bug-Loving WiiMotes Into A Working One”

An Atari Desktop On A Sega

Over recent years there have been a range of classic 16-bit consoles coaxed into running familiar operating systems, with -nommu Linux being a favourite. But the 16-bit era had its own operating systems of note, and [1d4r3k] has brought one of them to a console that fit very much into a different 16-bit camp. It’s Atari’s TOS, on a Sega Mega CD.

We should in all fairness start by saying it’s not “real” TOS, but EmuTOS, an open-source drop-in replacement. So far it supports a serial keyboard device, a printer, and sound, and it mounts the CD or cartridge it booted from, a RAMdisk, internal backup RAM, and cartridge save RAM. We’re told in the tip email that there’s also been some work porting GEOS to the platform, and thus the GEOS software suite may be ported to it.

Sadly there are no images, so we can’t see it working, but trying it looks to be as straightforward as burning aan ISO or flashing a cartridge if you have the original hardware. We have no idea as to whether it would be any use given the specs of the Sega, but given that TOS ran on Ataris without a lot of RAM we suspect it might be. Meanwhile, here’s a Megadrive/Genesis running Linux.

Header: 軍事用懐中電灯, CC BY-SA 4.0.

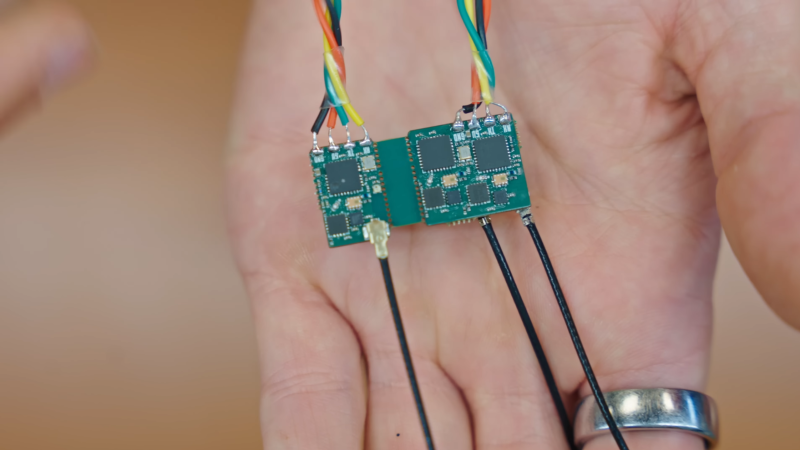
A man's hand is shown holding two small circuit boards, joined together by a central bridge. Each circuit board is connected to four wires and a coaxial antenna cable.

Open-Source ExpressLRS Receiver Reaches For Range

Drone control links are, from a radio signals perspective, nothing short of amazing: using a transmitter capable of transmitting, at most, one watt, a protocol such as ExpressLRS (ELRS) can control a drone over 100 kilometers away. [Stan], who has been building a drone electronics stack from scratch, recently designed four ELRS receivers and went over the principles behind their incredible range.

Up to a certain point, the simplest way to increase a radio’s range is to lower the frequency; lower radio frequencies penetrate better through most materials and don’t attenuate as quickly with distance. However, although ELRS can use 900 MHz bands, [Stan]’s receivers primarily use 2.4 GHz. The major improvement is in modulation: unlike other control protocols, which mostly use frequency modulation, or Wi-Fi, which uses phase and amplitude modulation, ELRS uses Chirp Spread Spectrum modulation. This has a low data rate, but it’s very reliable; every bit is transmitted as a chirp – a linearly rising radio tone – and the data is encoded in the chirp’s starting frequency. To decode this, the receiver multiplies it with an inverse chirp, then takes a fast Fourier transform, revealing the starting frequency. This process has an equivalent gain of 24 dB, which is enough to let it decode signals even below the receiver’s noise floor.

The hardware [Stan] designed to implement this was comparatively simple, just an ESP32 microcontroller, an SX1281 radio chip, and a few peripherals. All four receivers worked in 2.4 GHz, but two had additional 900 MHz antennas. Against RF design convention, one of the receivers used a via to connect the antenna. This would normally cause a significant impedance mismatch, but since there were enough ground-plane vias nearby, the current return path was barely affected; the receiver’s performance hardly changed. In one test, all four receivers maintained a connection at more than five kilometers, despite a forest blocking the signal’s path.

We previously covered ExpressLRS when it was still an emerging technology. To get this kind of range, it builds on LoRa technology, which has reached some impressive distance records.

Thanks to [Keith Olson] for the tip!

The Shutter Makes This 3D Printed Camera Special

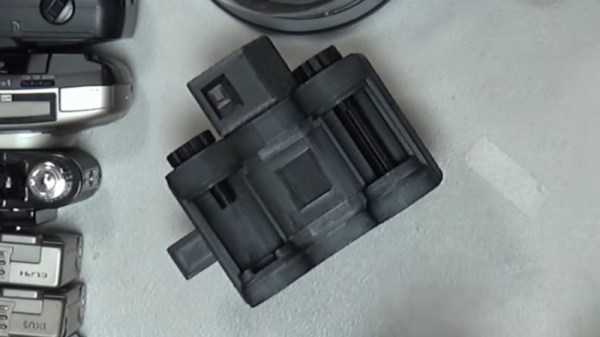
Making a film camera is a project within the reach of almost anyone, from the experimenter with cardboard and sticky tape, to the machinist with an aluminium billet. But 3D printing has opened up the world of cameras to whole new set of experimenters, and we’ve seen some very impressive builds here as a result. For all that, there’s always been a particularly tricky aspect to a home made camera: the shutter. In particular, making one with variable speed has proved almost impossible. Now [Camera Things] has given it a very good shot, with a sliding 3D printed design.

To cock it, both the strips are pulled across, before the blind strip is pushed back, and the shutter operates by sliding back under the influence of a rubber band. The clever part in this case is that the blind strip can be partially pushed back to affect the size of the shutter opening. The effect is then of a variable width strip of light passing over the film, which is equivalent to varying the speed of a conventional shutter.

Due to space constraints he’s only able to make it a half frame shutter, so he’s abandoning this design in favour of a more complicated set of vertical leaves. Sadly he’s not made the files available, but we thing proficient CAD users should be able to make their own version. The video is below the break.

It’s not the first printable shutter we’ve seen, but it remains the first variable one.

Continue reading “The Shutter Makes This 3D Printed Camera Special”

555 Makes A Useful Beat Frequency Oscillator

If you’ve got a cheap ham rig, it might not be very practical for you to receive certain transmissions out of the box. However, if you were to hack in a convenient little beat frequency oscillator (BFO) to your rig, then you’d be up and running. Here’s a simple way to do just that with a venerable old part everybody knows and loves.

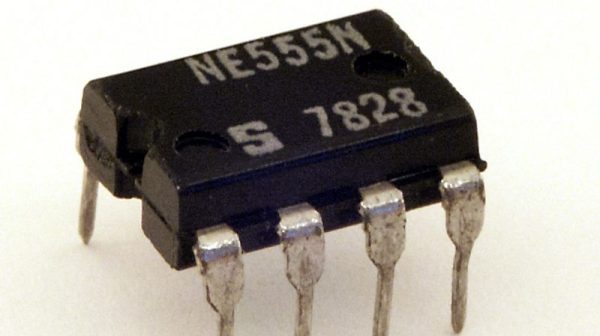
The build in question concerns the use of a 555 timer IC. It’s seasoned with the right smattering of resistors and capacitors to taste, producing a 455 kHz beat frequency oscillator. This can be injected into the intermediate frequency chain of a receiver, making up for the lack of a steady carrier wave when receiving continuous-wave and single side-band suppressed carrier transmissions. Thanks to a potentiometer in the circuit, it’s tunable, too, from 455 kHz, plus or minus twenty percent or so. Thanks to the versatility of the 555, it’s possible to run the chip on a wide voltage range, anywhere from 4.5 volts to 16 volts, which makes it easy to install in just about any old radio set without requiring adding a specialized power supply. There’s also an alternative design that EDN covered in greater detail some time ago.

If you’re eager to dive into a wider range of transmissions than your radio can currently receive, this old-school ham hack could be just what the shack ordered. We feature plenty of good ham hacks around these parts, and don’t forget—we always want to hear about the freshest ones on the tipsline.