Art of 3D printer in the middle of printing a Hackaday Jolly Wrencher logo

Brainstorming

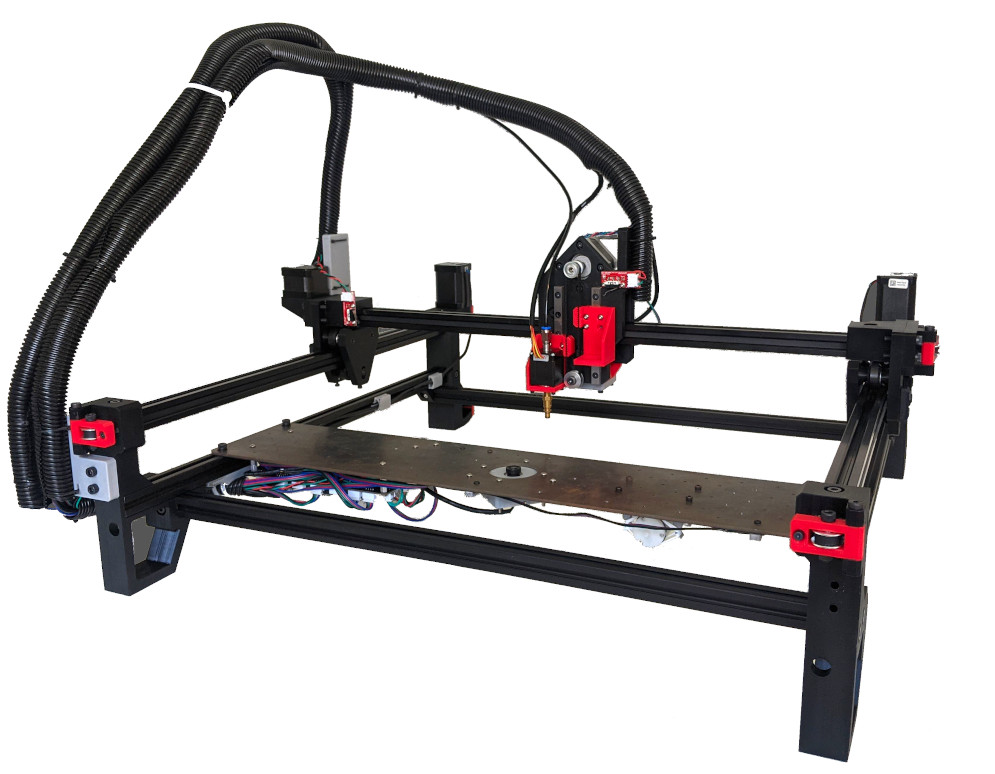
One of the best things about hanging out with other hackers is the freewheeling brainstorming sessions that tend to occur. Case in point: I was at the Electronica trade fair and ended up hanging out with [Stephen Hawes] and [Lucian Chapar], two of the folks behind the LumenPnP open-source pick and place machine that we’ve covered a fair number of times in the past.

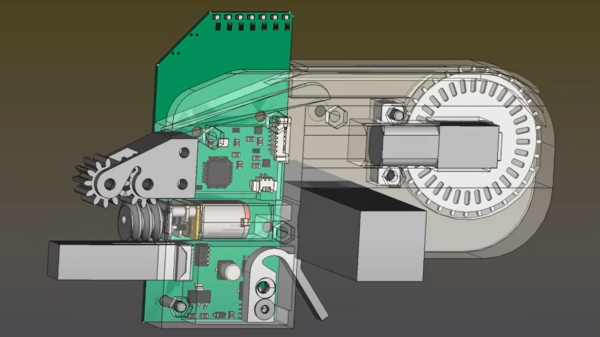
Among many cool features, it has a camera mounted on the parts-moving head to find the fiducial markings on the PCB. But of course, this mean a camera mounted to an almost general purpose two-axis gantry, and that sent the geeks’ minds spinning. [Stephen] was talking about how easy it would be to turn into a photo-stitching macrophotography rig, which could yield amazingly high resolution photos.

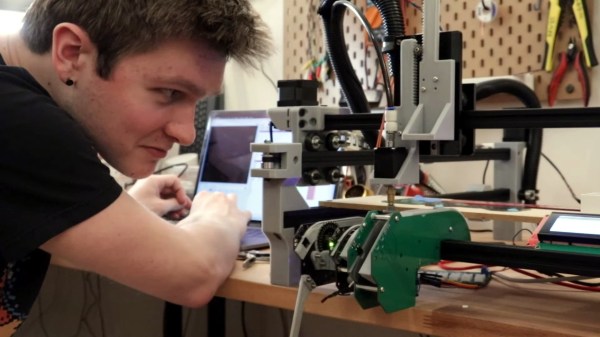
Meanwhile [Lucian] and I were thinking about how similar this gantry was to a 3D printer, and [Lucian] asked why 3D printers don’t come with cameras mounted on the hot ends. He’d even shopped this idea around at the East Coast Reprap Festival and gotten some people excited about it.

So here’s the idea: computer vision near extruder gives you real-time process control. You could use it to home the nozzle in Z. You could use it to tell when the filament has run out, or the steppers have skipped steps. If you had it really refined, you could use it to compensate other printing defects. In short, it would be a simple hardware addition that would open up a universe of computer-vision software improvements, and best of all, it’s easy enough for the home gamer to do – you’d probably only need a 3D printer.

Now I’ve shared the brainstorm with you. Hope it inspires some DIY 3DP innovation, or at least encourages you to brainstorm along below.

(Re)designing The LumenPnP Tape Feeder

Many of the hardware orientated hackers among us will likely have been following along with the story of [Stephen Hawes] and the Lumen pick-and-place project but kind of waiting a bit for the project to mature some more before maybe taking the plunge and ordering a kit. One reason for this might be that whilst the basic machine design is there and working, the tape feeders did need a fair bit of work, and a lack of usable feeders does not make a great PnP machine. [Stephen] has been working on a newer design that addresses some of the identified shortcomings, and has started documenting his progress (video, embedded below) along the way.

Gone is the PCB-based ‘case’, reverting back to a 3D printable affair and a much smaller PCB. After flip-flopping a bit between different geared DC motors, [Stephen] settled back on the original, smaller unit, which after a wee spot of hacking, was convinced to accept an optical encoder stripped from another unit, and this proved that it was indeed more than up to the tape-advancement duty. The reason for this change was physical size — the original motor resulted in an assembly 38mm wide — this limited the number for feeders on the front rail to barely eleven units. This is not really enough, but with the narrower assembly, the width is reduced to 15.5mm allowing 27 feeders to snuggle together on the rail, and that should make the machine much more usable.

Continue reading “(Re)designing The LumenPnP Tape Feeder”

Angel Investor Gives Open Source PnP A Massive Boost

We love it when an Open Source hardware project grows up and turns into a sustainable business, bootstrapped with nothing but hard work and great ideas, but it’s a really tough prospect to do it using your own money, ploughing the profits from any sales back into development and not taking a dime in wages whilst you do so. People obviously need an income to live off, and that time spent working on a startup is time you can’t spend earning your keep. So it’s with great pleasure that we can bring you the latest news from [Stephen Hawes] and his pick-and-place machine plans. In the year since we last checked in with the project, development has continued at a steady pace, with the guys quickly outgrowing the garage workspace, whilst they prepare PnP machine kits ready for sale.

The big news is that [Joel Spolsky], co-founder of Stack Exchange, creator of Kanban management tool, Trello, and angel investor, has made a sizable ($100K USD) investment in the company which has allowed them to take on a 3,000+ sq. ft office space, and given them the funds for stock and all that boring business overhead stuff. [Stephen] takes time to explain that [Joel] will not have any control of the company, and all hardware and software will remain fully Open Source. For those interested [Joel] implemented his investment as a SAFE note (Simple Agreement for Future Equity) and as such, [Joel] will only make a return in the form of a small share allocation, if they hit the big-time in the future. Can’t really say fairer than that!

[Stephen] did recently receive a ‘cease and desist’ notice regarding his use of the ‘Index’ name for the project, since that is already a trademarked term, defended by somebody else, the project will need change name very soon. A minor setback, but it is a bit annoying that a chunk of that investment now has to go to a lawyer to make sure that the name they do eventually choose isn’t already taken and is safe to use.

In terms of the machine itself, it is now is fully operating, with multiple automatic tape feeders, featuring up and down-facing machine vision, and all that OpenPnP goodness. It has even been demonstrated placing parts for its own custom motherboard PCB, reprap style. Nice!

We wish [Stephen] and partner [Lucian] all the success they deserve, and hope they get those kits out there, because there are people around these parts that need an affordable, hackable, desktop PnP machine ASAP, this scribe included!

Here’s the earlier story covering the machine, but it’s not the only Open Source PnP machine we’ve seen – here’s another one from a few years ago.

Continue reading “Angel Investor Gives Open Source PnP A Massive Boost”

No Wonder These Projects Won The Circuit Sculpture Contest

There are five winners of the Hackaday Circuit Sculpture contest, and every one of them comes as no surprise, even in a tightly packed race to the top.

Beginning with the gorgeous photo above, we have [Eirik Brandal’s] waldian being named the most beautiful. Imagine this hanging on your living room wall, then head over and listen to the video demo as it’s light-actuated synthesizer chimes like distant (or maybe not so distant) church bells. This isn’t a one-off dip into circuit sculpture for [Eirik], we featured his broader body of work back in 2018, all of it worth checking out in more depth.

The glowing mask is actually made of PCB. The seams are secured with super glue bolstered with baking soda. The labor behind this one is intense. As we mention back in September, the project took place over about two years, mostly due to the sheer volume of cutting and sanding [Stephen Hawes] needed to do to bring together so many pieces. This one grabbed him the most artistic award.

[Jiří Praus] takes the top spot for best video with his luminescent RGB LED sphere. We swooned over this one when it first dropped back in December. [Jiří] shows off a combination of patience and ingenuity by using a 3D-printed mold to hold each LED while he soldered brass rod in place to serve as both electrical and mechanical support.

Speaking of molds, one of the challenges was to show off the best jig for creating a circuit sculpture. [Inne’s] Soft Soldering Jig provides the channels needed to keep crisp right angles on the brass rod as you work, with voids to position components at intersections for soldering. Drawing on the advice of numerous circuit sculpture success from people like [Mohit Bohite] and [Jiří Praus], he was looking for a way to easily position everything on a surface that would not be burnt by the soldering iron. The answer comes in the form of Silicone jigs made with 3D-printed molds.

Finally we have the Binary Calculator project which won the most functional award. While it does operate as a binary calculator, the beauty of it is not to be overlooked. Among its many attributes are a set of cherry-wood keycaps that were milled for the project and a bell-jar display stand where the calculator rests and serves as a binary clock when not in use. You may remember seeing our feature of this project last week.

As prizes, the binary calculator, orb, and wall sculpture creators will each be receiving $200 in goodies from Digi-Key who sponsored the contest and will be featuring entries in a 2021 wall calendar. Creators of the soldering jig and the PCB mask will receive a $100 Tindie gift card.

Circuit Board Origami Puts You Face-to-Face With Low-Poly Electronics

Paper craft has been around almost as long as paper itself. It’s fun to mimic paper craft and origami with low-poly 3D prints, and [Stephen Hawes] wondered whether it could be done with copper-clad PCBs. Two years after the question arose, we have the answer in the form of a fantastical mask with light-up eyes. Check it out in the video below.

[Stephen] started with a model (Update: [kongorilla]’s 2012 low poly mask model from back in 2012 was the starting point for this hack) from the papercraft program Pepakura Designer, then milled out dozens of boards. Only a few of them support circuitry, but it was still quite the time-consuming process. The ATmega32U4 on the forehead along with the fold-traversing circuitry serve to light up the WS2812B eyes. Power runs up the copper tube, which doubles as a handy mounting rod to connect to the 3D printed base.

Continue reading “Circuit Board Origami Puts You Face-to-Face With Low-Poly Electronics”

Open Source Pick And Place Has A $450 BOM Cost

Give your grizzled and cramped hands a break from stuffing boards with surface mount components. This is the job of pick and place machine, and over the years these tools of the trade for Printed Circuit Board Assembly (PCBA) have gotten closer to reality for the home shop; with some models diving below the $10,000 mark. But if you’re not doing it professionally, those are still unobtanium.

The cost of this one, on the other hand, could be explained away as a project in itself. You’re not buying a $450 shop tool, you’re purchasing materials to chase the fever dream of building an open source pick and place machine. There are two major parts here, an X/Y/Z machine tool that can also rotate the vacuum-based parts picker, and the feeders that reel out components to be placed. All of this is working, but there’s still a long road to travel before it becomes a set and forget machine.

The rubber hits the road in two ways with pick and place machines: the feeders, and the optical placement. The feeders are where [Stephen Hawes] has done a ton of work, all shown in his video series that began back in January. The stackup of PCBs and 3D-prints hangs on the front rail of the gantry assembly, is adjustable for tape widths, and uses an interesting PCB encoder wheel and worm-gear for fine-tuning the feed. [Stephen’s] main controller board, a RAMPS shield for and Arduino Mega that runs a customized version of Marlin, can work with up to 32 of these feeders.

So far it doesn’t look like he’s tackled a vision system, although the Bill of Materials does include  “Downwards Camera”, confirming this is a planned feature. Vision is crucial in commercial offerings, with at least one downward camera for precise board positioning, and often an up-facing camera as well to ensure component position and orientation (if not multiple cameras for each purpose). Without these, the machine would be dead reckoning and that can lead to drift over the size of the board and the duration of the placement run as well as axial misalignment. Adding vision shouldn’t be a ground-up effort though, as [Stephen] chose to use OpenPnP to drive the machine and that project already has vision support. This will be much simpler to add when compared to the complexity of the feeders.

[Stephen] admits that much work still needs to be done and he would love to have help dialing in the performance of the feeder design, and fleshing out features on the road to perfection. Although we suspect that as in the early days of bootstrapping 3D printers, a project like this can never be truly finished. At least it’ll make his next run of LED glowties a lot easier to fabricate.

Continue reading “Open Source Pick And Place Has A $450 BOM Cost”

Glowtie Is Perfect For Those Fancy Dress Raves

Are you bored of your traditional bow tie? Do you wish it had RGB LEDs, WiFi, and a web interface that you could access from your smartphone? If you’re like us at Hackaday…maybe not. But that hasn’t stopped [Stephen Hawes] from creating the Glowtie, an admittedly very slick piece of open source electronic neckwear that you can build yourself or even purchase as an assembled unit. Truly we’re living in the future.

Evolution of the Glowtie

While we’re hardly experts on fashion around these parts (please see the “About” page for evidence), we can absolutely appreciate the amount of time and effort [Stephen] has put into its design. Especially considering his decision to release the hardware and software as open source while still putting the device up on Kickstarter. We seen far too many Kickstarters promising to open the source up after they get the money, so we’re always glad to see a project that’s willing to put everything out there from the start.

For the hardware, [Stephen] has gone with the ever popular ESP8266 module and an array of WS2812B LEDs around the edge of the PCB. There’s also a tiny power switch on the bottom, and a USB port for charging the two 1S 300mAh lipo batteries on the backside of the Glowtie. The 3D printed rear panel gives the board some support, and features an integrated bracket that allows it to clip onto the top button of your shirt. For those that aren’t necessarily a fan of the bare PCB look or blinding people with exposed LEDs, there’s a cloth panel that covers the front of the Glowtie to not only diffuse the light but make it look a bit more like a real tie.

To control the Glowtie, the user just needs to connect their smartphone to the device’s WiFi access point and use the web-based interface. The user can change the color and brightness of the LEDs, as well as select from different pre-loaded flashing and fading patterns. The end result, especially with the cloth diffuser, really does look gorgeous. Even if this isn’t the kind of thing you’d wear on a daily basis, we have no doubt that you’ll be getting plenty of attention every time you clip it on.

It should be said that [Stephen] is no stranger to wearable technology. We’ve previously covered his mildly terrifying wrist mounted flamethrower, so if he managed to build that without blowing himself up, we imagine building a light up tie should be a piece of cake in comparison.

Continue reading “Glowtie Is Perfect For Those Fancy Dress Raves”