Come For The PCB Holder, Stay For The Tour Of FreeCAD

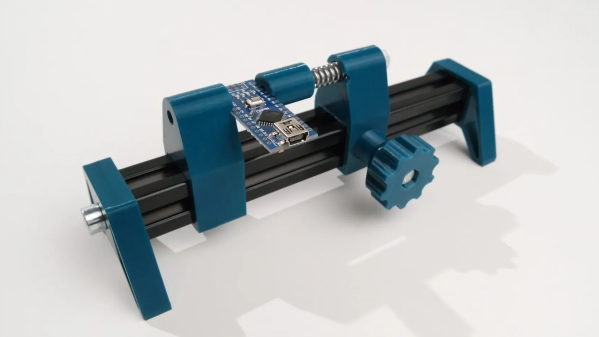
PCB holders are great tools. Not only is the PCB Solder Fren from [PistonPin] a nice DIY design, it offers some insight into the parts design process with FreeCAD.

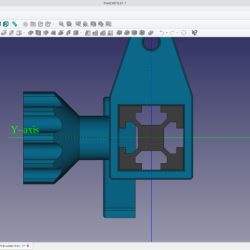
This design nicely demonstrates FreeCAD’s workflow for designing parts.

The PCB holder uses 3D-printed parts, M5 hardware, a length of 2020 aluminum extrusion, and one spring to create a handy and adjustable design that accommodates a variety of PCB sizes and shapes. If the ends of the extrusion are threaded, the end caps can be screwed in. Otherwise, a little glue ought to do the trick.

Want a little more insight into what making a part like this involves? [Jo Hinchliffe] at FreeCAD reached out to [PistonPin] for more detail and has a blog post explaining the workflow and steps involved in this part. As a bonus, STEP files and the FreeCAD project file are all included!

Not only is FreeCAD simple to use, but it’s also flexible enough to accommodate custom, niche extensions like a Rocketry workbench, so be sure to give it a look for your open-source CAD needs.

Tour A PCB Assembly Line From Your Armchair

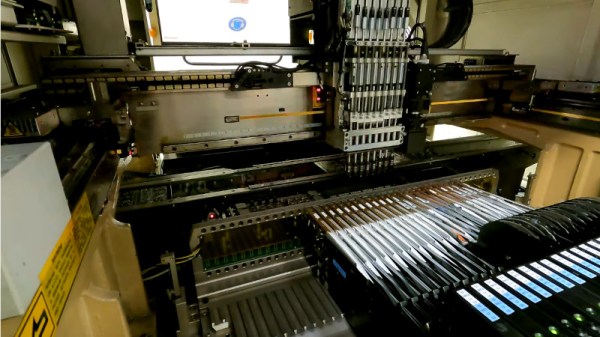
Those of us who build our own electronics should have some idea of the process used to assemble modern surface-mount printed circuit boards. Whether we hand-solder, apply paste with a syringe, use a hotplate, or go the whole hog with stencil and oven, the process of putting components on boards and soldering them is fairly straightforward. It’s the same in an industrial setting, though perhaps fewer of us will have seen an industrial pick-and-place line in action. [Martina] looks at just such a line for us, giving a very accessible introduction to the machines and how they are used. Have a look, in the video below the break.

It’s particularly interesting as someone used to the home-made versions of these machines, to see the optical self-alignment and the multiple pick-and-place tools which are beyond the simpler pick-and-place machines you’ll find in a hackerspace. Multiple machines in a line are also beyond hackerspaces, so the revelation that the first machine is deliberately run slowly to avoid the line backing up is a valuable one.

At the end of the line is the reflow oven itself, through which the boards pass on a belt through carefully graded hot air zones. Certainly a step up from a toaster oven with an Arduino controller!

Sadly not all of us will be lucky enough to have such a line at our disposal, but pick-and-place projects come up here quite often. We did a teardown on the feeders from a Siemens machine a couple of years ago.

Continue reading “Tour A PCB Assembly Line From Your Armchair”

A Guided Tour Of The NES

No matter your age or background, there’s an excellent chance you’ll recognize the Nintendo Entertainment System (NES) at first glance. The iconic 8-bit system not only revitalized the gaming industry, but helped to establish the “blueprint” of console gaming for decades to come. It’s a machine so legendary and transformative that even today, it enjoys a considerable following. Some appreciate the more austere approach to gaming from a bygone era, while others are fascinated with the functional aspects of console.

The NesHacker YouTube channel is an excellent example of that latter group. Host [Ryan] explores the ins and outs of the NES as a platform, with a leaning towards the software techniques used to push the system’s 6502 processor to the limits. Even if you aren’t terribly interested in gaming, the videos on assembly programming and optimization are well worth a watch for anyone writing code for vintage hardware.

Continue reading “A Guided Tour Of The NES”

Retrotechtacular: Gibson Factory Tour, 1967-Style

If nothing else good came out of 2020, we can say that we at least have “Instrument of the People” — some 1967-era footage of Gibson Guitars’ “craftory”, which was discovered sometime in the fall of 2020. It appears a bit boring at first — a suit slowly approaches the camera on a dimly-lit factory floor and you half-expect an ‘oh, I didn’t see you there’ type of introduction, but no. When he reaches the foreground, he finds a candy apple-red Gibson semi-hollow body guitar waiting for him. After giving the thing a quick once over, he assesses the straightness of the neck and then begins shredding on it, fingerpicking style.

If you like this or any type of guitar music, then hang on to your headstock, because it lilts nonstop throughout this 20-minute tour as we see a parade of nameless, and often headless, players showing their stuff on various styles of Gibson both electric and acoustic.

Continue reading “Retrotechtacular: Gibson Factory Tour, 1967-Style”

Word Tour Map of High Altitude Balloon Launched at Hackaday Supercon.

Supercon Balloon W6MRR-26 Continues Its World Tour

[Martin Rothfield] and other amateur radio operators from San Francisco High Altitude Ballooning (SF-HAB) treated conference attendees to the 2022 Hackaday Supercon to the launch of two High Altitude Balloons (HABs). On the morning of November 6th, the two balloons were launched from a park across the street from Supplyframe DesignLab in Pasadena, California.

Seven days after its launch from Southern California, one of the balloons was over Tajikistan cruising eastward at an altitude of 42,000 feet (12,800 meters). Balloon W6MRR-26 was already approaching China where it will continue its wonderful world tour to parts unknown. The second balloon (call sign W3HAC-11) landed in northern Arizona where it has continued transmitting whenever it receives power from the sun.

Each balloon carries a tiny payload — a printed circuit board powered only by small photovoltaic cells. The board includes a microcontroller, a GPS module, and a Weak Signal Propagation Reporter (WSPR) radio transmitter.  The transmitted operates on the 20 meter amateur radio band at around 14 MHz.

WSPR beacons can provide time, altitude, and location information.  The WSPR telemetry is then relayed via WSPRgates using Automatic Packet Reporting System (APRS) onto the Internet. The collected information can be viewed and mapped on websites such as aprs.fi.

Continue reading “Supercon Balloon W6MRR-26 Continues Its World Tour”

Scratch-Built RC Excavator Is A Model Making Tour De Force

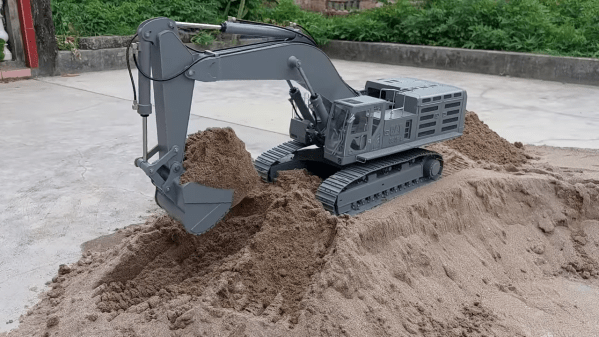
Some projects just take your breath away with their level of attention to detail. This scratch-built RC-controlled model excavator is not only breathtaking in its detail, but also amazing for the materials and tools used to create it.

We’ve got to be honest, we’ve been keeping an eye on the progress [Vang Hà] has been making on this build for a few weeks now. The first video below is a full tour of the finished project, which is painstakingly faithful to the original, a Caterpiller 390F tracked excavator. As impressive as that is, though, you’ve got to check out the build process that starts with fabricating the tracks in the second video below. The raw material for most of the model is plain gray PVC pipe, which is sliced and diced into flat sheets, cut into tiny pieces using a jury-rigged table saw, and heat formed to create curved pieces. Check out the full playlist for a bounty of fabrication delights, like tiny hinges and working latches.

We can’t possibly heap enough praise onto [Vang Hà] for his craftsmanship, but that’s not all we love about this one. There are tons of helpful tips here, and plenty of food for thought for more practical builds. We’re thinking about that full set of working hydraulic cylinders that operates the boom, the dipper, and the bucket, as well as the servo-operated hydraulic control valves. All of it is made from scratch, of course, and mostly from PVC. Keep that in mind for a project where electric motors or linear actuators just won’t fill the bill.

If this construction technique seems familiar to you, it could because we featured a toolbox made out of similarly processed PVC pipes back in June.

Continue reading “Scratch-Built RC Excavator Is A Model Making Tour De Force”

Helping The War Effort With 3D Printed Tourniquets

It’s a sad statement on the modern world that even civilians are at risk for severe traumatic injuries in the course of going about their lives. And if something unthinkable happens to you or someone you love, here’s hoping both that the injury can be treated, and that someone is nearby who both knows what to do and is properly equipped to do it.

That’s the thinking behind these 3D printed tourniquets, an unfortunate but necessary response to the ongoing war in Ukraine. To get tourniquets into the hands of those trained to use them, [3DPrintingforUkraine] is working on plans for a printable version of the C-A-T, or combat application tourniquet, a lightweight but strong tourniquet that can be rapidly applied, even by victims themselves. The commercial device consists of molded nylon buckles and hook-and-loop fastener bands, along with a very sturdy plastic handle that serves as a windlass that provides the necessary occlusive force when twisted. The 3D printed version’s parts aren’t as streamlined as the commercial unit’s, but they appear to be strong enough to withstand the considerable forces involved. From the look of their site, STL files and instructions for assembly will be available soon.

To be clear, tourniquets should only be applied by someone properly trained to do so. But having ample tourniquets available where traumatic injuries to the extremities are likely to occur can only improve the odds that one will be available when it’s needed. So hats off to [3DPrintingforUkraine] for making the effort to push this forward.

[Austin Everman] sent us this tip. Thanks!