CircuitPython Macro Pad Is One Build That Won’t Bite

Have you built a macro keypad yet? This is one of those projects where the need can materialize after the build is complete, because these things are made of wishes and upsides. A totally customized, fun build that streamlines processes for both work and play? Yes please. The only downside is that you actually have to like, know how to build them.

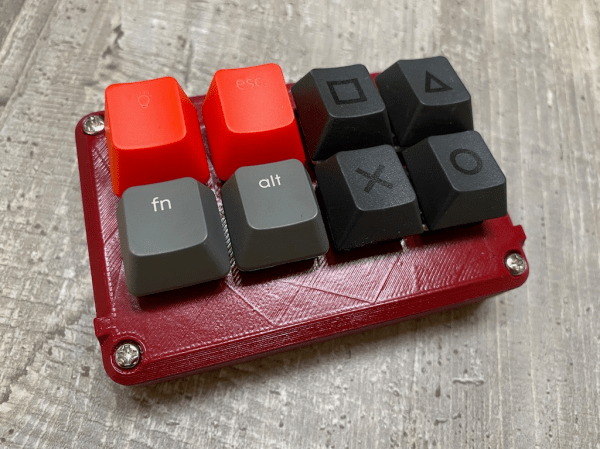
Suffer no more, because [Andy Warburton] can show you exactly how to put a macro pad together without worrying about wiring up a key switch matrix correctly. [Andy]’s keypad uses the very affordable Seeeduino Xiao, a tiny board that natively runs Arduino code. Since it has a SAMD21 processor, [Andy] chose to run CircuitPython on it instead. And lucky for you, he wrote a separate guide for that.

Practicalities aside, the next best thing about macro keyboards is that they can take nearly any shape or form. Print a case from Thingiverse as [Andy] did, or build it into anything you have lying around that’s sturdy enough to stand up to key presses and won’t slide around on your desk.

No room left on the desk? Build a macro foot stool and put those feet to work.

Via r/circuitpython

Robotic Open Source Puppy Needs A Home

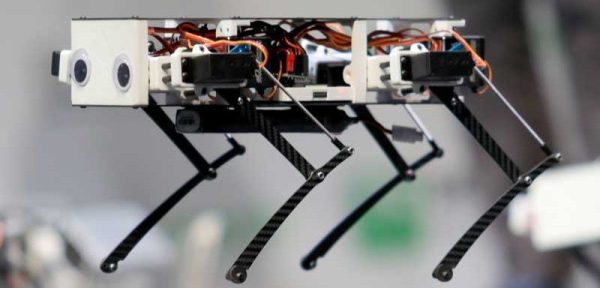
Personally, I am a fan of the real thing, but dogs aren’t an option for all. Plus, robotic dogs are easier to train and don’t pee on your couch. If you are looking to adopt a robotic companion, Stanford Pupper might be a good place to start. It’s a new open source project from the Stanford Robotics Student group,  a group of robotic hackers from Stanford University. This simple robotic quadruped looks pretty simple to build, but also looks like a great into to four-legged robots.

This is the first version of the design, but it looks pretty complete, built around a carbon fiber and 3D printed frame. The carbon fiber parts have to be cut out on a router, but you can order them pre-cut here, and you might be able to adapt it to easier materials. The Pupper is driven by twelve servos powered from a 5200 mAh 2S LiPo battery and a custom PCB that distributes the power. That means it could run autonomously.

Continue reading “Robotic Open Source Puppy Needs A Home”

New Teensy 4.1 Arrives With 100 Mbps Ethernet, High-Speed USB, 8 MB Flash

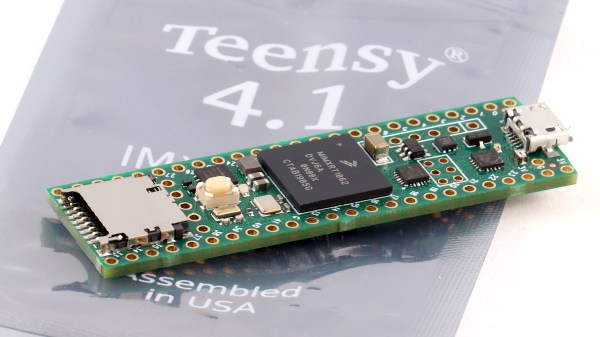
It was only last August that PJRC released Teensy 4.0. At that time, the 4.0 became the fastest microcontroller development board on the planet, a title it still holds as of this writing — or, well, not exactly. Today the Teensy 4.1 has been released, and using the same 600 MHz ARM Cortex M7 under the hood, is now also the fastest microcontroller board. What the 4.1 brings to the table is more peripherals, memory, and GPIOs. While Teensy 4.0 used the same small form factor as the 3.2, Teensy 4.1 uses the larger board size of the 3.5/3.6 to expose the extra goodies.

The now slightly older Teensy 4.0 — released on August 7th of last year — is priced at $19.95, with the new 4.1 version offered at $26.85. It seems that the 4.1 isn’t intended as a replacement for the 4.0, as they serve different segments of the market. If you’re looking for an ultra-fast affordable microcontroller board that lives up to its Teensy name, the 4.0 fits the bill. On the other hand, if you need the additional peripherals broken out and can afford the space of the larger board, the not-as-teensy-sized 4.1 is for you. How big is it? The sample board I measured was 61 x 18 mm (2.4 x 0. 7″), not counting the small protrusion of the micro-usb jack on one end.

Let’s have a look at all the fun stuff PJRC was able to pack into this space. Continue reading “New Teensy 4.1 Arrives With 100 Mbps Ethernet, High-Speed USB, 8 MB Flash”

Inputs Of Interest: I’m Building An ErgoDox!

I’ve been using my Kinesis Advantage keyboard for two months, and I love it. I’ll never go back to a regular keyboard again if I can help it.

There are a few downsides to it, however. The biggest one is that split distance between the two sides is fixed. It doesn’t have Cherry MX blues (although the browns plus the firmware beeps is pretty nice). It doesn’t have layers, really — just a ten-key under the right hand. And honestly, it’s not very portable.

ErgoDox with Nuclear Data keycaps via geekhack

I took the Kinesis out to a coffee shop a few times before they all dried up into drive-thrus, and plunking it down on a four-top out in public made me realize just how large and loud it really is.

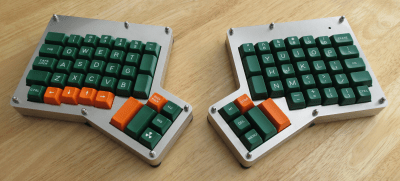
And so I’m building an ErgoDox keyboard. What I really want to build is a Dactyl — a curved variation on the ErgoDox — but I can’t just go whole-hog into that without building some type of keyboard first. That’s just my practical nature, I guess. I realize that the comparison is weak, because I’ll have to hand-wire the keyboard matrix when I make the dactyl. Assembling an ErgoDox is child’s play, comparatively. Our goal today is to lay out just what I’m getting myself into with a build like this one.

Continue reading “Inputs Of Interest: I’m Building An ErgoDox!”

Custom Firmware Makes A LoRA-Enabled HAB Tracker Watch

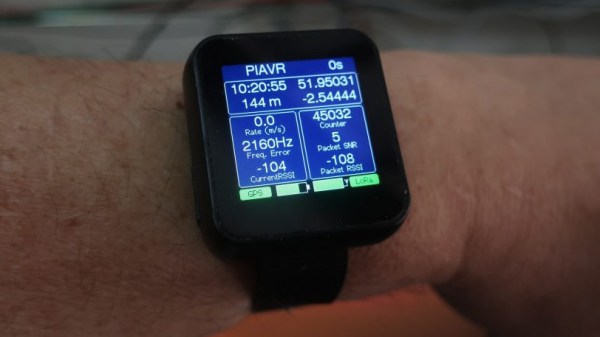
High Altitude Balloons (HAB) are a great way to get all kinds of data and shoot great photos and video, but what goes up must come down. Once the equipment has landed, one must track it down. GPS and LoRA, with its long wireless range and ease of use, are invaluable tools in tracking payloads that have returned to Earth. [Dave Akerman] has made handheld receivers to guide him to payloads, but wanted something even smaller; ideally something that could be worn on the wrist.

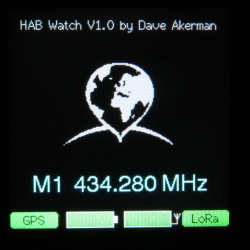
One day he came across the affordable LilyGo T-Watch which includes GPS and LoRA functionality, and he started getting ideas. The watch has the features, but the stock firmware didn’t measure up. Not to be deterred, [Dave] wrote new firmware to turn the device into a wrist-worn GPS and LoRA chase watch.

Not only is the new firmware functional, but it’s got a wonderful user interface. GitHub repository for the new firmware is here, and you can see the UI in action in the brief video embedded below.

Continue reading “Custom Firmware Makes A LoRA-Enabled HAB Tracker Watch”

New Part Day: Raspberry Pi Camera Gets Serious With 12 Megapixels & Proper Lenses

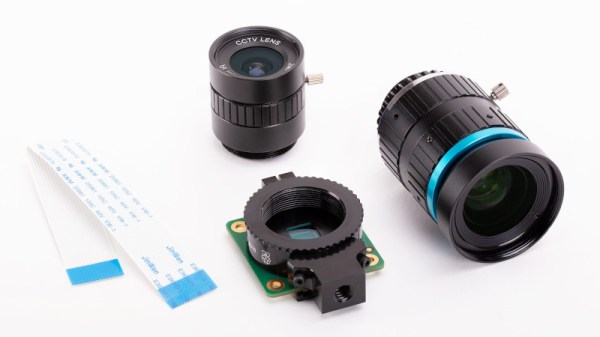
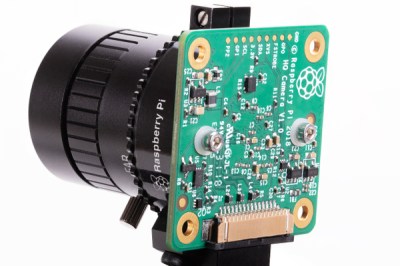
The Raspberry Pi Foundation have slipped out a new product, a $50 camera module with a larger sensor that increases the resolution from the 8 megapixels of its predecessor to a Sony IMX477R stacked, back-illuminated 12.3 megapixel sensor, and most interestingly adds a mounting ring for a C mount lens (the kind used with CCTV equipment) in place of the tiny fixed focus lenses of past Pi cameras. In addition there is a standard threaded tripod mount on the module, and an adapter ring for CS mount lens types. The camera cannot be used without a lens, but there are a few options available when ordering, like 16mm telephoto or 6mm wide angle lenses, if you do not already have a suitable lens on hand.

It’s an exciting move for photography experimenters, because for the first time it offers an affordable way into building custom cameras with both a higher quality sensor and a comprehensive selection of interchangeable lenses. We can imagine that the astronomers and microscopists among us will be enthusiastic about this development, as will those building automated wildlife cameras. For us though the excitement comes in the prospect of building decent quality cameras with custom form factors that break away from the conventional, because aside from a period when consumer digital cameras were in their infancy they have stuck rigidly to the same form factor dictated by a 35mm film canister. It’s clear that this module will be made into many different projects, and we are looking forward to featuring them.

At the time of writing the camera is sold out from all the usual suppliers, which follows the trend for Raspberry Pi products on their launch day. We didn’t manage to snag one, but perhaps with such an expensive module it’s best to step back for a moment and consider the project it will become part of rather than risking it joining the unfinished pile. While waiting for stock then perhaps the next best thing is to 3D print a C mount adapter for your existing Pi camera, or maybe even hook it up to a full-sized SLR lens.

An All Lead Screw 3D Printer You Can Build Yourself

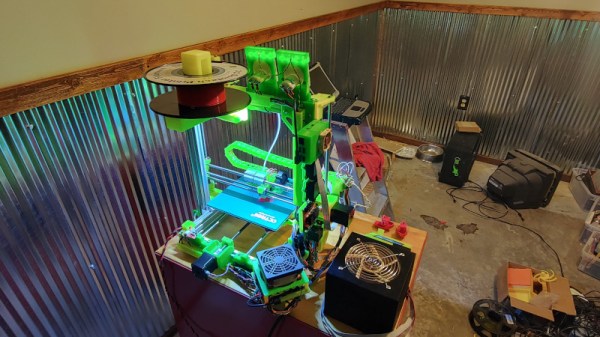
There was a time when the curious hardware hacker  had to build their own 3D printer, because commercial models were so expensive as to be unaffordable except by well-funded institutions. We’re fortunate then to live in an era in which a good quality off-the-shelf machine can be had without breaking the bank, but that is not to say that home-made 3D printers are a thing of the past. Instead the community of rapid prototyping experimenters continue to push the boundaries of the art, and from that we all benefit. An example comes from [Morgan Lowe], whose 3DLS lead screw driven 3D printer joins the freely downloadable designs to be found on Thingiverse.

If at first sight you think it looks a little familiar, you are correct, as it takes its frame design from the popular AM8 metal frame upgrade for the Anet A8 off-the-shelf printer. It draws heavily from other A8 upgrades, and brings in some parts such as the extruder and bed from the Creality Ender3. This is the beauty of incremental open source, and the result is a belt-free printer that does a decent-looking Benchy on the bench, and as a party piece manages to print a slightly more hairy little plastic boat when suspended at 45 degrees by a rope from the ceiling.

When dipping a toe into the world of home made 3D printers it’s interesting to take a look into some of the earlier Hackaday RepRap posts, and see how far we’ve come.