ESP32 Brings Air Purifier Online With Home Assistant

A lot of hackers are rightfully concerned about the privacy issues that surround many of today’s “smart” gadgets, but it’s hard to argue that the ability to remotely control devices around your home isn’t convenient. Enter self-hosted, open source projects like Home Assistant. This provides the framework for building out a home automation system without having your soul information sold, but as you might expect, you’re going to have to put some effort in to get the most of it.

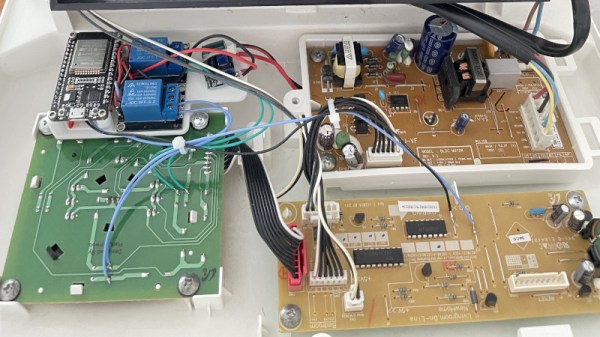
For example, take a look at this Phillips AC4014 air purifier that [Anton] connected to Home Assistant by way of an ESP32. Rather than getting too bogged down in reverse engineering the purifier’s surprisingly complex internal electronics, he took the easy way out and wired a couple of relays across the power and fan speed buttons; this allows the device to be easily controlled by the microcontroller, without impacting the functionality of the original controls.

But since those front panel controls still work, that meant [Anton] needed a way for the ESP32 to detect the device’s status and report that to Home Assistant so everything stayed in sync. So he looked around on the PCB for a trace that got powered up when the air purifier was up and running, which he connected to a pin of the microcontroller through a transistor. This let’s the firmware determine if the machine is running or not just by checking if the appropriate pin has gone high.

Speaking of the firmware, [Anton] decided to use ESPHome rather than trying to write his own code from scratch. This project allows you to rapidly add new devices to Home Assistant by providing the firmware with a relatively simple YAML configuration file, which he’s provided as an example. In fact, he’s provided quite a lot of examples with this project, down to an annotated image of the PCB that shows where to tap your wires into. He’s done quite a service for anyone who’s got this same model of air purifier.

This unit doesn’t appear to have any capability of actually checking the quality of the air in the room, but we’ve recently seen a low-cost IKEA product that can do exactly that. Even better, it can be easily modified to report its findings over the network using the ESP8266.

Inverted Pendulum Balanced On A Drone

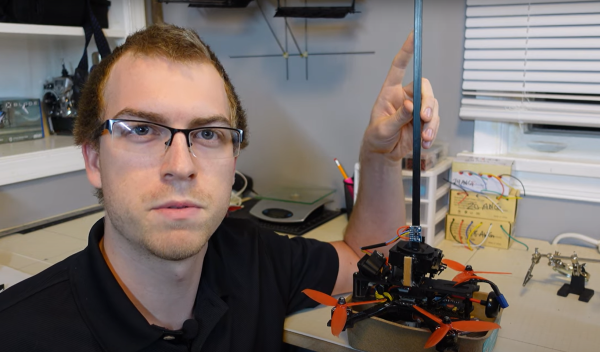
[Nicholas Rehm] works during the day at the Applied Physics Laboratory at Johns Hopkins, Maryland, so has considerable experience with a variety of UAV applications. The question arose about how the perseverance mars rover landing worked, which prompted [Nicholas] to hang a rock under his drone, attached via a winch. This proved to be interesting. But what is more interesting for us, is what happens when you try to attach an inverted pendulum to the top of a drone in flight? (video embedded, below)

This is a classic control theory problem, where you need to measure the angle of the pendulum with respect to the base, and close the loop by calculating the necessary acceleration from the pendulum angle. Typically this is demonstrated in one dimension only, but it is only a little more complicated to balance a pendulum with two degrees of freedom.

[Nicholas] first tried to derive the pendulum angle by simply removing the centering springs from an analog joystick, and using it to attach the pendulum rod to the drone body. As is quite obvious, this has a big drawback. The pendulum angle from vertical is now the sum of the joystick angle and the drone angle, which with the associated measurement errors, proved to be an unusable setup. Not to be discouraged, [Nicholas] simply added another IMU board to the bottom of the pendulum, and kept the joystick mechanism as a pivot only. And, as you can see from the video after the break, this indeed worked.

The flight controller is [Nicholas’] own project, dRehmFlight (GitHub), which is an Arduino library intended for the Teensy 4.0, using the ubiquitous MPU6050 6-DOF IMU. [Nicholas] also made an intro video for the controller, which may prove instructive for those wishing to go down this road to build their own VTOL aircraft. The code for pendulum experiment is not available at the time of writing, perhaps it will hit the GitHub in the future?

Continue reading “Inverted Pendulum Balanced On A Drone”

Surfboard Gets Jet Upgrades

Surfing is a fun and exciting sport but a lot of beginners can get discouraged with how little time is spent actually riding waves while learning. Not only are balance and wave selection critical skills that take time to learn, but a majority of time in the water is spent battling crashing waves to get out past the breakers. Many people have attempted to solve this problem through other means than willpower alone, and one of the latest attempts is [Andrew W] with a completely DIY surfboard with custom impeller jet drives.

The surfboard is hand-made by [Andrew W] himself using a few blocks of styrofoam glued together and then cut into a generic surfboard shape. After the rough shaping is done, he cuts out a huge hole in the back of the board for the jet drive. This drive is almost completely built by [Andrew] as well including the impeller pumps themselves which he designed and 3D printed. The pair of impellers are driven by some beefy motors and a robust speed controller that connects wirelessly to a handheld waterproof throttle to hold while surfing. Once everything was secured in the motor box the surfboard was given a final shaping and then glassed. The final touch was an emergency disconnect attached to a leash so that if he falls off the board it doesn’t speed away without him.

The build is impressive not only for [Andrew]’s shaping skills but for his dedication to a custom jet drive for the surfboard. He spent over a year refining the build and actually encourages people not to do this as he thinks it took too much time and effort, but we’re going to have to disagree with him there. Even if you want to try to build something a lot simpler, builds like these look like a lot of fun once they’re finished. The build seems flawless and while he only tested it in a lake we’re excited to see if it holds up surfing real waves in an ocean.

Continue reading “Surfboard Gets Jet Upgrades”

N-Gage Controller Uses All The Buttons

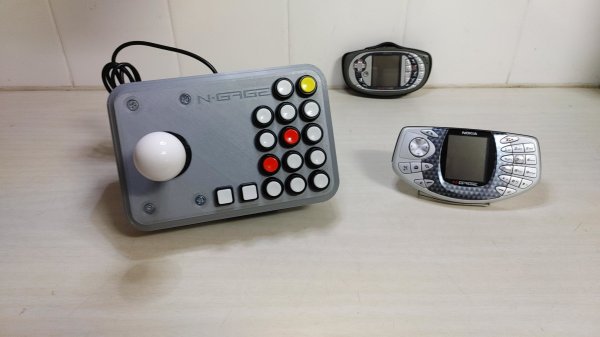
If there’s anything you can guarantee about a video game system, it’s that in 20 years after one suffers a commercial failure there will be a tiny yet rabid group of enthusiasts obsessed with that system. It’s true for the Virtual Boy, the Atari Jaguar, and of course, the Nokia N-Gage. For those not familiar, this was a quirky competitor of the Game Boy Advance that was also a cell phone. And for that reason it had more buttons than a four-player arcade cabinet, which has led to things like this custom controller.

Most N-Gage gaming these days takes place on emulators, this build is specifically built for the emulator experience. The original system had so many buttons that it’s difficult to get even a standard 102-key keyboard mapped comfortably to it, so something custom is almost necessary. [Lvaneede], the creator of this project, took some parts from an existing arcade cabinet he had and 3D printed the case in order to craft this custom controller. The buttons he chose are a little stiff for his liking, but it’s much better than using a keyboard.

In the video below, [Lvaneede] demonstrates it with a few of the N-Gage’s games. It seems to hold up pretty well. With backing from Sony and Sega, it’s a shame that these gaming platforms weren’t a bigger hit than they were, but there are plenty of people around with original hardware who are still patching and repairing them so they can still play some of these unique games.

Thanks to [Michael] for the tip!

Continue reading “N-Gage Controller Uses All The Buttons”

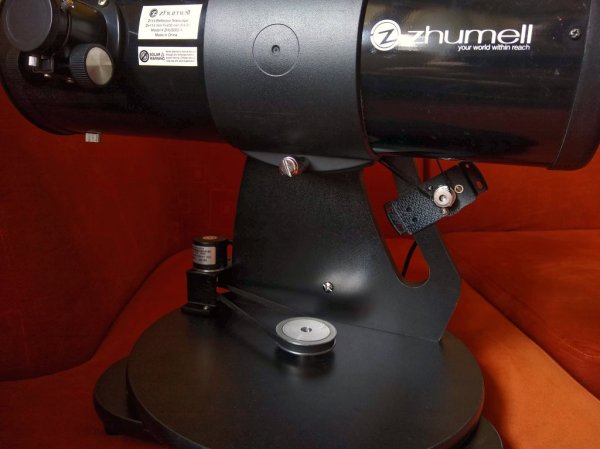
Fully assembled DobsonianDSC.

Find Your Way In The Starry Skies With DobsonianDSC

An obvious problem with the use of a telescope is getting the former to point at the proper part of the sky which you intend to observe, or vice versa when you spot something interesting and wish to record the exact location. While all of this can be done manually with some trouble, there’s a lot to be said for automating this process. Unfortunately these Digital Setting Circles (DSC) features are not cheap even as add-on, which is why [Vladimir Atehortúa] created DobsonianDSC as a low-cost DIY solution.

As the name suggests, this project is based around a Dobsonian-style telescope: Newtonian tube with simple altazimuth base. Aside from the mechanical construction, this system uses an ESP32 as its controller along with two rotary encoders, with the simple circuit detailed in a build guide. The firmware for the ESP32 is written in the Arduino C dialect, and a guide for flashing the ESP32 with the Arduino IDE and connecting it to the WLAN is provided as well.

After setup, the resulting telescope system can be used either via WiFi or Bluetooth from existing apps such as SkySafari that support the ‘Basic Encoding System’. An initial calibration is required, but after that you should have a telescope that works in concert with SkySafari or similar to automate this tedious part of astronomy away.

Obviously this is not a ready-to-install system, as every telescope is shaped and sized differently, but inspiration for mounting solutions is provided as well.

PicoMite Gives Your Pico A Deluxe BASIC

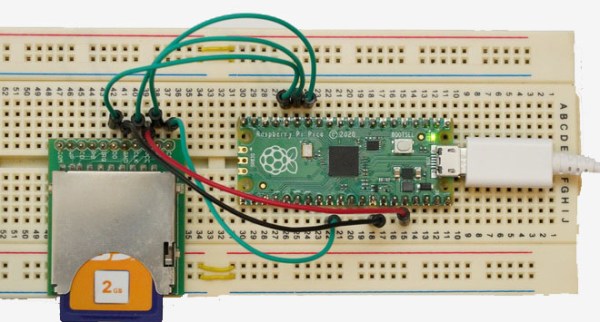
What makes developing a microcontroller project quick and easy? Tops on our list are an interactive shell and comprehensive libraries that handle all the low-level peripheral stuff. You think we’re talking MicroPython? Not today! MMBasic has just been ported to the Raspberry Pi Pico dev board, and it has all the batteries included.

Just to give you a taste, it has built-in support for SD cards, all sorts of displays, touch screens, real-time clocks, IR remotes, numerous sensors, and of course WS2812 LED strips. And because all of this is baked into the BASIC, writing code to use any of these peripherals is straightforward.

Now, there’s BASIC and there’s BASIC. This is a modern BASIC: it has loops, functions, arrays, floating point, and a built-in full-screen editor. You connect to the Pico via UART, and you’re off to the races. If you’ve got a Pico sitting around, flash it and give it a try. Or check out the GitHub repository if you want to poke around in the internals.

This is a port of the BASIC that’s used on the Maximite virtual retrocomputer platform, which means that there are many working examples out there for you to crib from, and even a forum. Add in the incredibly nice user manual and tutorial (PDF), and you’ve got the perfect weekend afternoon.

Think MicroPython killed BASIC? Think again. BASIC is small enough that it can run where Python can’t, but that’s of course a more minimal experience. In contrast, MMBasic looks like it’s got all the toppings. The whole enchilada. It’s like BASIC Deluxe.

Build Your Own HP41C

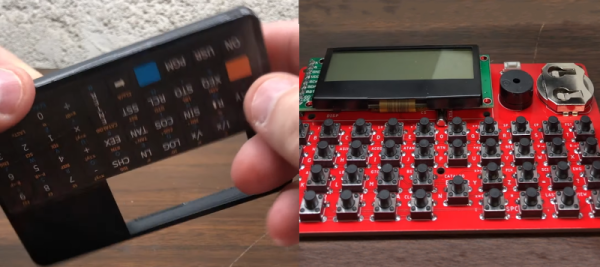
There was a time when engineers carried slide rules. Then there was a time when we all carried calculators. Sure, calculators are still around, but you are more likely to use your phone. If you really need serious number crunching, you’ll turn to a full computer. But there was that awkward time when calculators were very important and computers were very expensive that calculators tried to be what we needed from full-blown computers. The HP41C was probably the pinnacle of that trend. If you’ve ever had one, you know that is a marvel of the day’s technology with alphanumeric capabilities and four plug in ports for more memory or ROMs. It really was a little hand-held computer. Didn’t have one? Don’t worry, you can now build your own. In fact, the HP emulator will also act like an HP15C or 16C, if you prefer.

You can see the device in action in the video below. As you might expect, this version uses a through-hole ATMEGA328 and even at 8 MHz, the emulation is faster than the original calculator. The machine also has over double the memory the original calculator had along with a real-time clock built-in. The display is also backlit, something we all wanted in the original.

Continue reading “Build Your Own HP41C”