a CH32V003 Linux-bearing PCB, single-sided, hand-etched, lovely

Bring Linux To CH32V003 Through, Yes, RISC-V Emulation

Like playing around with Linux on low-power devices? You’d be hard pressed to find a better example than the [tvlad1234]’s linux-ch32v003 project. It’s not just a one-off — it’s something you could build right now, since it requires hardly any extra parts.

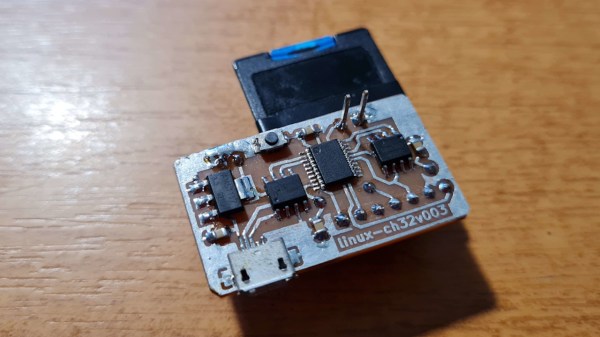
With help of a 8 MB PSRAM chip for RAM supplementation purposes and an SD card, plus some careful tailoring of the Linux .config parameters, you get Linux on a chip never meant to even come close to handling this much power. The five minutes it takes to boot up to a prompt is part of the experience.

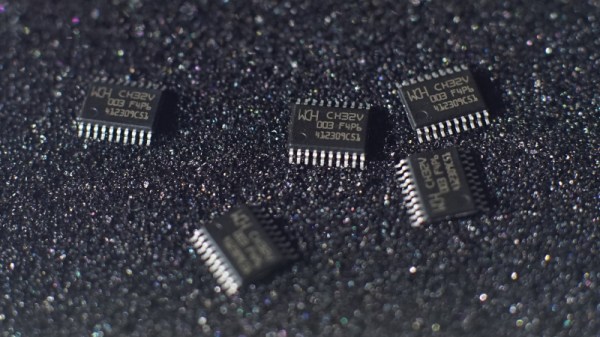
As usual with [tvlad1234]’s projects, there’s a fun twist to it! Running Linux on this chip is only possible thanks to [chlohr]’s mini-rv32ima project, which, as you might remember, is a RISC-V emulator. Yes, this runs Linux by running a RISC-V emulator on a RISC-V chip. The main reason for that is because the MCU can’t map the PSRAM chip into RAM, but if you use an emulator, memory mapping is only a matter of software. Having applied a fair amount of elbow grease, [tvlad1234] brings us buildroot and mainline Linux kernel configs you can compile to play with this — as well as a single-layer-ready KiCad board project on GitHub. Yep, you could literally etch a PCB for this project from single-sided copper-clad FR4 with a bit of FeCl3.

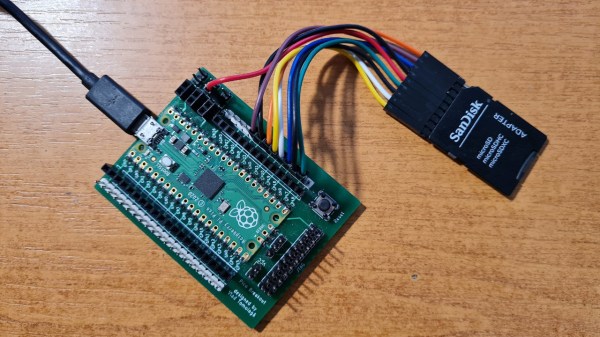
While the CH32V003 is undoubtedly a more impressive target for Linux, the RP2040 Linux project might be more approachable in terms of having most of the parts in your parts box. At least, up until we start valuing the CH32V003 for all the cool stuff it can do!

CH32 RISC-V MCUs Get Official Arduino Support

Like many of you, we’ve been keeping a close eye on the CH32 family of RISC-V microcontrollers from WCH Electronics. You can get the CH32V003, featuring 2 kB RAM and 16 kB of flash for under fifteen cents, and the higher-end models include impressive features like onboard Ethernet. But while the hardware is definitely interesting, the software side of things has been a little rocky compared to what we’ve come to expect from modern MCUs.

Things should start looking up a bit though with the release of an Arduino core for the CH32 direct from WCH themselves. It’s been tested on Windows, Linux, and Mac, and supports the CH32V00x, CH32V10x, CH32V20x, CH32V30x, and CH32X035 chips. Getting it installed is as easy as adding the URL to the Arduino IDE’s Boards Manager interface, though as the video below shows, running it on Linux does require an extra step or two.

So far, we’ve seen several projects, like this temperature sensor or this holiday gizmo that use [cnlohr]’s open-source toolchain. But there’s no question that plenty of hobbyists out there feel more comfortable in the Arduino environment, and if those folks are now able to pick up a CH32 and do something cool, that means more people jumping on board, more libraries developed, more demo code written…you get the idea.

Just like the ESP8266’s popularity exploded when it was added to the Arduino IDE, we’ve got high hopes for the CH32 family in the coming months.

Continue reading “CH32 RISC-V MCUs Get Official Arduino Support”

The New Hotness

If there’s one good thing to be said about the chip shortage of 2020-2023 (and counting!) it’s that a number of us were forced out of our ruts, and pushed to explore parts that we never would have otherwise. Or maybe it’s just me.

Back in the old times, I used to be a die-hard Atmel AVR fan for small projects, and an STM32 fan for anything larger. And I’ll freely admit, I got stuck in my ways. The incredible abundance of dev boards in the $2 range also helped keep me lazy. I had my thing, and I was fine sticking with it, admittedly due to the low price of those little blue pills.

An IN-12B Nixie tube on a compact driver PCBAnd then came the drought, and like everyone else, my stockpile of microcontrollers started to dwindle. Replacements at $9 just weren’t an option, so I started looking around. And it’s with no small bit of shame that I’ll admit that I hadn’t been keeping up with the changes as much as I should have. Nowadays, it’s all ESP32s and RP2040s over here, and granted there’s a bit of a price bump, but the performance is there in abundance. But I can’t help feeling like I’m a few years back of the cutting edge.

So when I see work like what [CNLohr] and [Bitluni] are doing with the ultra-cheap CH32V003 microcontrollers, it makes me think that I need to start filling in gaps in my comfortable working-set of chips again. But how the heck am I supposed to keep up? And how do you? It took a global pandemic and silicon drought to force me out of my comfort zone last time. Can the simple allure of dirt-cheap chips get me out? We’ll see!

An IN-12B Nixie tube on a compact driver PCB

Modern Components Enable Cheap And Compact Nixie Driver Circuit

Nixie tubes can add some retro flair to any project, but they can also complicate your electronics quite a bit: after all, you need to generate a voltage high enough to ignite the tube and then switch that between ten separate display segments. Traditionalists may want to stick with chunky mains transformers and those unobtainium 74141 segment drivers, but modern components allow you to make things much more compact, not to mention way cheaper. [CNLohr] took this to an extreme, and used clever design tricks and his sharp online shopping skills to make an exceptionally compact Nixie driver circuit that costs less than $2.50.

That price doesn’t include the tubes themselves, but [CNLohr] nevertheless bought the cheapest Nixies he could find: a pair of IN-12B tubes that set him back just $20. He decided to generate the necessary 180 volts through a forward converter built around a $0.30 transformer and a three-cent MOSFET, controlled by software running on a CH32V003. This is one of those ultra-cheap microcontrollers that manage to squeeze a 48 MHz RISC-V core plus a bunch of peripherals into a tiny QFN package costing just 12 cents.

The existing toolchain to program these micros left a lot to be desired, so [CNLohr] wrote his own, called
ch32v003fun. He used this to implement all the control loops for the forward converter as well as PWM control of the display segments – a feature that adds a beautifully smooth turn-on and turn-off effect to the Nixie tubes. There’s still plenty of CPU capacity left to implement other features, although [CNLohr] isn’t sure what to put there yet. Turning the tubes into a clock would be an obvious choice, but the basic system is flexible enough to implement almost anything requiring a numeric display.

The compactness of this circuit is impressive, especially if you compare it to earlier solutions. There’s plenty of fun to be had with cheap-yet-powerful micros like the ch32v003, provided you can find them.

Continue reading “Modern Components Enable Cheap And Compact Nixie Driver Circuit”

Making Neon Trees The Easy Way With No Oven Pumps Required

Neon lamps are fun and beautiful things. Hackers do love anything that glows, after all. But producing them can be difficult, requiring specialized equipment like ovens and bombarders to fill them up with plasma. However, [kcakarevska] has found a way to make neon lamps while bypassing these difficulties.

[kcakarevska] used the technique to great effect on some neon tree sculptures.
The trick is using magnesium ribbon, which is readily available form a variety of suppliers. The ribbon is cut into small inch-long fragments and pushed into a borosilicate tube of a neon sculpture near the electrode. Vacuum is then pulled on the tube down to approximately 5 microns of pressure. The tube is then closed off and the electrode is heated using an automotive-type induction heater. In due time, this vaporizes the magnesium which then creates a reactive getter coating on the inside of the tube. This picks up any oxygen, water vapor, or other contaminants that may have been left inside the tube without the need for an oven vacuum pumping stage. The tube is then ready to be filled with neon. After about 24 to 48 hours of running, the getter coating will have picked up the contaminants and the tube will glow well.

It’s a useful technique, particularly for complex neon sculptures that won’t readily fit in an oven for pumpdown. If the glasswork is still too daunting, though, you can always use other techniques to get a similar look. Video after the break.

Continue reading “Making Neon Trees The Easy Way With No Oven Pumps Required”

A Pi Pico soldered onto a custom breakout PCB, with an SD card connected to it using prototyping wires

RP2040 Runs Linux Through RISC-V Emulation

We’re used to running Linux on CPUs where it belongs, and the consensus is that RP2040 just isn’t up for the task – no memory controller, and nowhere near enough RAM, to boot. At least, that’s what you might believe until you see [tvlad1234]’s Linux-on-RP2040 project, reminding us there’s more than one way to boot Linux on a CPU like this! Just like with the “Linux on AVR” project in 2012 that emulated an ARM processor, the pico-rv32ima project emulates a RISC-V core – keeping up with the times.

Initially, the aforementioned “Linux on AVR through ARM” project was picked as a base – then, a newer development, [cnlohr]’s RISC-V emulator, presented itself and was too good to pass up on. Lack of RAM was fully negated by adding an SD card into the equation – coupled with a small caching layer, this is a crucial part for the project’s not-so-secret sauce. A fair amount of debugging and optimization later, [tvlad1234] got Linux to run, achieving boot times in 10-15 minutes’ ballpark – considering the emulation layer’s presence, this is no mean feat.

At this point, the boot process stalls as you enter a login shell. If Linux on RP2040 is within your area of interest, feel free to pick up the effort from here, as the project is fully open-source – you only need a Pi Pico board and a throwaway SD card! Now, if pairing a RP2040 with some classic software is your definition of an evening well-spent, you can’t go wrong with DOOM! However, if you’d rather play with something else *nix-like, we’ve seen someone port Fuzix onto the RP2040 before.

A CH32V003 Toolchain — If You Can Get One To Try It On

We’re in an exciting time for cheap microcontrollers, as with both the rise of RISC-V and the split between ARM and its Chinese subsidiary, a heap of super-cheap and very capable parts are coming to market. Sometimes these cheap chips come with the catch of being difficult to program though, but for one of them the ever-dependable [CNLohr] has brought together his own open-source toolchain. The part in question is the WCH CH32V003, which is a ten-cent RISC-V part that has an impressive array of capabilities. As always though, there’s a snag, in that we’re also told that while supplies are improving this part can be hard to find. The repository is ready for when you can get them again though, and currently also contains some demo work including addressable LED driver code.

As an alternative there’s a comparable and slightly cheaper ARM-based part, the Puya PY32. It’s reckoned to be the cheapest of the flash-based microcontrollers, and like the WCH part is bearing down on the crop of one-time-programmable chips such as the famous and considerably less powerful 3-cent Padauk. This end of the market is certainly heating up a little, and from our point of view this can only mean some exciting projects ahead.