Simple STM32 Frequency Meter Handles Up To 30MHz With Ease

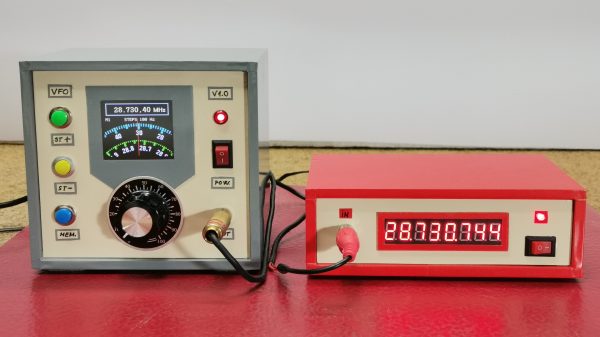
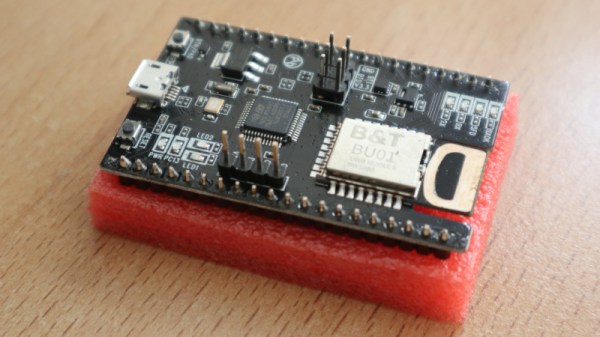
[mircemk] had previously built a frequency counter using an Arduino, with a useful range up to 6 MHz. Now, they’ve implemented a new design on a far more powerful STM32 chip that boosts the measurement range up to a full 30 MHz. That makes it a perfect tool for working with radios in the HF range.

The project is relatively simple to construct, with an STM32F103C6 or C8 development board used as the brains of the operation. It’s paired with old-school LED 7-segment displays for showing the measured frequency. Just one capacitor is used as input circuitry for the microcontroller, which can accept signals from 0.5 to 3V in amplitude. [mircemk] notes that the circuit would be more versatile with a more advanced input circuit to allow it to work with a wider range of signals.

It’s probably not the most accurate frequency counter out there, and you’d probably want to calibrate it using a known-good frequency source once you’ve built it. Regardless, it’s a cheap way to get one on your desk, and a great way to learn about measuring and working with time-varying signals. You might like to take a look at the earlier build from [mircemk] for further inspiration. Video after the break.

Continue reading “Simple STM32 Frequency Meter Handles Up To 30MHz With Ease”

Bench Power Supply Turned Realistic Flight Sim Panel

Flight simulator software has been available for about as long as desktop PCs have been a thing, but modern incarnations such as 2020’s Microsoft Flight Simulator have really raised the bar — not only graphically, but in terms of interactivity. There’s a dizzying array of switches and buttons that you can fiddle with in your aircraft’s virtual cockpit, but doing it with the same keyboard that you use to hammer out code or write Hackaday articles doesn’t do much for immersion.

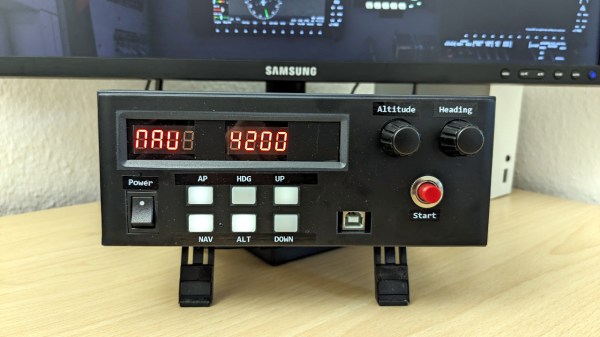
Looking to improve on the situation without having to shell out for an expensive sim panel, [Michael Fitzmayer] decided to convert a broken Manson SSP-8160 lab power supply into a fairly good approximation of the KAP 140 autopilot system which is used in one of his favorite aircraft, the Pilatus PC-6 Turbo-Porter.

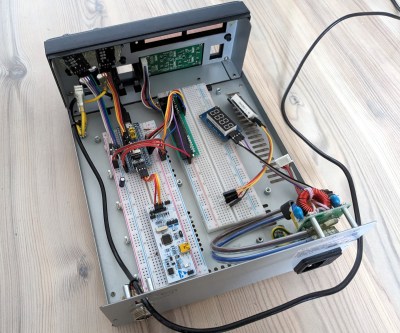
[Michael] gutted the piece of equipment pretty thoroughly, only leaving behind the case itself and the illuminated button panel on the front. The original displays were replaced with TM1637 seven-segment LEDs, and a pair of new rotary encoders are mounted where the stock knobs were. The whole show is run by a STM32F103 Blue Pill, which conveys the button pressing and knob spinning to the game by mimicking a USB Human Interface Device.

A fascia applied to the front of the power supply blocks the original text and labels, and really makes the finished unit look the part. [Michael] admits it’s not 100% accurate to the layout of the real hardware, but it’s certainly better than trying to enter heading and altitude information with the controller.

Oh that’s right, did we mention he’s actually using this on the Xbox Series S? While we generally see this sort of sim hardware hooked up to a tricked out gaming computer, we appreciate that he’s trying to bring some of that same experience to the console world. While the one-way communication of USB HID does bring with it some limitations — for example the hardware needs to be manually reset at the beginning of each flight to make sure the physical displays match what’s shown in the virtual cockpit– there’s still a lot of potential here.

For example, you could design and build your own flight yoke, pedals, and throttles rather than spending hundreds on a commercial version. It sounds like [Michael] is just getting started in the world of affordable console-based flight simulation, and we’re very eager to see where he goes from here.

The New Hotness

If there’s one good thing to be said about the chip shortage of 2020-2023 (and counting!) it’s that a number of us were forced out of our ruts, and pushed to explore parts that we never would have otherwise. Or maybe it’s just me.

Back in the old times, I used to be a die-hard Atmel AVR fan for small projects, and an STM32 fan for anything larger. And I’ll freely admit, I got stuck in my ways. The incredible abundance of dev boards in the $2 range also helped keep me lazy. I had my thing, and I was fine sticking with it, admittedly due to the low price of those little blue pills.

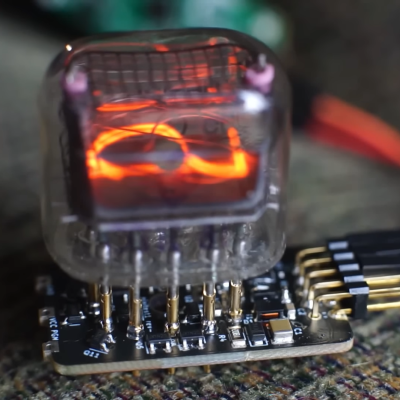
An IN-12B Nixie tube on a compact driver PCBAnd then came the drought, and like everyone else, my stockpile of microcontrollers started to dwindle. Replacements at $9 just weren’t an option, so I started looking around. And it’s with no small bit of shame that I’ll admit that I hadn’t been keeping up with the changes as much as I should have. Nowadays, it’s all ESP32s and RP2040s over here, and granted there’s a bit of a price bump, but the performance is there in abundance. But I can’t help feeling like I’m a few years back of the cutting edge.

So when I see work like what [CNLohr] and [Bitluni] are doing with the ultra-cheap CH32V003 microcontrollers, it makes me think that I need to start filling in gaps in my comfortable working-set of chips again. But how the heck am I supposed to keep up? And how do you? It took a global pandemic and silicon drought to force me out of my comfort zone last time. Can the simple allure of dirt-cheap chips get me out? We’ll see!

An Affordable And Programmable PLC

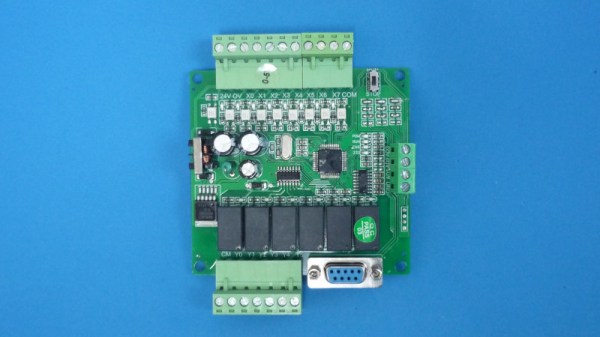
We’re all used to general purpose microcontroller boards such as the Arduino or its many imitators, but perhaps we don’t see as much of their industrial cousins. A programmable logic controller (PLC) is a computer designed to automate industrial machinery, and comes with protected interfaces and usually a specific PLC programming environment. Thus [Galopago]’s work with an inexpensive Chinese PLC clone is especially interesting, providing a route forward to using it within the Arduino IDE ecosystem.

Opening it up, the processor is identified as an STM32F103, and the connection needed to place it in bootloader mode is identified. Then it can be programmed from the Arduino IDE, even though its bootloader can’t be changed. Then to complete the process it’s necessary to identify the various different inputs and outputs by old-fashioned hardware reverse engineering.

This PLC may not be quite as robust as some products costing much more money, but it still represents a cost-effective way to access a microcontroller board with much of the interface circuitry already installed that would normally be required for controlling machinery. We expect that we’ll be seeing it appear on these pages over the coming months, and perhaps there might even be another comparison in the air.

StarPointer Keeps Scope On Target With Stellarium

On astronomical telescopes of even middling power, a small “finderscope” is often mounted in parallel to the main optics to assist in getting the larger instrument on target. The low magnification of the finderscope offers a far wider field of view than the primary telescope, which makes it much easier to find small objects in the sky. Even if your target is too small or faint to see in the finderscope, just being able to get your primary telescope pointed at the right celestial neighborhood is a huge help.

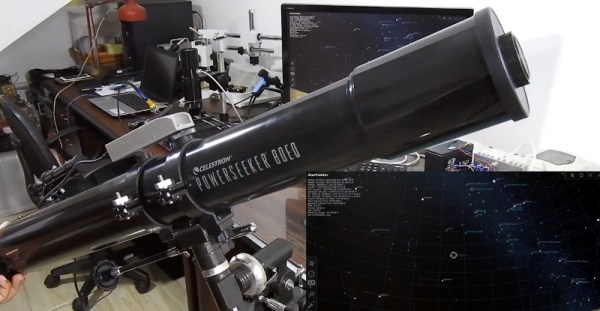
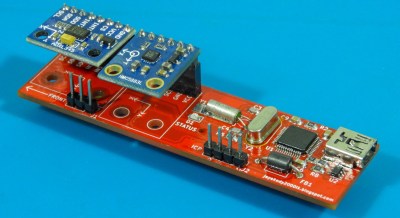
But [Dilshan Jayakody] still thought he could improve on things a bit. Instead of a small optical scope, his StarPointer is an electronic device that can determine the orientation of the telescope it’s mounted to. As the ADXL345 accelerometer and HMC5883L magnetometer inside the STM32F103C8 powered gadget detect motion, the angle data is sent to Stellarium — an open source planetarium program. Combined with a known latitude and longitude, this allows the software to show where the telescope is currently pointed in the night sky.

As demonstrated in the video after the break, this provides real-time feedback which is easy to understand even for the absolute beginner: all you need to do is slew the scope around until the object you want to look at it under the crosshairs. While we wouldn’t recommend looking at a bright computer screen right before trying to pick out dim objects in your telescope’s eyepiece, we can certainly see the appeal of this “virtual” finderscope.

Then again…who said this technique had to be limited to optical observations? As the StarPointer is an open hardware project, you could always integrate the tech into that DIY radio telescope you’ve always dreamed of building in the backyard.

Continue reading “StarPointer Keeps Scope On Target With Stellarium

ZeroBug: From Simulation To Smooth Walking

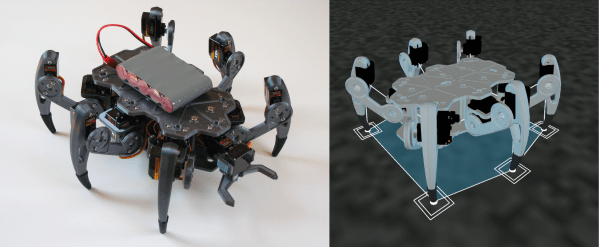
Thanks to 3D printing and cheap hobby servos, building you’re own small walking robot is not particularly difficult, but getting them to walk smoothly can be an entirely different story. Knowing this from experience, [Max.K] tackled the software side first by creating a virtual simulation of his ZeroBug hexapod, before building it.

Learning from his previous experience building a quadruped, ZeroBug started life in Processing as a simple stick figure, which gradually increased in complexity as [Max.K] figured out how to make it walk properly. He first developed the required movement sequence for the tip of each leg, and then added joints and calculated the actuator movements using reverse kinematics. Using the results of the simulations, he designed the mechanics and pulled it back into the simulation for final validation.

Each leg uses three micro servos which are controlled by an STM32F103 on a custom PCB, which handles all the motion calculations. It receives commands over UART from a python script running on a Raspberry Pi Zero. This allows for user control over a web interface using WiFi, or from a gamepad using a Bluetooth connection. [Max.K] also added a pincer to the front to allow it to interact with its environment. Video after the break.

The final product moves a lot smoother than most other servo-driven hexapods we’ve seen, and the entire project is well documented. The electronics and software are available on GitHub and the mechanics on Thingiverse.

Continue reading “ZeroBug: From Simulation To Smooth Walking”

What Is Ultra Wideband?

If you’ve been following the world of mobile phone technology of late, you may be aware that Apple’s latest IPhones and AirTag locator tags bring something new to that platform. Ultra wideband radios are the new hotness when it comes to cellphones, so just what are they and what’s in it for those of us who experiment with these things?

An Apple AirTag being paired with an iPhone. Swisshashtag, CC BY-SA 4.0.

Ultra wideband in this context refers to radio signals with a very high bandwidth of over 500 MHz, and a very low overall power density spread over that  spectrum. Transmissions are encoded not by modulation of discrete-frequency carriers as they would be in a conventional radio system, but by the emission of wideband pulses of RF energy across that bandwidth.  It can exist across the same unlicensed spectrum as narrower bandwidth channelised services, and that huge bandwidth gives it an extremely high short-range data transfer bandwidth capability. The chipsets used by consumer devices use a range of UWB channels between about 3.5 and 6.5 GHz, which in radio terms is an immense quantity of spectrum. Continue reading “What Is Ultra Wideband?”