A word of warning: Google for the definition of the word “pummer” at your own risk. Rest assured that this beautiful solar-powered circuit sculpture fits the only definition of pummer that we care to deal with.
For the unfamiliar, a pummer is a device from the BEAM style of robotics, a sort of cyborg plant that absorbs solar energy during the day and turns it into a gently pulsating light that “pumms” away the dark hours.
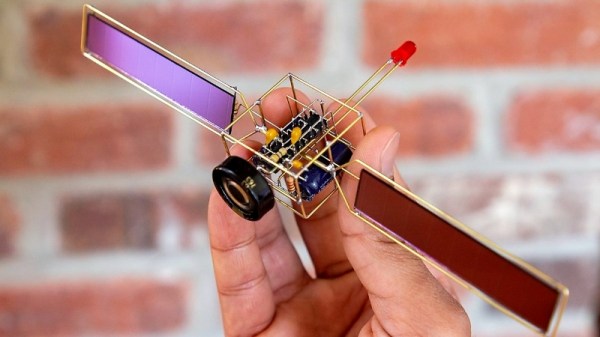
[Mohit Bhoite]’s take on the pummer is an extraordinary model of a satellite executed mainly in brass rod. His attention to detail on the framework boggles our minds; we could work for days on a brass rod and never achieve the straight lines and perfect corners he did. The wings support two solar cells, while the hull of the satellite holds a dead-bugged 74HC240 octal buffer/line-driver chip and all the other pumm-enabling components. A one farad supercap – mounted to look like a dish antenna – is charged during the day and a single LED beacon blinks into the night.
No schematic is provided, but there are probably enough closeup shots to reverse engineer this, which actually sounds like a fun exercise. (Or you can cheat and fetch the PDF copy of the old Make magazine article that inspired him.)
Hats off to [Mohit] for a top-notch circuit sculpture. We’ve seen similarly detailed and well-executed sculptures from him before; something tells us this won’t be the last.
Thanks to [Varun Reddy] for the tip.


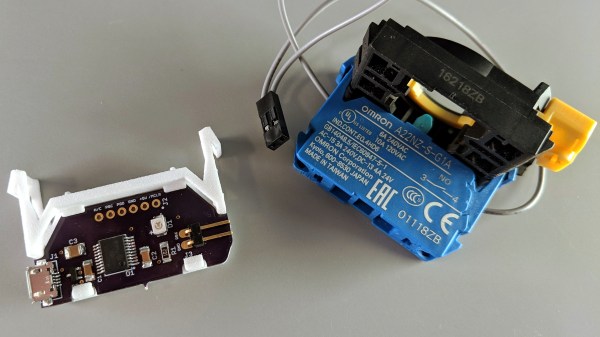
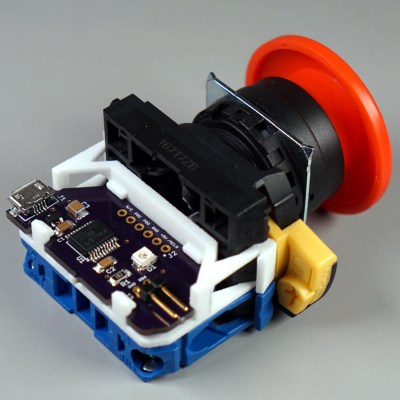 It turns out that industrial push buttons have standardized components which can be assembled in an almost LEGO-like manner, with components mixed and matched to provide different switch actions, light indicators, and things of that nature. [Glen] decided to leverage this feature to make his custom PCB (the same design used in his


