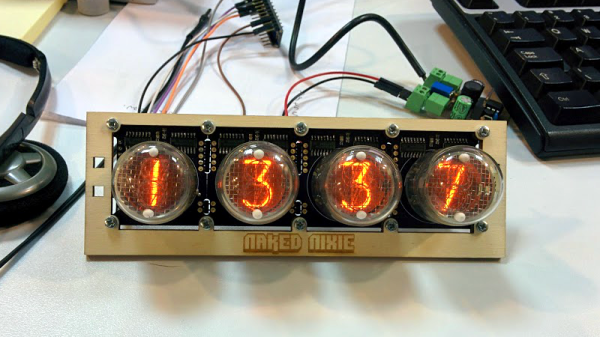
Simulacra and simulation and Kickstarter videos. The Amigo Robot is a 4-wheeled omnibot robot on Kickstarter. It does STEM or STEAM or whatever. Oh neat, injection molded magnetic pogo pins, that’s cool. Watch the video for this Kickstarter, it is a work of postmodern horror. We live in a post-reality world, and this is beyond parody. You have the ubiquitous cheerful whistling, a ukulele, tambourine and a glockenspiel. You’ve got a narrator that falls squarely into the uncanny valley and a cadence that could have only been generated by a computer. You’ve got grammar that is very much correct, but somehow wrong; ‘It is the key to interact with family pets’. This is really, really bad.
Who is Satoshi? The creator of Bitcoin, a person or persons known as Satoshi Nakamoto, has been an open question for years now, with many people claiming they are the one that invented Bitcoin (with the implication that they’re in control of the first coins and therefore a multi-Billionaire). Newsweek found someone named Dorian Nakamoto, but that guy didn’t make Bitcoin. Wired magazine used back-dated blog posts to identify the creator of Bitcoin. Needless to say, the creator of Bitcoin has not been identified yet. Now, there’s an unveiling of sorts coming up. gotsatoshi.com has a live countdown and doesn’t use Rockapella as a house band. This bears repeating, again: there is exactly one way to prove the identity of Satoshi Nakamoto. To prove you are Satoshi, all you need to do is move some of the first Bitcoins. That’s it, that’s all you need to do, and it’s not going to happen when the gotsatoshi.com countdown hits zero.
CNC machines controlled by a Pi abound, but here’s a word of warning about buying a ‘bargain’ CNC machine from China from [Rob] via our tips line:
In the “homebrew” community, I know some people have their own CNC machines – I’ve seen a hundred and one projects using Raspberry Pis to run homemade CNCs and so on, so I guess there is a good supply of open-source/freeware to software to control them with.
However, some people, like a mate at work, might be tempted by a good “bargain” from China. No names, no pack drill, but just before last Christmas, my mate bought a “cheap” CNC system from China – It was about three or four thousand Euros, if I remember rightly. It has been working well and he done some work for our work as well. No problems.
Last week, our firm was contacted by Siemens. They claimed that someone at our firm has been using unlicensed Siemens software. At first no-one knew what they were on about. Someone thought it might be about some CAD system or other – we had been trialing a few to see which suited us best, but we had stuck well within the restrictions for the trials.
Then we found out it was the software on his CNC machine. Because he had used his work laptop with it, the system had “phoned home” and alerted Siemens that an unlicensed version was being used. Siemens then demanded EUR 32,000 – yes, thirty two THOUSAND Euros to license the software. That was something like EUR 27,000 for the commercial license and EUR 5 000 for the second one. It was explained that he had bought the CNC system from where-ever and had a license issued by the manufacturer. I license that Siemens do not acknowledge. They have now accepted that he bought and used it in good faith that it was fully legit, so they waived the commercial license and are now demanding “only” EUR 5,000, but that still comes with the threat – pay up or we take you to court…
We’re all very familiar that Dassault Systems will start hitting you up for that Solidworks license you didn’t pay for, but this is effectively firmware for a CNC machine that is phoning home through a laptop. In effect it’s a reverse Stuxnet, brought to you by a cheap Chinese CNC machine.
Here’s a hot tip for anyone who wants to do something people want. Direct to garment printers (DTG printers) are pretty much inkjet printers modified to print on t-shirts. ‘dtg printer’ is one of Hackaday’s perennial top search terms, most likely because of a post we did ten years ago. If you want to join the cool kids club and do something people desperately want, find a cheap inkjet and turn it into a DTG printer.
Red Hat has changed its logo. Red Hat, the company that somehow makes money on Open Source software, changed their logo this week. The branding for Red Hat hasn’t been very good since 2016 or thereabouts, and the branding for the Fedora project has been taking hits for just as long, m’lady. Beyond that, customer surveys revealed that the old ‘Shadowman’ logo evoked feelings like, ‘sinister, secretive, evil, and sneaky’. The new logo removes the shadowman entirely, and makes the hat the focus of attention. There is now official confirmation that there is a black band around the crown of the hat (in the Shadowman logo, this band could be confused for a shadow), and the crown is sharper. The jury is still out on the fedora vs. trilby argument, and indeed the argument is even more divisive now: the difference between a trilby and a fedora is in how they are worn, and by removing the Shadowman from the logo we now have fewer context clues to make the determination. Bet you didn’t think you were going to read two hundred words about the Red Hat logo today, did you?