No Privacy: Cloning The AirTag

You’ve probably heard of the infamous rule 34, but we’d like to propose a new rule — call it rule 35: Anything that can be used for nefarious purposes will be, even if you can’t think of how at the moment. Case in point: apparently there has been an uptick in people using AirTags to do bad things. People have used them to stalk people or to tag cars so they can be found later and stolen. According to [Fabian Bräunlein], Apple’s responses to this don’t consider cases where clones or modified AirTags are in play. To prove the point, he built a clone that bypasses the current protection features and used it to track a willing experimental subject for 5 days with no notifications.

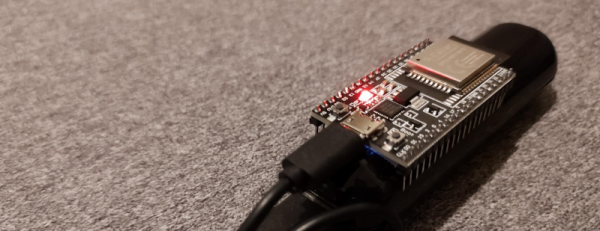
According to the post, Apple says that AirTags have serial numbers and beep when they have not been around their host Apple device for a certain period. [Fabian] points out that clone tags don’t have serial numbers and may also not have speakers. There is apparently a thriving market, too, for genuine tags that have been modified to remove their speakers. [Fabian’s] clone uses an ESP32 with no speaker and no serial number.

The other protection, according to Apple, is that if they note an AirTag moving with you over some period of time without the owner, you get a notification. In other words, if your iPhone sees your own tag repeatedly, that’s fine. It also doesn’t mind seeing someone else’s tags if they are near you. But if your phone sees a tag many times and the owner isn’t around, you get a notification. That way, you can help identify random tags, but you’ll know if someone is trying to track you. [Fabian] gets around that by cycling between 2,000 pre-loaded public keys so that the tracked person’s device doesn’t realize that it is seeing the same tag over and over. Even Apple’s Android app that scans for trackers is vulnerable to this strategy.

Even for folks who aren’t particularly privacy minded, it’s pretty clear a worldwide network of mass-market devices that allow almost anyone to be tracked is a problem. But what’s the solution? Even the better strategies employed by AirGuard won’t catch everything, as [Fabian] explains.

This isn’t the first time we’ve had a look at privacy concerns around AirTags. Of course, it is always possible to build a tracker. But it is hard to get the worldwide network of Bluetooth listeners that Apple has.

Closeup of the car dash with nixie tubes

Retro Future Nixie Corvair Instrument Panel

The future we know today looks very different than the one envisioned in the 60s and 70s. For starters, it has far too few Nixie tubes. An oversight [nixiebunny] wants to address with his Nixie tube instrument panel.

All the essential info is there: engine temperature, tachometer, speed, battery voltage, and even odometer. You might have noticed that there isn’t a clock. The justification that [nixiebunny] gives is that he’s always wearing his Nixie watch, so a clock in his car seems redundant. There is also a gap in the panel to allow an oil pressure display. Corvairs are known for throwing belts next to the oil sender, so any attached sensor needs to be designed well and thought through. A Teensy receives engine telemetry data (no OBDII port to hook into — GM didn’t come out with the first OBD port until the 80s) from the engine bay. The data is transformed into SPI data sent to the 74HC595 shift register chain via a CAT5 cable. Details are a little sparse, but we can see a custom PCB to fit the shape of the hole in the dash with the different Nixie tube footprints silkscreened on.

We love seeing Nixie tubes in unexpected places. Like this POV Nixie clock or this Nixie robot sculpture.

Weather Station Predicts Air Quality

Measuring air quality at any particular location isn’t too complicated. Just a sensor or two and a small microcontroller is generally all that’s needed. Predicting the upcoming air quality is a little more complicated, though, since so many factors determine how safe it will be to breathe the air outside. Luckily, though, we don’t need to know all of these factors and their complex interactions in order to predict air quality. We can train a computer to do that for us as [kutluhan_aktar] demonstrates with a machine learning-capable air quality meter.

The build is based around an Arduino Nano 33 BLE which is connected to a small weather station outside. It specifically monitors ozone concentration as a benchmark for overall air quality but also uses an anemometer and a BMP180 precision pressure and temperature sensor to assist in training the algorithm. The weather data is sent over Bluetooth to a Raspberry Pi which is running TensorFlow. Once the neural network was trained, the model was sent back to the Arduino which is now capable of using it to make much more accurate predictions of future air quality.

The build goes into quite a bit of detail on setting up the models, training them, and then using them on the Arduino. It’s an impressive build capped off with a fun 3D-printed case that resembles an old windmill. Using machine learning to help predict the weather is starting to become more commonplace as well, as we have seen before with this weather station that can predict rainfall intensity.

Hackaday Podcast 155: Dual Integrating Spheres, More Magnetic Switches, PlottyBot, Red Hair In Your Wafers

This week Hackaday Editor-in-Chief Elliot Williams and Managing Editor Tom Nardi take a close look at two pairs of projects that demonstrate the wildly different approaches that hackers can take while still arriving at the same conclusion. We’ll also examine the brilliant mechanism that the James Webb Space Telescope uses to adjust its mirrors, and marvel over a particularly well-developed bot that can do your handwriting for you. The finer points of living off home-grown algae will be discussed, and by the end of the show, you’ll learn the one weird trick to stopping chip fabs in their tracks.

Take a look at the links below if you want to follow along, and as always, tell us what you think about this episode in the comments!

Direct Download (~70 MB)

Continue reading “Hackaday Podcast 155: Dual Integrating Spheres, More Magnetic Switches, PlottyBot, Red Hair In Your Wafers”

Hair Today Gone Tomorrow: Four Men Go To Fix A Wafer Prober

I’ve had a fairly varied early part of my career in the semiconductors business: a series of events caused me to jump disciplines a little bit, and after one such event, I landed in the test engineering department at Philips Semiconductors. I was tasked with a variety of oddball projects, supporting engineering work, fixing broken ATE equipment, and given a absolute ton of training: Good times!  Here’s a story that comes straight off the oddball pile.

We needed to assemble a crack team of experts and high-tail it to deepest darkest Wales, and sort out an urgent production problem. The brief was that the wafer probe yield was disastrous and the correlation wafer was not giving the correct results. Getting to the punch line is going to require some IC fabrication background, but if you like stories about silicon, or red-bearded test engineers, it’s worth it. Continue reading “Hair Today Gone Tomorrow: Four Men Go To Fix A Wafer Prober”

A computer program written in basic next to a modular synthesizer with many switches and lights

Modular Synth Pairs Perfectly With The Apple II

We have a soft spot for synthesizers – seriously, who doesn’t? So when [Joshua Coleman] combined his retro-looking DIY modular synth with the equally retro Apple II computer, we just had to share it with you.

The two machines are paired using a vintage digital-to-analog logic controller pack. This DAC was originally used to control model trains using your Apple II – something that we now desperately need to see in action. The pack can output voltages between 0 and 2.55 V at 8-bit resolution (or 256 steps), which is plenty for a retro synth.

With the card installed in Slot 7 of the Apple II and the DAC wired through to the synth’s CV/gate, it’s then a trivial matter of writing POKE statements in Applesoft BASIC to control the synth. The video after the break demonstrates playing a simple melody, as well as how one might use the Apple II keyboard to ‘play’ the synth in real time.

If you’re interested in building your own, the video below has all the information needed, as well as helpful advice on where to find a DAC for your preferred model of vintage computer. If all that doesn’t tickle your musical fancy, make sure to check out our coverage on the Game Boy MIDI synth, or perhaps this peculiar synth and visualizer combo.

Continue reading “Modular Synth Pairs Perfectly With The Apple II”

Radio Control Joby Aircraft Uses Six Tiltrotors To Fly

eVTOL (Electric Vertical Take-off and Landing) craft are some of the more exciting air vehicles being developed lately. They aim to combine the maneuverability and landing benefits of helicopters with the environmental benefits of electric drive, and are often touted as the only way air taxis could ever be practical. The aircraft from Joby Aviation are some of the most advanced in this space, and [Peter Ryseck] set about building a radio-controlled model that flies in the same way.

The design is inspired by the Joby eVTOL test vehicle.

The result is mighty complex, with six tilt rotors controlled via servos for the utmost in maneuverability. These allow the vehicle to take off vertically, while allowing the rotors to tilt horizontally for better efficiency in forward flight, as seen on the Bell-Boeing V-22 Osprey.

The build uses a 3D-printed chassis which made implementing all the tilt rotor mounts and mechanisms as straightforward as possible. A Teensy flight controller is responsible for controlling the craft, running the dRehmFlight VTOL firmware. The assembled craft only weighs 320 grams including battery; an impressive achievement given the extra motors and servos used relative to a regular quadcopter build.

With some tuning, hovering flight proved relatively easy to achieve. The inner four motors are used like a traditional quadcopter in this mode, constantly varying RPM to keep the craft stable. The outer two motors are then pivoted as needed for additional control authority.

In forward flight, pitch is controlled by adjusting the angle of the central four motors. Roll is achieved by tilting the rotors on either side of the plane’s central axis, and yaw control is provided by differential thrust. In the transitional period between modes, simple interpolation is used between both modes until transition is complete.

Outdoor flight testing showed the vehicle is readily capable of graceful forward flight much like a conventional fixed wing plane. In the hover mode, it just looks like any other multirotor. Overall, it’s a great demonstration of what it takes to build a successful tilt rotor craft.

We’ve seen tilt rotor UAVs before, and they’re as cool as they are complicated to build. Video after the break.

Continue reading “Radio Control Joby Aircraft Uses Six Tiltrotors To Fly”