How To Add Audio In To The Sony NEX-5 Line Of DSLR Cameras

[Tynan] loves his Sony NEX-5 camera but he’s fed up with not being able to choose any external microphone when recording video. Recently he set out to remedy that, and managed to add an audio in jack without modify the camera itself.

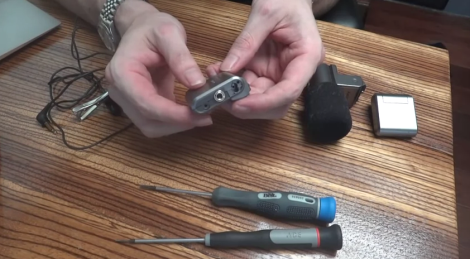
The real trick here is to modify how a microphone accessory connects to the camera. In [Tynan’s] tutorial video (embedded after the break) he uses the enclosure from a flash module as a connector. After removing the electronics he’s left with plenty of room for the guts of a Sony microphone accessory. Those include the PCB and wiring, but not the microphone element itself. A 3.5mm audio jack is added to the flash case, and soldered to the microphone cable. Now he has a modular audio-in jack. The only problem is that his tinkering resulted in mono only. If you don’t mind spending a bit more time reverse engineering the scrapped microphone we bet you can parlay that into a true stereo option.

Continue reading “How To Add Audio In To The Sony NEX-5 Line Of DSLR Cameras”

STM32 F4 Discovery Tutorial Using Open Source Tools

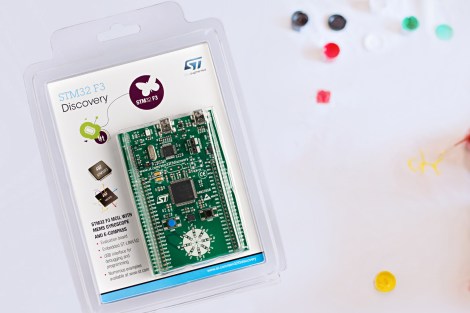
[Pulko Mandy] got his hands on the new STM32 F3 Discovery board. He’s a fan of the open source tools just like we are, so he posted a guide covering the use of an open source toolchain with the F3 hardware.

This board was just announced earlier this month but there is already support for it in OpenOCD. It’s not all that different from the F4 board, which we would think made the process a bit easier. [Pulko] is using the Sourcery CodeBench Lite toolchain, which works for pretty much all of the ARM chips out there. It is GCC based and comes with GDB for debugging (along with all the other tools you would expect). He did created his own Linker script and startup code. These are crucial for ARM so it’s nice that he provided them for us. He finishes up the guide by showing how OpenOCD can be used to flash the code to the chip and how it works with the debugger.

[Photo source]

Tri-mounted Monitors Using Strut Channeling (no Welding)

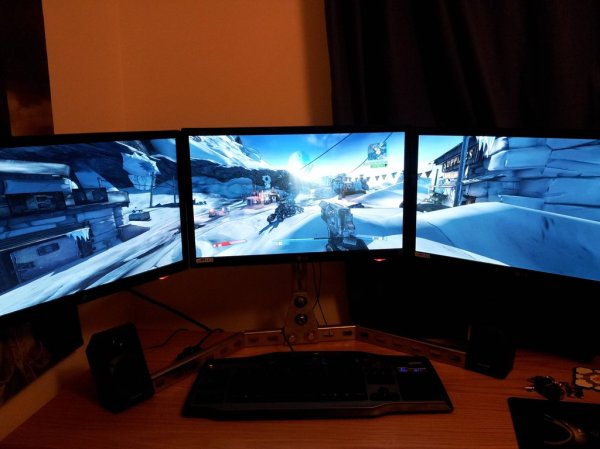
[Optec] want his own triple monitor setup built to his specifications. It turns out to have been a pretty easy project thanks to his mastery of stock materials. The image above is just a bit dim, but if you look closely you can see the strut channel which makes up the monitor frame.

When it comes to this type of metal strut material there’s a lot to choose from. [Optec] went with the half-slot format which provides a little bit of left and right wiggle room. This is important to get the edges of those monitors to butt up to one another. After making a pair of relief cuts he bent the channel in two places, using 45 degree brackets as reinforcement. The monitor mounts are made of MDF with countersunk holes to hide the bolt heads which connect it to the channel.

He figures the total cost of the mount was around $40. Seeing how easy it was makes us think we may never buy a commercial TV mounting bracket again. Of course if you’re more into woodworking there’s a tri-monitor project for you too.

[via reddit]

Laser Power System Keeps UAVs Flying Indefinitely

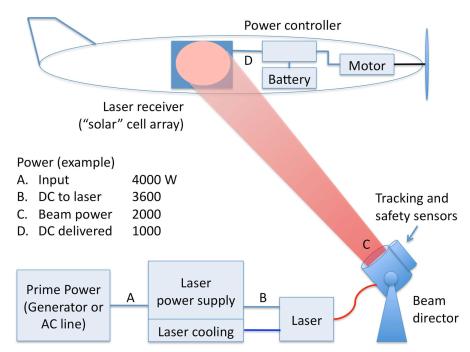
Drone technology is driving the aerospace industry as companies trip over each other trying to develop the next big thing. Here’s a good example of what we’re talking about. Lasers can no be used to keep a UAV in the air indefinitely. The trick is to add an array of photovoltaic cells specifically tuned to an IR laser’s wavelength. A ground system then directs a high-intensity laser beam onto the aircraft’s cell array to transfer energy while in flight.

After the break you can catch a video from a trade show where a Lockheed Martin employee describes the successful testing of such a system. But there’s a lot more information available in the white paper (PDF) which Laser Motive has released. They’re the folks behind the technology who have teamed up with LM to implement the system. The laser unit on the ground can track a UAV visually, but there is also a method of using GPS coordinates to do so in the case of overcast skies.

Continue reading “Laser Power System Keeps UAVs Flying Indefinitely”

Hands On The Stellaris Launchpad

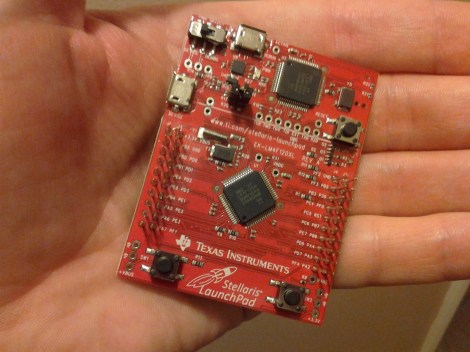
We just got our hands on a Stellaris Launchpad. We had placed an order when the preorder was originally announced, but the marketing folks at TI reached out an offered to send us one a bit sooner and took them up on it. We’ve embedded a quick unboxing video after the break but read on for some info that didn’t make it into that clip.

The look and feel of the board and its packaging are almost exactly the same as the MSP430 version of the Launchpad. But why not? After all it worked so well the first time. This board hosts an ARM Cortex-M4 processor. The two buttons on the bottom are user buttons, the one on the upper right is a reset button. The top of the board is the programmer, with a micro USB port for connectivity. The kit also includes about a 2′ cable for this connection. Next to that jack is a switch that selects a power source. You’ll also notice a USB port to the left, this because the processor includes USB functionality, with a free library available from TI. Power can come from the programmer/debugger USB port, or from this device USB port. There are dual pin headers to either side on the face of the board, and pin sockets on the back which break out pins of the processor. Just below the reset button is a RGB LED, and a clock crystal has also been populated just above the chip.

When plugged in via the programmer’s USB port the PWR LED lights up as does the RGB LED. The firmware that ships on the device fades through a range of colors and the user buttons scroll through a set of predefined colors. The device enumerates as: “Bus 002 Device 005: ID 1cbe:00fd Luminary Micro Inc.” on our machine. But if you connect it via the device USB jack it enumerates as: “Bus 001 Device 015: ID 04e8:689e Samsung Electronics Co., Ltd GT-S5670 [Galaxy Fit]”. Interesting.

We have no idea if there are programming tools for flashing the board using a Linux box, but we’ll be trying to figure it out. If you have some info please share it in the comments.

Continue reading “Hands On The Stellaris Launchpad”

Beginner’s Look At On-Chip Debugging

As your embedded applications get more complicated an On-Chip Debugger will save you a lot of time when things don’t run quite right. On-Chip Debugging (OCD) is just what it sounds like — a way to run your program on the target chip that lets you pause execution to examine values and change them if need be. The Arduino has no built-in method of using OCD, but the AVR chips used by the boards do. The caveat is that you need a proper AVR programmer to access the Debug Wire protocol, or a JTAG interface for some of the larger chips. In this case I’m going to be using an STM32 Discovery Board to give you an overview of OCD. But this will work the same way for any chip that has hardware debugging capabilities. Many IDE’s have debugging support built right in so that you can use a nice GUI as you work. But often these are just a front end for the command line tools I’ll be using. Join me after the break and we’ll get started.

Continue reading “Beginner’s Look At On-Chip Debugging”

Motorized Wheelchair Built From LEGO Pieces

You’re certainly not going to sneak up on anyone if using this LEGO motorized wheelchair. The high-pitched whine of all those tiny motors sounds like an army of robotic mosquitoes out for blood.

Six of the LEGO Mindstorm bricks are used to drive the motors, with a seventh acting as the master. It’s not pictured above, but there is a joystick on the right hand side which allows the rider to navigate. The master brick monitors the four sensors on that joystick. It then uses a pair of motors to actuate switches monitored by the slave bricks. Each slave has one switch for forward, and another for backward and drives two motors. To get around problems with angular velocities dues to turning, all of the wheels are multidirectional.

The plan is to add Bluetooth control in the near future. The master/slave setup should make that relatively easy as it only affects one of the bricks. The idea is to facilitate Android control to the chair like we’ve seen in other Mindstorm builds.

Don’t miss the demo embedded after the break.

Continue reading “Motorized Wheelchair Built From LEGO Pieces”