James Bruton's mini electric bike

Building A Mini Electric Bike In Between Projects

What do you do when you suddenly find you have some free time because you’re waiting on parts or have run up against other delays for your current project? If you’re [James Bruton], you design and build a mini electric bike.

Being a prolific builder, [James] already had the parts he needed. Some of them were left over from previous projects: a small motor, a 24 volt LiPo battery, an SK8 electronic speed controller, and a twist grip for the handlebars. He cut a wooden frame using his CNC machine and 3D printed various other components. Normally he uses ABS for motor mounts but this time he went with PLA and sure enough, the motor heated up and the mounting screws got hot enough to melt the plastic. But other than that, the bike worked great and looks like a polished, manufactured product. How many of us can say the same for our own unplanned projects using only parts from around the workshop? Check out his build and watch him whizzing around on it in the video below.

As for the former projects from which he had leftover parts, he says that some came from skateboard projects such as his pimped out electric LEGO longboard.

Continue reading “Building A Mini Electric Bike In Between Projects”

Controlling Robotics Visually

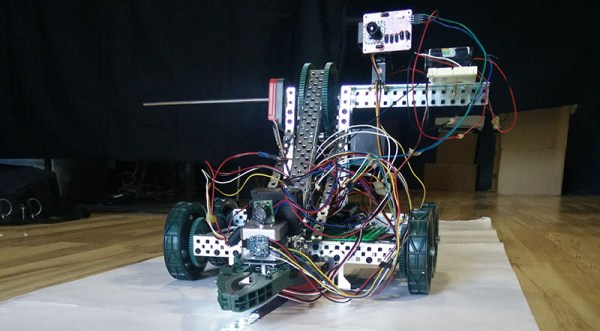
The world — and the Hackaday Prize — is filled with educational robots. These are small, wheeled robots loaded up with sensors, actuators, a few motor drivers, and some sort of system that is easy to program. The idea behind these educational robots is to give students an easy-to-use platform to test out code, learn inverse kinematics, and realize odometry is a lot harder than you think it is. Give these kids some time and patience, and you’ll have a fleet of Battlebots at the end of the semester, if the teacher is cool.

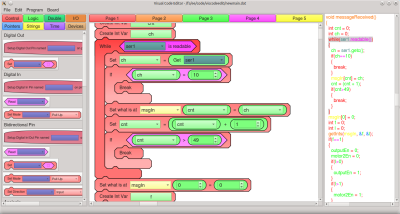
But there’s a problem with all educational robots. The programming. For someone just starting out in robotics club, being able to code isn’t a guarantee. You need an easy to use programming interface. This project for the Hackaday Prize gives all students a great visual programming interface. It’s basically like the first generation of Lego Mindstorms, only you don’t need a weird IR tower attached to a serial port.

Of course you can’t program a robot without a board, and this project brings it in spades. The brain for this platform is built on an ARM microcontroller, has Bluetooth, supports up to six DC motors, twelve analog inputs, PWM and serial ports, and all the ports are color-coded for kids who can’t read so good.

This is a visual programming environment, though, and with that, you get a fancy IDE filled with loops that wrap around commands, IO access that’s in easy to read blocks, and control software that gives students a dashboard filled with buttons and odometers and the video feed from the camera. It’s a great Hackaday Prize entry, and an excellent way to introduce kids to robotics.

Friday Hack Chat: Making Programming Easier

There is a long history of graphical programming languages. Some people don’t like to code, and for them, graphical programming languages replace semicolons and brackets with easy-to-understand boxes and wires.

This Friday, we’re going to be talking about graphical programming languages with [Boian Mitov]. He’s a software developer, founder of Mitov Software, and the creator of Visuino, a graphical programming language for the embedded domain. He specialized in video, audio, DSP, DAQ, industrial automation, communications, computer vision, artificial intelligence, as well as parallel and distributed computing. [Boian] is the author of the OpenWire open source technology, the IGDI+ open source library, the VideoLab, SignalLab, AudioLab, PlotLab, InstrumentLab, VisionLab, IntelligenceLab, AnimationLab, LogicLab, CommunicationLab, and ControlLab libraries, OpenWire Studio, Visuino, and author of the “VCL for Visual C++” technology.

For this Hack Chat, we’re going to be talking about ways to make programming microcontrollers easier. The focus of this discussion is Visuino, a graphical programming environment. Visuino allows anyone to program an Arduino, Teensy, or an ESP simply by connecting wires and choosing some logic. Think of it as a step above the programming environment that came with the Lego Mindstorms, Scratch, or whatever else MIT was coming out with in the early ‘aughts.

You are, of course, encouraged to add your own questions to the discussion. You can do that by leaving a comment on the Hack Chat Event Page and we’ll put that in the queue for the Hack Chat discussion.join-hack-chat

Our Hack Chats are live community events on the Hackaday.io Hack Chat group messaging. This week is just like any other, and we’ll be gathering ’round our video terminals at noon, Pacific, on Friday, May 25th.  Here’s a clock counting down the time until the Hack Chat starts.

Click that speech bubble to the right, and you’ll be taken directly to the Hack Chat group on Hackaday.io.

You don’t have to wait until Friday; join whenever you want and you can see what the community is talking about.

Hands-On: Flying Drones With Scratch

I’ll admit it. I have a lot of drones. Sitting at my desk I can count no fewer than ten in various states of flight readiness. There are probably another half dozen in the garage. Some of them cost almost nothing. Some cost the better part of a thousand bucks. But I recently bought a drone for $100 that is both technically interesting and has great potential for motivating kids to learn about programming. The Tello is a small drone from a company you’ve never heard of (Ryze Tech), but it has DJI flight technology onboard and you can program it via an API. What’s more exciting for someone learning to program than using it to fly a quadcopter?

For $100, the Tello drone is a great little flyer. I’d go as far as saying it is the best $100 drone I’ve ever seen. Normally I don’t suggest getting a drone with no GPS since the price on those has come down. But the Tello optical sensor does a great job of keeping the craft stable as long as there is enough light for it to see. In addition, the optical sensor works indoors unlike GPS.

But if that was all there was to it, it probably wouldn’t warrant a Hackaday post. What piqued my interest was that you can program the thing using a PC. In particular, they use Scratch — the language built at MIT for young students. However, the API is usable from other languages with some work.

Information about the programming environment is rather sparse, so I dug in to find out how it all worked.

Continue reading “Hands-On: Flying Drones With Scratch”

Step The Halbach From My Magnets

[Klaus Halbach] gets his name attached to these clever arrangements of permanent magnets but the effect was discovered by [John C. Mallinson]. Mallinson array sounds good too, but what’s in a name? A Halbach array consists of permanent magnets with their poles rotated relative to each other. Depending on how they’re rotated, you can create some useful patterns in the overall magnetic field.

Over at the K&J Magnetics blog, they dig into the effects and power of these arrays in the linear form and the circular form. The Halbach effect may not be a common topic over dinner, but the arrays are appearing in some of the best tech including maglev trains, hoverboards (that don’t ride on rubber wheels), and the particle accelerators they were designed for.

Once aligned, these arrays sculpt a magnetic field. The field can be one-sided, neutralized at one point, and metal filings are used to demonstrate the shape of these fields in a quick video. In the video after the break, a powerful magnetic field is built but when a rare earth magnet is placed in the center, rather than blasting into one of the nearby magnets, it wobbles lazily.

Be careful when working with powerful magnets, they can pinch and crush, but go ahead and build your own levitating flyer or if you came for hoverboards, check out this hoverboard built with gardening tools.


Continue reading “Step The Halbach From My Magnets”

Decellularization: Apples To Earlobes

Our bodies are not like LEGO blocks or computers because we cannot swap out our parts in the living room while watching television. Organ transplants and cosmetic surgery are currently our options for upgrades, repairs, and augments, but post-transplant therapy can be a lifelong commitment because of rejection. Elective surgery costs more than a NIB Millenium Falcon LEGO set. Laboratories have been improving the processes and associated treatments for decades but experimental labs and even home laboratories are getting in on the action as some creative minds take the stage. These folks aren’t performing surgeries, but they are expanding what is possible to for people to do and learn without a medical license.

One promising gateway to human building blocks is the decellularization and recellularization of organic material. Commercial scaffolds exist but they are expensive, so the average tinkerer isn’t going to be buying a few to play with over a holiday weekend.

Let’s explore what all this means. When something is decellularized, it means that the cells are removed, but the structure holding the cells in place remains. Recellularizing is the process where new cells are grown in that area. Decellularizing is like stripping a Hilton hotel down to the girders. The remaining structures are the ECM or the Extra Cellular Matrix, usually referred to as scaffolding. The structure has a shape but no functionality, like a stripped hotel. The scaffolding can be repopulated with new cells in the same way that our gutted hotel can be rebuilt as a factory, office building, or a hospital.

Continue reading “Decellularization: Apples To Earlobes”

Why Won’t This Darn Thing Charge?

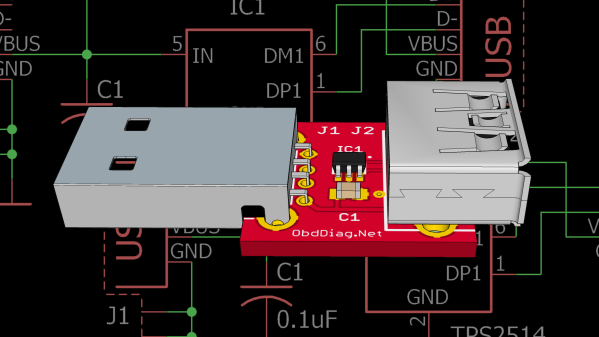
What is more fun than plugging in your phone and coming back to find your battery on empty? Stepping on a LEGO block with bare feet or arriving hungry at a restaurant after closing probably qualify. [Alex Sidorenko] won’t clean your floors or order you a pizza, but he can help you understand why cheap chargers won’t always power expensive devices. He also shows how to build an adapter to make them work despite themselves.

The cheapest smart device chargers take electricity from your home or car and convert it to five volts of direct current. That voltage sits on the power rails of a USB socket until you plug in a cable. If you’re fortunate, you might get a measly fuse.

Smart device manufacturers don’t make money when you buy an off-brand charger, and they can’t speak to the current protection of them, so they started to add features on their own chargers to protect their components and profit margins. In the case of dedicated chargers, a simple resistor across the data lines tells your phone it is acceptable power. Other devices are more finicky, but [Alex Sidorenko] shows how they work and provides Eagle files to build whatever flavor you want. Just be positive that your power supply is worthy of the reliability these boards promise to the device.

Now you know why connecting a homemade benchtop power supply to a USB cable seems good on paper but doesn’t always get the job done. Always be safe when you make your own power supplies.