Home Server Has AMD CPU And IKEA Case

Readers who took part in the glory days of custom PC building will no doubt remember the stress of having to pick a case for their carefully-curated build. You may have wanted to lower the total cost a bit by getting a cheap case, but then you’d be stuck looking at some econo-box day in and day out. Plus, how do you post pictures online to boast about your latest build if there are no transparent windows and a lighting kit?

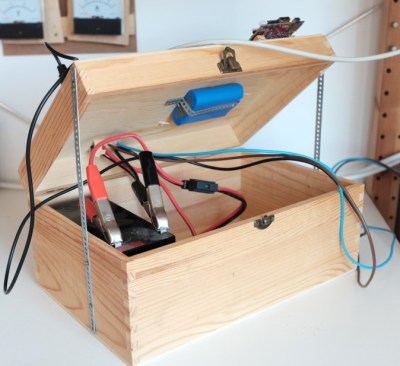
While some may have spent more time choosing their lighted case fans than their optical drive, [Miroslav Prašil] was surely not one of them. When he decided to build a new NAS for his home network, [Miroslav] decided he wanted to put all his money into the device’s internals, and house his build in a wooden storage crate from IKEA. While the low cost was certainly a major factor in the decision, it turns out the crate actually offers a decent amount of room for hardware components. As an added bonus, it doesn’t look completely terrible sitting out in the living room.

In a detailed series of posts on his blog, [Miroslav] walks us through the entire process of building what he has come to call the “NAScrate”. Wanting gigabit Ethernet and a real SATA controller, [Miroslav] went for the ASRock C70M1, a Mini-ITX board with integrated dual-core AMD processor. While not exactly a powerhouse, it will certainly wipe the floor with the fruit-inspired single board computers that so often dominate these types of builds.

To get his clearances worked out, [Miroslav] rendered the entire build in OnShape, which gave him enough confidence in his design to move on to actual construction. The build involves several 3D printed parts, most notably some clever hard drive mounting brackets which allow the drives to be stacked into a space-saving arrangement while still leaving room for airflow between them.

[Miroslav] deftly avoids any religious debates by leaving off his particular choice for software and operating system on his newly constructed NAS, but he does mention that something like FreeNAS would be a logical choice.

While this may be the first wooden one we’ve covered so far, home servers in general are a favorite project for hackers, from budget-friendly scratch builds all the way up to re-purposed enterprise hardware.

Repurposing Moving Coil Meters To Monitor Server Performance

Snazzy analog meters can lend a retro flair to almost any project, but these days they often seem to be retasked as indicators for completely different purposes than originally intended. That’s true for these Vu meters repurposed as gauges for a Raspberry Pi server, and we think the build log is as informative as the finished product is good-looking.

As [MrWunderbar] admits, the dancing needles of moving-coil meters lend hipster cred to a project, but getting his Vu meters to cooperate and display network utilization and disk I/O on his Raspberry Pi NAS server was no mean feat. His build log is full of nice details on how to measure the internal resistance of the meter and determine a proper series resistor. He also has a lengthy discussion of the relative merits of driving the meters using a PWM signal or using a DAC; in the end, [MrWunderbar] chose to go the DAC route, and the video below shows the desired rapid but smooth swings as disk and network usage change. He also goes into great depth on pulling usage parameters from psutil and parsing the results for display on the meters.

Looking for more analog meter goodness? We saw a similar CPU load meter a few months back, and there was this mash-up of Nixies and old meters for a solar energy CEO’s desk.

Continue reading “Repurposing Moving Coil Meters To Monitor Server Performance”

An Android Phone Makes A Better Server Than You’d Think

There was a time a few years ago when the first Android phones made it to market, that they seemed full of promise as general purpose computers. Android is sort of Linux, right, or so the story went, so of course you must be able to run Linux on an Android phone and do all sorts of cool stuff with it.

As anyone who tried to root an Android phone from 2010 will tell you, it was a painful and unrewarding process. There was normally a convoluted rooting process followed by somehow squeezing your own Linux filesystem tree onto the device, then chroot-ing into it. You’d then have to set up a VNC server and VNC into it, and eventually you’d feel immensely proud of your very slow tiny-screen Linux desktop that you’d slaved over creating. It was one of those things that’s simple in theory, but extremely convoluted in practice.

But six years have passed since those days, phones have gotten much faster and so has the software for tasks such as rooting, so maybe it’s time to return to the topic of Linux on an Android device. [Pete Scargill] gave it a try when a friend gave him a Chinese quad-core Android phone with a broken screen. He proceeded to put a Debian installation on it, upon which he runs his collection of server processes.

Rooting the phone was straightforward process using the KingRoot app, a sideloaded version as it seems there’s a bogus copy on the Play Store. Then bringing a Linux system to it could be achieved with the LinuxDeploy app. The result is surprisingly useful, after some installation steps upon which he goes into detail.

You might ask what would be the point of this exercise, given that you can do the same thing much more easily with a single board computer such as a Raspberry Pi. But to buy a Pi, SD card, screen, and UPS, as he points out you’d have to spend a lot more than you would for a second-hand phone from eBay — or a free, slightly broken, one from friends or family.

If getting more from your Android phone is your thing, perhaps you’d like to know about installing Busybox on it. We’ve also advocated for using old Android phones for ARM dev.

Bring Saturday Mornings Back To Life With This Cartoon Server

It was an American ritual for over four decades: wake up early on Saturday morning, prepare a bowl of sugar, and occupy the couch for four glorious hours of cartoons. The only interruptions came when the least-significant sibling had to be commanded to get up to change the channel to one of the two other networks, or when your mom decided to vacuum the TV room. It was a beautiful ritual, but now it’s gone.

Or is it? If you really want to recapture your misspent youth, you can try this Raspberry Pi multi-channel cartoon server with retro TV display. [FozzTexx] started with a yard sale 13″ Zenith set, which languished in his shop for want of a mission. When he found a four-channel video modulator, he knew he had the makings of the full channel-changing Saturday morning experience.

Four Raspberry Pis were configured to serve up four separate streams of cartoons from his Plex server, and after a late Friday night of hacking the whole thing together, each stream was ready to go live at 7:00 AM on Saturday. [FozzTexx] thought of everything — from the pre-“broadcast day” test pattern to actual commercials spliced into the cartoons to the static between the channels, it’s all there in low-definition glory. He even printed up faux TV Guide pages! You can watch a brief demo on [FozzTexx]’ Twitter feed, or you can watch the entire 2-hour Periscope feed if you’re feeling nostalgic.

[FozzTexx] chose UHF channels for his “stations,” so if you want to replicate this build it may pay to bone up on analog TV tuner basics. Or if it’s just the retro look you’re going for, this custom case inspired by a 40s TV might be nice to check out.

Continue reading “Bring Saturday Mornings Back To Life With This Cartoon Server”

Bench Power Supply Uses Server Voltage Regulator

If you stuff a computer into a rack with a bunch of other machines, you’d better make it a tough machine. Server-grade means something, so using server parts in a project, like this high-wattage power supply using server voltage regulators, can take it to the next level of robustness.

But before [Andy Brown] could build this power supply, he had to reverse-engineer the modules. Based on what he learned, and armed with a data sheet for the modules, he designed a controller to take advantage of all the capabilities of them and ended up with a full-featured power supply. The modules are rated for 66 watts total dissipation at 3.3 volts and have a secondary 5-volt output. Using an ATmega328, [Andy] was able to control the module, provide a display for voltage and current, temperature sensing and fan control, and even a UART to allow data logging to a serial port. His design features mainly through-hole components to make the build accessible to everyone. A suitable case is yet to come, and we’re looking forward to seeing the finished product.

Can’t scrape together some of these modules on eBay? Or perhaps you prefer linear power supplies to switched- mode? No worries – here’s a super stable unregulated supply for you.

Continue reading “Bench Power Supply Uses Server Voltage Regulator”

Apple II Web Server Written In BASIC

The Apple II was the machine that many say launched Apple as a company. As with many popular computers of the 1980s, the Apple II maintains a steady following to this day who continue to develop new hardware and software to keep the platform alive.

[deater] had scored an Uthernet II Ethernet interface for his Apple IIe, based off the venerable W5100 chipset. He decided to have some fun and wrote a webserver for the Apple II in BASIC. The program sets up the Ethernet card with a series of PEEKs and POKEs, and then listens out for incoming packets before responding with the requisite data loaded from floppy disk.

The server can deal with HTML, text, and even JPEG and PNG images. It’s even compliant with RFC 2324. It does suffer from some limitations however — the disk format used can only hold 140 kB, it can only serve an 8kB file at a time, and due to using a lot of string manipulation in the code, is painstakingly slow.

Before you get too excited, the machine is running on a local network only, so you can’t check it out from here. However, [deater] has kindly released the source code if you wish to run it for yourself.

If you’re thirsty for more 8-bit action, check out this Apple II playing animated GIFs.

How To Run A Pagekite Server To Expose Your Raspberry Pi

Last time I showed you how to expose a web service on a Raspberry Pi (or, actually, any kind of device) by using a reverse proxy from Pagekite. On your Pi, you just need a simple Python script. However, it also depends on the Pagekite server, which isn’t always convenient. There are limits to the free service, and you don’t control the entire thing. The good news is twofold: the same Python script you use to set up the client-side can also set up a server. The other good news is the entire thing is open source.

In practical terms, then, if you have a computer that is always on and has an IP address that can be found on the public internet, you can run your own Pagekite server (they call it a front end) and service your own backends.

Continue reading “How To Run A Pagekite Server To Expose Your Raspberry Pi”