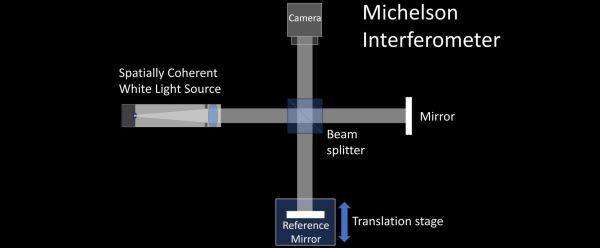
White light interferometry (WLI) is a contact-free optical method for measuring surface height. It uses the phase difference between the light reflected off a reference mirror and the target sample to calculate the height profile of the sample’s surface. As complex as this sounds, it doesn’t take expensive hardware to build a WLI microscope, as [Huygen Optics] explains in a detailed introductory video on the topic. At its core you need a source of white light (e.g. a white LED), with a way to focus the light so as to get a spatially coherent light source, like aluminium foil with a pin hole and a lens.
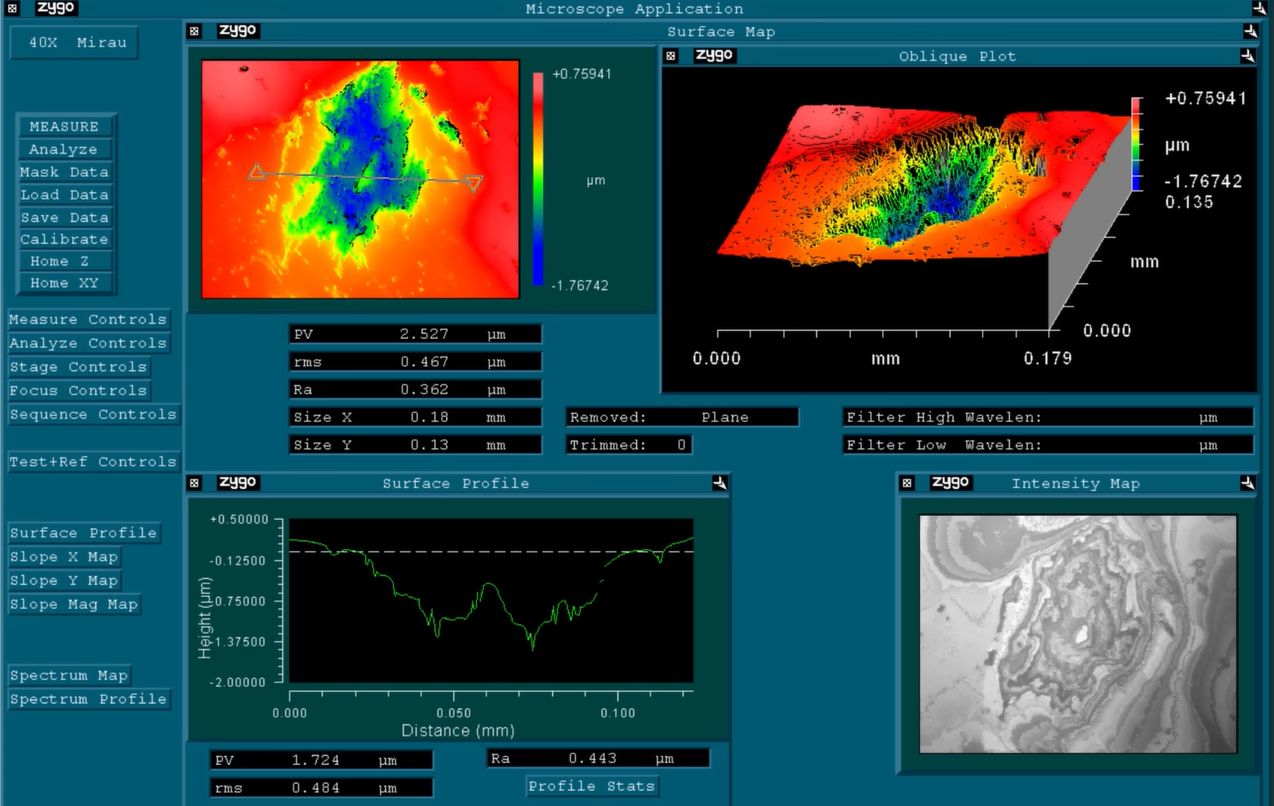
This light source then targets a beam splitter, which splits the light into one beam that targets the sample, and one that targets the reference mirror. When both beams are reflected and return to the beam splitter, part of the reflected light from either side ends up at the camera, which captures the result of the reference and sample beams after their interference (i.e. combination of the amplitudes). This creates a Michelson interferometer, which is simple, but quite low resolution. For the demonstrated Zygo Newview 100 WLI microscope this is the first objective used, followed by a more recent innovation: the Mirau interferometer, which integrates the reference mirror in such a manner that much higher resolutions are possible, down to a few µm.
Continue reading “Gentle Introduction To White Light Interferometry”