That’s right, this solution to the problem of bed adhesion is more commonly stirred into your coffee every morning – it’s sugar. [Mysimplefix] shares their preferred process, consisting of first mixing up a sugar/water solution in the microwave, before applying it to the bed with a paper towel and allowing the water to evaporate off.
Several test prints are then shown, with major overhangs, to show the adhesive capabilities of the sugar. The results are impressive, with parts sticking well while the bed is hot, while being easy to remove once cool. The video deals with PLA, but we’d be interested to see the performance with other materials as well.
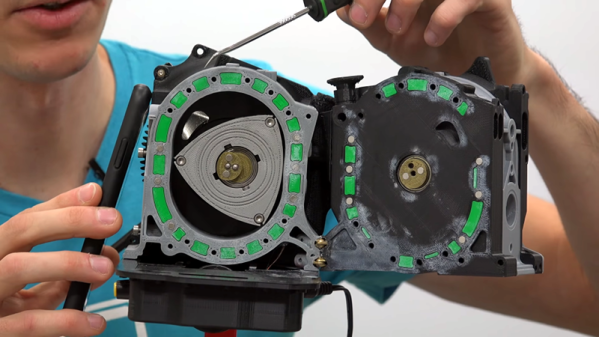
Although there was briefly a company called Rotary Rocket, the term is much better known as a nickname for the Mazda RX-7 — one of the few cars that used a Wankel, or rotary, engine. If you ever wondered how these worked, why not print a model? That’s what [Engineering Explained] did. They printed a 1/3 scale model and made a video explaining and demonstrating its operation. The model itself was from Thingiverse, created by [EricThePoolBoy].
One thing we really liked about the model was the use of lights to show the different stages of combustion. Cool air intake is a blue light, hot air is red, and so on. It really helps visualize what’s happening. You can watch the video below.
If you haven’t seen a Wankel before, it is a clever design. It has very few moving parts and offers very smooth power transfer and high power to weight ratio. The downside, though, is that the engine deliberately burns oil to lubricate and seal, so it is difficult to meet emission standards and requires a lot of oil. The fuel efficiency of current designs is not very good either, especially since manufacturers will often trade fuel efficiency for better emissions.
If you’d like to read more about the Wankel, check out our earlier post (and the 165 comments attached). We also looked at — or rather through — another Wankel earlier this year.
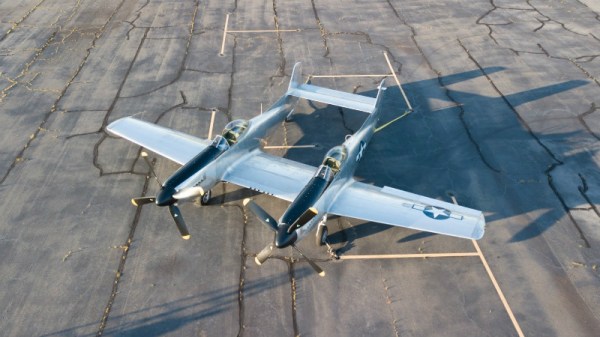
Towards the end of the Second World War, as the United States considered their options for a possible invasion of Japan, there was demand for a new fighter that could escort long range bombers on missions which could see them travel more than 3,200 kilometers (2,000 miles) without refueling. In response, North American Aviation created the F-82, which essentially took two of their immensely successful P-51 fighters and combined them on the same wing. The resulting plane, of which only 272 were built, ultimately set the world record for longest nonstop flight of a propeller-driven fighter at 8,129 km (5,051 mi) and ended up being the last piston engine fighter ordered by the United States Air Force.
The project provides a fascinating look at what it takes to not only return a 70+ year old ultra-rare aircraft to fully functional status, but do it in a responsible and historically accurate way. With only four other intact F-82’s in the world, replacement parts are obviously an exceptional rarity. The original parts used to rebuild this particular aircraft were sourced from literally all over the planet, piece by piece, in a process that started before [Tom] even purchased the plane itself.
In a way, the search for parts was aided by the unusual nature of the F-82, which has the outward appearance of being two standard P-51 fighters, but in fact utilizes a vast number of modified components. [Tom] would keep an eye out for parts being sold on the open market which their owners mysteriously discovered wouldn’t fit on a standard P-51. In some cases these “defective” P-51 parts ended up being intended for the Twin Mustang project, and would get added to the collection of parts that would eventually go into the XP-82 restoration.
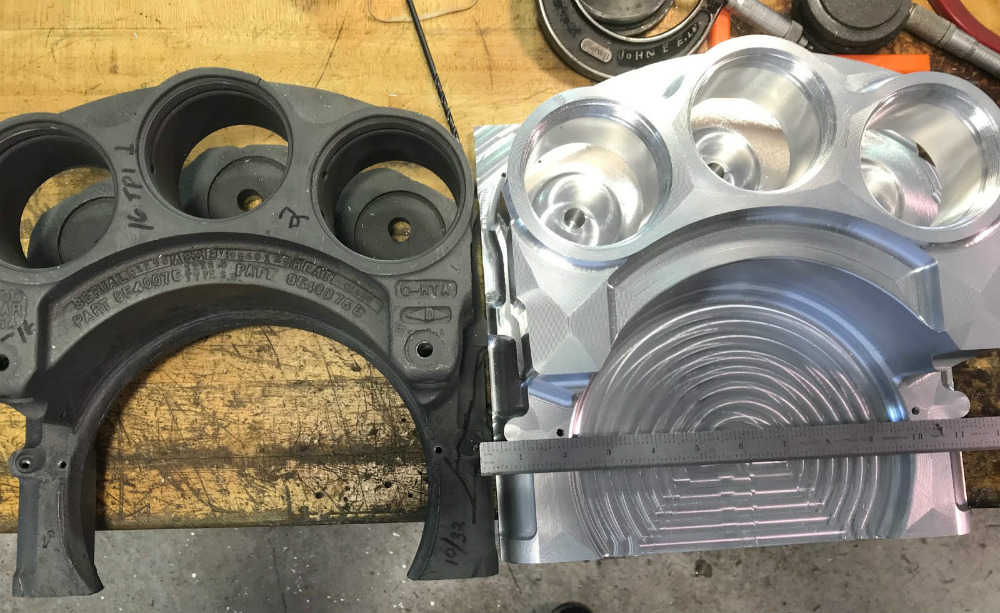
For the parts that [Tom] couldn’t find, modern manufacturing techniques were sometimes called in. The twin layout of the aircraft meant the team occasionally had one component but was missing its counterpart. In these cases, the original component could be carefully measured and then recreated with either a CNC mill or 3D printed to be used as a die for pressing the parts out of metal. In this way the team was able to reap the benefits of modern production methods while still maintaining historical accuracy; important on an aircraft where even the colors of the wires used in the original electrical system have been researched and faithfully recreated.
We’ve seen plenty of restorations here at Hackaday, but they tend to be of the vintage computer and occasionally Power Wheels variety. It’s interesting to see that the same sort of techniques we apply to our small scale projects are used by the pros to preserve pieces of history for future generations.
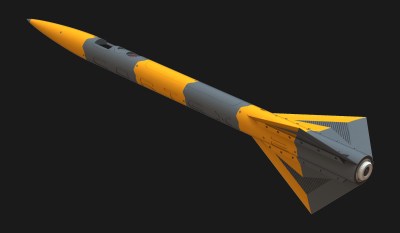
Rocketry is wild, and [Foaly] is sharing build and design details of the Cortex 2 mini rocket which is entirely 3D printed. Don’t let that fool you into thinking it is in any way a gimmick; the Cortex 2 is a serious piece of engineering with some fascinating development.
Cortex 1 was launched as part of C’Space, an event allowing students to launch experimental rockets. Stuffed with sensors and entirely 3D printed, Cortex 1 flew well, but the parachute failed to deploy mainly due to an imperfectly bonded assembly. The hatch was recovered, but the rocket was lost. Lessons were learned, and Cortex 2 was drafted up before the end of the event.
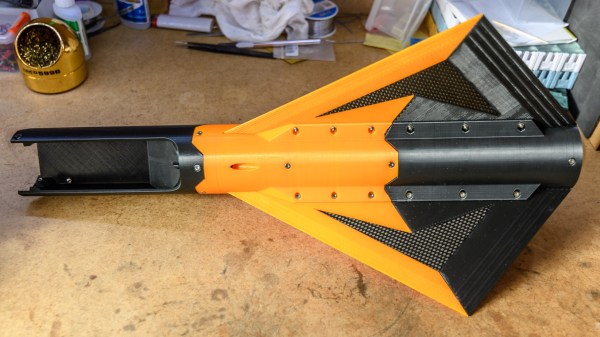
Some of the changes included tweaking the shape and reducing weight, and the refinements also led to reducing the number of fins from four to three. The fins for Cortex 2 are also reinforced with carbon fiber inserts and are bolted on to the main body.
Here’s an interesting details: apparently keeping the original fins would result in a rocket that was “overstable”. We didn’t really realize that was a thing. The results of overstabilizing are similar to a PID loop where gain is too high, and overcorrection results in oscillations instead of a nice stable trajectory.
Cortex 2 uses a different rocket motor from its predecessor, which led to another interesting design issue. The new motor is similar to hobby solid rocket motors where a small explosive charge at the top of the motor blows some time after the fuel is gone. This charge is meant to eject a parachute, but the Cortex 2 is not designed to use this method, and so the gasses must be vented. [Foaly] was understandably not enthusiastic about venting hot gasses through the mostly-PLA rocket body. Instead, a cylindrical cartridge was designed that both encases the motor and redirects any gasses from the explosive charge out the rear of the rocket. That cartridge was SLA printed out of what looks to us like Formlabs’ High Tempurature Resin.
Finally, to address the reasons Cortex 1 crashed, the hatch and parachute were redesigned for better reliability. A servo takes care of activating the system, and a couple of reverse-polarity magnets assist in ensuring the hatch blows clear. There’s even a small servo that takes care of retracting the launch guide.
The rocket is only half built so far, but looks absolutely fantastic and we can’t wait to see more. It’s clear [Foaly] has a lot of experience and knowledge. After all, [Foaly] did convert a Makerbot printer into a CNC circuitboard engraver.
Can you turn 47 pounds (21 kg) of PLA filament into a gigantic working 3D-printed RC car? No, no you can’t — at least not if you eschew proper bearings in favor of printed bushings.
That’s the hard lesson that [Joel Telling] learned with his scaled up version of the OpenRC F1 car, an RC car that can be mostly 3D-printed. The small version still has its share of non-printed parts, mainly screws and bearings. In his video series documenting the build of the upsized version, [Joel] elaborates on some of the reasons for going with printed bushings rather than bearings, which mainly boil down to hoping that the graphite lubricant powder he added would reduce friction enough to prevent the parts from welding themselves together.
The car came out looking great, and even managed to scoot about nicely for a few seconds before its predictably noisy and unhappy demise. But what was unexpected was the actual failure mode. The plastic-on-plastic running gear seemed to handle the rolling loads fine; it was the lateral force exerted on the axle by the tension of the drive belt that was too much for the printed bushing to bear.
As [Joel] rightly points out, it’s only a failure if you fail to learn something, so kudos to him for at least giving this a try. And all that PLA won’t go to waste, of course — everything else on the car worked fine, so adding one bearing should get it back on the road. He should check out our primer on bearings for a few tips on selecting the right one.
Sure there are the occasional functional Christmas tree ornaments; we had one that plugged into the lights and was supposed to sound like a bird gently trilling its song, but was in fact so eardrum-piercing that we were forbidden from using it. But in general, ornaments are just supposed to be for looks, right? Not so fast — this 3D-printed ornament has a 3D-printer inside that prints other ornaments. One day it might just be the must-have in functional Christmas decor.
Given that [Sean Hodgins] had only a few days to work on this tree-dwelling 3D-printer, the questionable print quality and tiny print volume can be overlooked. But the fact that he got this working at all is quite a feat. We were initially surprised that he chose to build a stereolithography (SLA) printer rather than the more common fused deposition modeling (FDM) printer, but it makes sense. SLA only requires movement in the Z-axis, provided in this case by the guts of an old DVD drive. The build platform moves in and out of a tiny resin tank, the base of which has a small LCD screen whose backlight has been replaced by a bunch of UV LEDs. A Feather M0 controls the build stage height and displays pre-sliced bitmaps on the LCD, curing the resin in the tank a slice at a time.
Results were mixed, with the tiny snowflake being the best of the bunch. For a rush job, though, and one that competed with collaborating on a package-theft deterring glitter-bomb, it’s pretty impressive. Here’s hoping that this turns into a full-sized SLA build like [Sean] promises.
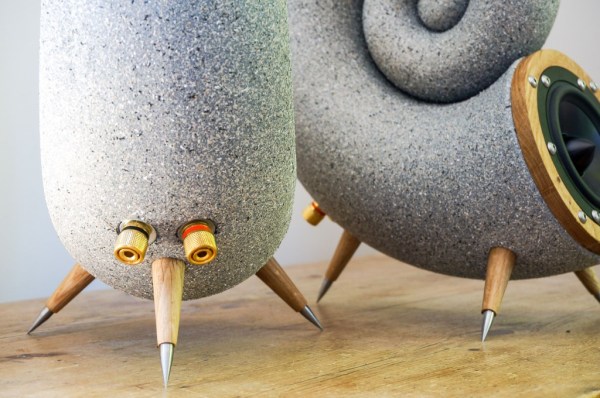
We all maintain this balancing act between the cool things we want, the money we can spend, and our free time. When the pièce de résistance is a couple of orders of magnitude out of our budget, the only question is, “Do I want to spend the time to build my own?” [Nick Charlton] clearly answered “Yes,” and documented the process for his Nautilus speakers. The speaker design was inspired by Bowers & Wilkins and revised from a previous Thingiverse model which is credited.
The sound or acoustic modeling is not what we want to focus on since the original looks like something out of a sci-fi parody. We want to talk about the smart finishing touches that transform a couple of 3D printed shells into enviable centerpieces. The first, and most apparent is the surface. 3D prints from consumer FDM printers are prone to layer lines, and that aesthetic has ceased to be trendy. Textured paint will cover them nicely and requires minimal elbow grease. Besides sand and shells go together naturally. At first glance, the tripod legs holding these speakers seemed like a classy purchase from an upscale furniture store, but they are, in fact, stained wood and ground-down bolts. Nicely done.
The moral is to work smarter, take pictures, then drop us a line.

 Cortex 1 was launched as part of
 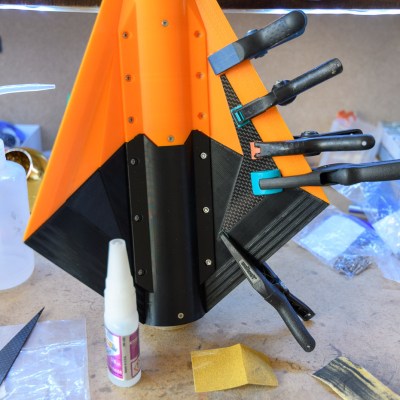 Cortex 2 uses a different rocket motor from its predecessor, which led to another interesting design issue. The new motor is similar to hobby solid rocket motors where a small explosive charge at the top of the motor blows some time after the fuel is gone. This charge is meant to eject a parachute, but the Cortex 2 is not designed to use this method, and so the gasses must be vented. [Foaly] was understandably not enthusiastic about venting hot gasses through the mostly-PLA rocket body. Instead, a cylindrical cartridge was designed that both encases the motor and redirects any gasses from the explosive charge out the rear of the rocket. That cartridge was SLA printed out of what looks to us like Formlabs’