The Pre-CRT Oscilloscope

Oscilloscopes are especially magical because they translate the abstract world of electronics into something you can visualize. These days, a scope is likely to use an LCD or another kind of flat electronic display, but the gold standard for many years was the ubiquitous CRT (cathode ray tube). Historically, though, CRTs were not very common in the early days of electronics and radio. What we think of as a CRT didn’t really show up until 1931, although if you could draw a high vacuum and provide 30 kV, there were tubes as early as 1919. But there was a lot of electronics work done well before that, so how did early scientists visualize electric current? You might think the answer is “they didn’t,” but that’s not true. We are spoiled today with high-resolution electronic displays, but our grandfathers were clever and used what they had to visualize electronics.

Keep in mind, you couldn’t even get an electronic amplifier until the early 1900s (something we’ve talked about before). The earliest way to get a visual idea of what was happening in a circuit was purely a manual process. You would make measurements and draw your readings on a piece of graph paper.

Continue reading “The Pre-CRT Oscilloscope”

Hackaday Links Column Banner

Hackaday Links: September 9, 2018

Octoprint is one of those must-have apps for 3D printers. All you need is a Raspberry Pi, an SD card, and a USB cable, and you can control your 3D printer from anywhere in the house. Of course, some people take it too far and open up their Octoprint to the greater Internet. Gizmodo reports thousands of people are doing so, with possible dire consequences. Choice quotes: “Imagine waking up in the morning to find that your 3D printer was used to produce a gun” and “Once again, 3D guns come to mind”. Yes, they referenced 3D printed guns twice in a story. Call me when you can 3D print bullets. Or when bioprinters can print airborne HIV, which was also suggested in the story.

ARS Electronica is going on in Linz this weekend, and it’s the largest new media art festival where cyber artists are recognized for their innovations. One of the more interesting exhibits is [Sarah Petkus]’ Noodlefeet. Its [Sarah]’s kid, that’s a robot, that’s made out of pool noodles. She’s talked about it at the Hackaday Superconference, and now there’s an entire exhibit behind it. You can check out her ‘making of’ post right here.

A mirror is a useful survival tool, if only for signalling people. Here’s a video showing long-distance mirror signalling, over a distance of 27.5 miles. The mirror used was 330 x 254mm, but the real challenge here is pointing the mirror in the right direction. For that, [Andy] used a bamboo pole a few meters in front of the mirror. By reflecting sunlight onto the pole, he knew it was going in about the right direction. Accuracy versus precision, or something like that.

Last week, a slow leak was detected aboard the International Space Station. The leak was quickly traced to a 2mm hole in the upper orbital module of a visiting Soyuz spacecraft. prompting call of micrometeoroid damage and plenty of speculation on what would have happened if this hole appeared anywhere else on the station. Now, it looks like this hole was put there by a drill, probably during assembly or testing, and was somehow plugged until the Soyuz was in space for a few weeks. Why this hole just magically appeared one night is anyone’s guess, but there you go.

FOSSCON 2018: Where Open Source And LEGO Collide

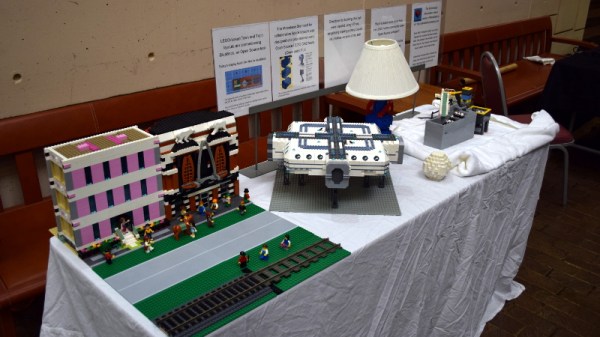
It probably won’t come as a surprise to anyone reading this, but hackers and makers absolutely love LEGO. We think you’d be hard pressed to find a Hackaday reader, young or old, that hasn’t spent some quality time with the little plastic bricks from Billund, Denmark. So it follows that there’s a considerable community of individuals who leverage their better than average technical prowess to utilize LEGO in new and unique ways. But the activities and history of these LEGO hackers is not exactly common knowledge to those who aren’t heavily vested in the hobby.

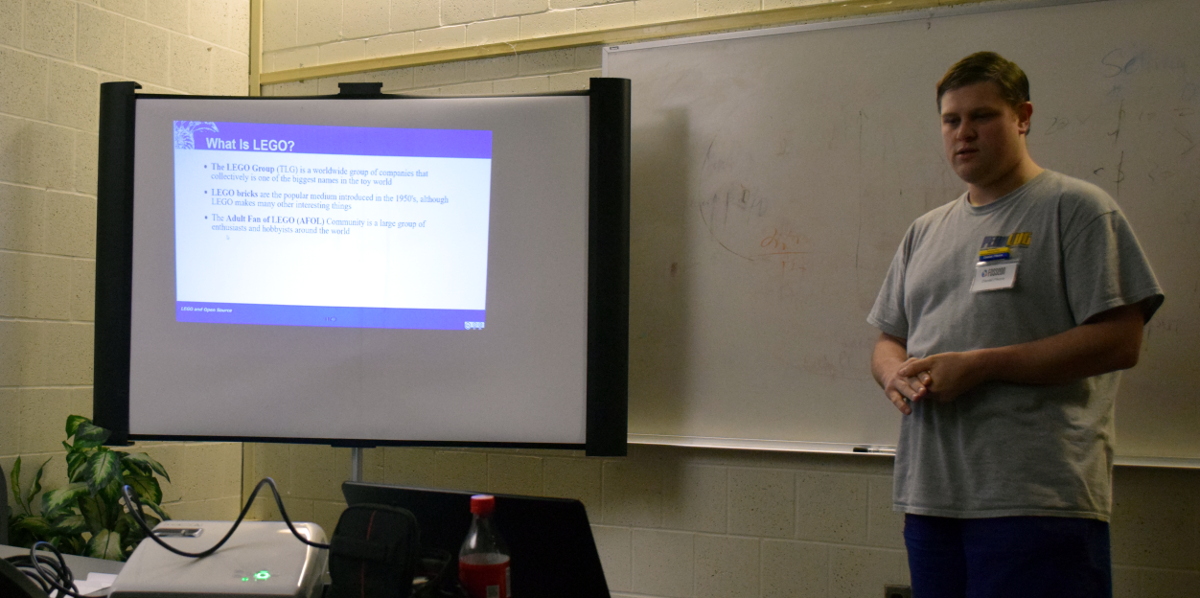
During the recent FOSSCON 2018 in Philadelphia, Daniel Pikora gave attendees a comprehensive look at the intersection of open source development and the world’s most popular brand of construction toys. A software developer with a penchant for open source code by trade, he’s also an avid member of what’s known as the Adult Fan of LEGO (AFOL) community who’s exhibited his creations at shows across the United States and Canada. Such a unique perspective, with a foot in both the FOSS and LEGO camps, makes Daniel an ideal tour guide for this particular microcosm of toys and tech.

In a whirlwind presentation that took attendees through 49 slides in about as many minutes, Daniel covered LEGO’s beginnings in the 1930s to the rise of 3D printed custom bricks, and everything in between. Some of the engineering-centric product lines, such as Technic and Mindstorms, were already fairly well known to the types of folk who spent a beautiful Saturday in Philadelphia at an open source conference. But Daniel’s deep-dive into the long history of open source LEGO projects brought to light the work of so many dedicated developers that everyone walked away with a newfound respect for the amount of work the AFOL community has put into elevating LEGO from a child’s toy to a legitimate tool. Join me below for a look at the particulars of that deep dive.

Continue reading “FOSSCON 2018: Where Open Source And LEGO Collide”

We’re Hiring: Come Join Us!

You wake up in the morning, and check Hackaday over breakfast. Then it’s off to work or school, where you’ve already had to explain the Jolly Wrencher to your shoulder-surfing colleagues. And then to a hackspace or back to your home lab, stopping by the skull-and-cross-wrenches while commuting, naturally. You don’t bleed red, but rather #F3BF10. It’s time we talked.

The Hackaday writing crew goes to great lengths to cover all that is interesting to engineers and enthusiasts. We find ourselves stretched a bit thin and it’s time to ask for help. Want to lend a hand while making some extra dough to plow back into your projects? We’re looking for contributors to write a few blog posts per week and keep the Hackaday flame burning.

Contributors are hired as private contractors and paid for each article. You should have the technical expertise to understand the projects you write about, and a passion for the wide range of topics we feature. You’ll have access to the Hackaday Tips Line, and we count on your judgement to help us find the juicy nuggets that you’d want to share with your hacker friends.

If you’re interested, please email our jobs line and include:

  • One example post written in the voice of Hackaday. Include a banner image, at least 150 words, the link to the project, and any in-links to related and relevant Hackaday features. We need to know that you can write.
  • Details about your background (education, employment, interests) that make you a valuable addition to the team. What do you like, and what do you do?
  • Links to your blog/project posts/etc. that have been published on the Internet, if any.

What are you waiting for? Ladies and Gentlemen, start your applications!

How To Add UART To Your FPGA Projects

Being able to communicate between a host computer and a project is often a key requirement, and for FPGA projects that is easily done by adding a submodule like a UART. A Universal Asynchronous Receiver-Transmitter is the hardware that facilitates communications with a serial port, so you can send commands from a computer and get messages in return.

Last week I wrote about an example POV project that’s a good example for learn. It was both non-trivial and used the board’s features nicely. But it has the message hard coded into the Verilog which means you need to rebuild the FPGA every time you want to change it. Adding a UART will allow us to update that message.

The good news is the demo is open source, so I forked it on GitHub so you can follow along with my new demo. To illustrate how you can add a UART to this project I made this simple plan:

Continue reading “How To Add UART To Your FPGA Projects”

Fail Of The Week: How Not To Design An RF Signal Generator

We usually reserve the honor of Fail of the Week for one of us – someone laboring at the bench who just couldn’t get it together, or perhaps someone who came perilously close to winning a Darwin Award. We generally don’t highlight commercial products in FotW, but in the case of this substandard RF signal generator, we’ll make an exception.

We suppose the fail-badge could be pinned on [electronupdate] for this one in a way; after all, he did shell out $200 for the RF Explorer signal generator, which touts coverage from 24 MHz to 6 GHz. But in true lemons-to-lemonade fashion, the video below he provides us with a thorough analysis of the unit’s performance and a teardown of the unit.

The first step is a look at the signal with a spectrum analyzer, which was not encouraging. Were the unit generating a pure sine wave as it should, we wouldn’t see the forest of spikes indicating harmonics across the band. The oscilloscope isn’t much better; the waveform is closer to a square wave than a sine. Under the hood, he found a PIC microcontroller and a MAX2870 frequency synthesizer, but a conspicuous absence of any RF filtering components, which explains how the output got so crusty. Granted, $200 is not a lot to spend compared to what a lab-grade signal generator with such a wide frequency range would cost. And sure, external filters could help. But for $200, it seems reasonable to expect at least some filtering.

We applaud [electronupdate] for taking one for the team here and providing some valuable tips on RF design dos and don’ts. We’re used to seeing him do teardowns of components, like this peek inside surface-mount inductors, but we like thoughtful reviews like this too.

Continue reading “Fail Of The Week: How Not To Design An RF Signal Generator”

Twenty Projects That Just Won The Human Computer Interface Challenge

The greatest hardware competition on the planet is going on right now. The Hackaday Prize is the Oscars of Open Hardware. It’s the Nobel Prize of building a thing. It’s the Fields Medal of firmware development, and simply making it to the finals grants you a knighthood in the upper echelon of hardware developers.

Last week, we wrapped up the fourth challenge in The Hackaday Prize, the Human Computer Interface challenge. Now we’re happy to announce twenty of those projects have been selected to move onto the final round and have been awarded a $1000 cash prize. Congratulations to the winners of the Human Computer Interface Challenge in this year’s Hackaday Prize. Here are the winners, in no particular order:

Human Computer Interface Challenge Hackaday Prize Finalists:

Continue reading “Twenty Projects That Just Won The Human Computer Interface Challenge”