Klein Hidden Bolt and Tool

Tricky Screw Heads Have Disappearing Slots

Perhaps you’ve seen them, demonstrations of a machined piece of metal that upon further inspection is actually two pieces machined so perfectly that they appear as one. With extremely tight tolerances, it’s not possible to determine where one piece of metal ends and another begins — that is, until the secret is revealed. Inspired by such pieces of art, [Andrew Klein] sought to put this high level of machine work to practical use. And so it was that his as-yet-unnamed Screw With No Slot came to be.

Klein Hidden Bolt depressed by brass rod
A brass rod pushes down to reveal the keyed center section.

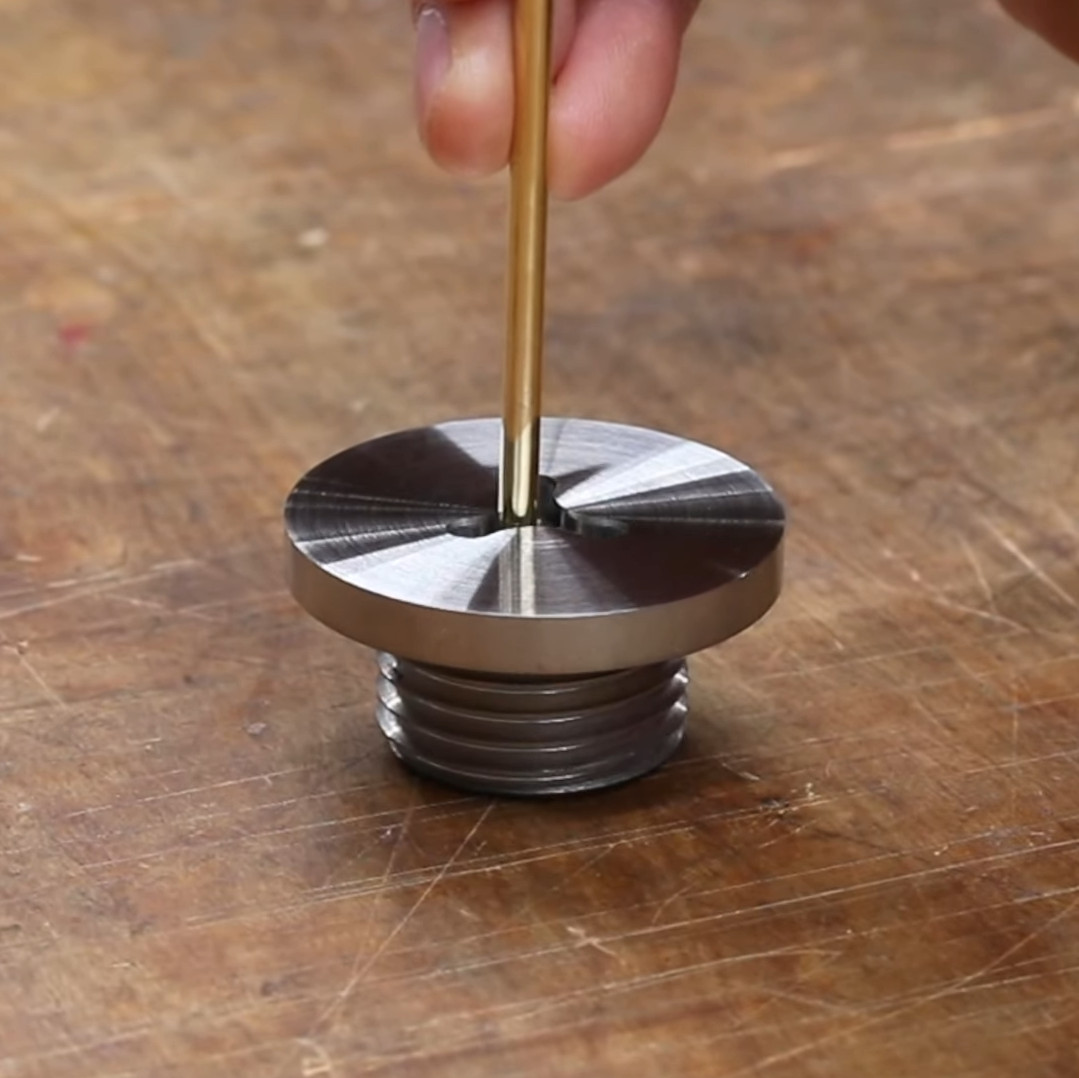
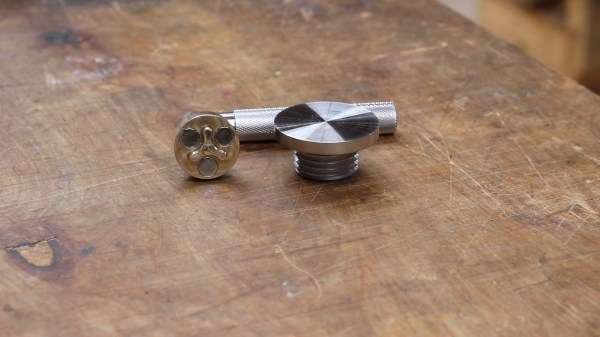
The screw’s disc-like appearance looks as if it’s a metal trim piece to cover a bolt hole. But in the video below [Andrew] shows us the trick, pushing a brass rod into the middle of the disc to reveal the hidden three-point slot. The center of the disk is actually a separate bit of finely machined metal that is spring loaded to stay flush. A specially designed wrench keys into the rounded concave triangle shape cut into the face.

The wrench is made with brass to avoid marring the precision surface. It uses three magnets to hold tight to the screw’s 410 magnetic stainless steel. [Andrew] didn’t spill the beans on how this was done, but we haven’t seen any process other than electrical discharge machining (EDM) that can achieve this level of mating precision. If that topic is new to you, we recommend checking out [Ben Krasnow’s] lab experiments on the topic.

We can’t help but be taken in by the beauty of the fastener, and it immediately sent our imaginations into a National Treasure induced dream-like state. [Andrew Klein] has yet to name this fastener, and he’s soliciting ideas for names in the video below the break. If you have such an idea, you can comment on his video. He’s also exploring the viability of the as-yet-named fastener as a commercial product for high end furniture builders.

This is not the first time we’ve featured [Andrew Klein]’s work. His previous featured projects include a custom sawblade for perfectly foldable joints and an unveiling of the magnetic magic behind switchable permanent magnets. Be sure to submit the neat hacks, builds, and inspiring projects that you come across to our Tip Line!

Continue reading “Tricky Screw Heads Have Disappearing Slots”

A sandbox for ergonomic keyboard makers.

Dactyl Chimera Leaves The Learning Out Of The Curve

Have you been wanting to build your own keyboard, ergonomic or otherwise, but are hesitant to spend all that time and filament on something that may not be a good fit for your hands? Glad as we are that the dactyl is open-source, to get in there and really mess around with it requires intimate knowledge of either OpenSCAD or Clojure.

Well, not anymore. [WolfIcefang]’s dactyl chimera is an ergo sandbox, a test bench for column curvature, stagger, and height that should keep you from having to iterate all day and night. It was designed in FreeCAD and has three parts — the rack, the tenting foot, and the arches. The rack acts like a bottom plate and has slots for holding the columns (arches) in place. Underneath that is the tenting foot, which changes the lateral inclination. Thirdly are the arches, the business part where the switches go.

[WolfIcefang] says it’s sturdy but not portable, and for some reason feels the need to apologize for the looks. We think it’s beautiful, but then again are easily captivated by such practicality. It’s not quite a keyboard yet, as [WolfIcefang] has neither wired it up nor burned in any firmware. This is still in the early stages, and [WolfIcefang] wants to open it up to collaborators. Plans for the future include interchangeable thumb clusters and a complete build guide.

Even if you aren’t that fluent in OpenSCAD, you’ll have fun messing around on the keycap modeling playground.

Via r/ErgoMechKeyboards

Chip Tester Knows If Your Old Chips Are Working

[Noel’s Retro Lab] has looked at retro chip testers before, but in a recent video you can see below he’s looking at the Chip Tester Pro, a preassembled chip tester for vintage chips, especially those used in Commodore computers. The device looks good on the surface with a form factor like a calculator or cell phone, an LCD display, and a 48 pin ZIF socket.

The user interface is pretty simple. A rotary encoder and a big red button are about it. However, there are also some headers where you have to use jumpers to wire signals to the chip. The firmware gives you specific directions, but it is reminiscent of programming old punchcard machines with jumper wires. Luckily, it looks like you only route the power to the device so you don’t have many wires to connect (usually two or three).

Continue reading “Chip Tester Knows If Your Old Chips Are Working”

3D Printable Scope Probe Adapts To Your Needs

If there’s one this we electronics engineers are precious about, it’s our test gear. The instruments themselves can be obscenely expensive, since all that R&D effort needs to be paid back over a much smaller user base compared to say a DVD player. The test probes themselves can often come with an eye-watering price tag as well. Take the oscilloscope probe, pretty much everyone who tinkers with hardware will be familiar with. It’s great for poking around, looking desperately for inspiration when you’re getting stuck in with some debug, but you’ve only got two hands, and that doesn’t leave any spare for button pushing.

Hands-free probing solutions exist, but they can be pricey, flimsy or just a pain to use. Sometimes you just want to solder a wire and leave the probe attached, hoping the grounding lead doesn’t fall off and short something. We’ve seen many solutions to this, so here’s yet another one you can 3D print yourself, so it’s almost free to make.

The two-part 3D printed assembly embeds a pair of wires with a Molex 0008500113 sprung terminal on one end, which can be terminated with your choice of pins, headers or just a pair of plain ‘ol wires. Once you’ve dropped your wiring of choice inside, simply glue the halves with a little cyanoacrylate and you’re good to go. Designed around the Siglent 200MHz PP215 specifically, it is likely compatible with many other brands. Thingiverse only has STL files (sigh!) so it may be tricky to adapt it to your exact probe dimensions, but the idea is good at least.

There is no shortage of electronics probing solutions out there, and boy have we covered a few over the years, here’s a low-cost current probe, an Open Source 2 GHz scope probe, and if you want to get really hacky, look no further for inspiration than the 2019 Hackaday SuperCon SMD Challenge.

Thanks [daniel] for the tip!

Building A Hammer Powered By Gunpowder

Hammers are pretty straightforward tools. If you need more impact force, just get a bigger hammer. Alternatively, you can look at enhancing performance with chemical means, and we don’t mean by using steroids. No, instead, you can try hammering with the aid of gunpowder, and [i did a thing] has done just that.

The build relies on using 6.8mm blank cartridges designed for the Ramset brand of explosive nail drivers. However, rather than buying such a tool off the shelf, [i did a thing] built one in a traditional hammer format instead. The device looks like a hammer, with a hinge on the two-piece head, which allows a blank cartridge to be placed inside. When the hammer is swung at a hard surface, the impact triggers the blank which drives the nail forward with incredible force.

[i did a thing] was able to pierce steel with the device, and sent a nail clean through a surfboard, too. It’s a very dangerous thing, so if you’re experimenting in this space, do be careful. Video after the break.

Continue reading “Building A Hammer Powered By Gunpowder”

The HP3458A: King Of Multimeters For Three Decades

[Marco] looks at a lot of meters. However, he considers the HP3458A the best even though they were introduced more than 30 years earlier in 1989. Someone donated one to [Marco] but it presented some error messages on startup and exhibited erratic behavior, so he had some repairs to do.

The error codes hinted there were issues with the multislope analog to digital converter and that’s what sets the meter apart, according to [Marco]. The meter has 8.5 digits, so a normal conversion stage won’t cut it.

Continue reading “The HP3458A: King Of Multimeters For Three Decades”

caliper jaw tools

Printable Caliper Jaws Increase Precision, Deflect Derision

If you’ve watched as many machining videos as we have, no doubt you’ve seen someone commit the cardinal sin of metalworking: using caliper jaws to scratch a mark into metal. Even if it’s a cheap Harbor Freight caliper rather than an expensive Starrett or Mitutoyo tool being abused, derision and scorn predictably rain down upon the hapless sinner’s head.

The criticism is not without its merit, of course. Recognizing this, [Nelson Stoldt] came up with these clamp-on nosepieces designed to turn calipers into a better marking tool. Using stock calipers as marking gauges always introduces some error, since the jaws are equal lengths and thus have to be held at a slight angle to the workpiece in order to make a mark. The caliper jaws correct for this admittedly negligible error by extending one jaw, allowing it to ride on a reference face while the other jaw remains perpendicular to the workpiece. As a bonus, the short jaw has a slot to mount a steel marking knife, saving the caliper jaws from damage.

[Nelson] chose to 3D-print his caliper jaws, but they could just as easily be milled from solid stock to make them a little more durable. Then again, you could always 3D-print the calipers in the first place, and integrate these jaws right into them.