Anyone who’s ever cut ribbon, grosgrain or otherwise, may be dismayed by the frayed edge. There are methods of avoiding this, like cutting the ribbon diagonally, or double-diagonally into a forked point, or cutting it straight across and cauterizing the threads with a lighter. But if you have a thirteen dozen baker’s dozens’ worth of goodies to festoon, ain’t nobody got time for that.
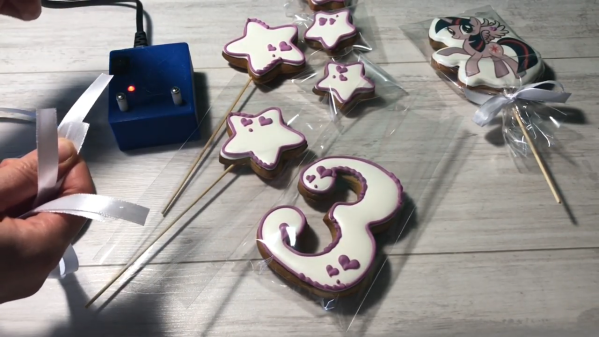
[IgorM92] made this hot wire ribbon cutter for his wife, who has a yummy-looking baking business. It combines the cutting and the heat-sealing into a single step by using the heating element from an old soldering iron. If you don’t have one of those, you could just as easily use the nichrome wire from an old hair dryer, a toaster, or wire-wound resistor.
Since the idea is essentially shorting a power source to heat up a wire, it should be done safely. [IgorM92] used a phone charger to condition mains power down to 5 V. There isn’t much else to the circuit, just a rocker switch, a power-indicating LED, and its resistor, but this simple project will no doubt save a lot of time and labor. Burn past the break to watch it ramp up production.
Nichrome wire is good for cutting foam, too. Here’s a bare-bones version that can be made in minutes.
Continue reading “Hot Wire Ribbon Cutter Ceremoniously Heats Up Productivity”