Artistic Images Made With Water Lens

It’s said that beauty and art can be found anywhere, as long as you look for it. The latest art project from [dmitry] both looks in unassuming places for that beauty, and projects what it sees for everyone to view. Like most of his projects, it’s able to produce its artwork in a very unconventional way. This particular project uses water as a lens, and by heating and cooling the water it produces a changing image.

The art installation uses a Peltier cooler to periodically freeze the water that’s being used as a lens. When light is projected through the frozen water onto a screen, the heat from the light melts the water and changes the projected image. The machine uses an Arduino and a Raspberry Pi in order to control the Peliter cooler and move the lens on top of the cooler to be frozen. Once frozen, it’s moved again into the path of the light in order to show an image through the lens.

[dmitry] intended the project to be a take on the cyclical nature of a substance from one state to another, and this is a very creative and interesting way of going about it. Of course, [dmitry]’s work always exhibits the same high build quality and interesting perspective, like his recent project which created music from the core samples of the deepest hole ever drilled.

Continue reading “Artistic Images Made With Water Lens”

Solar Heart Engineered To Beat For Decades

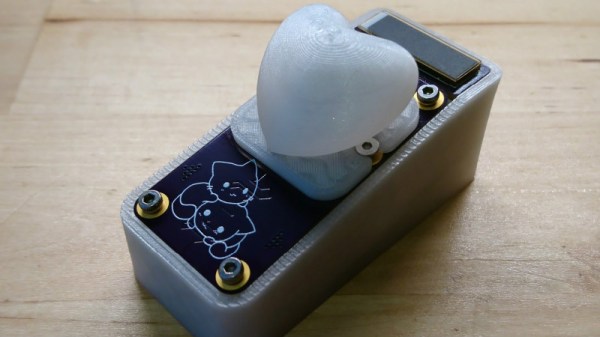
It’s often said that if something is worth doing it’s worth doing right, or maybe even worth overdoing. This is clearly a concept that [ANTALIFE] takes very seriously, as made abundantly clear by projects like the solar powered “beating” heart he made as a gift for his wife. What for most of us would have ended up being a junk bin build becomes a considerable engineering project in his hands, with a level of research and fine tuning that’s frankly staggering.

But [ANTALIFE] didn’t put this much thought into the device just for fun. He wants it to remain functional for as long as 30 years, and hopes he and the missus can still look on it fondly in their retirement years. Keeping an electronic device up and running for decades straight means you need to look carefully at each component and try to steer clear of any potential pitfalls.

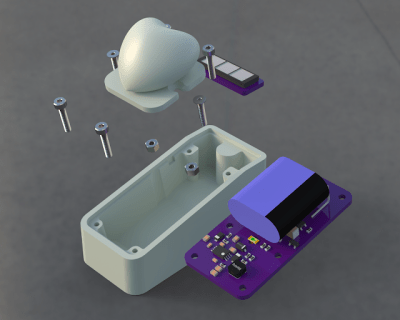
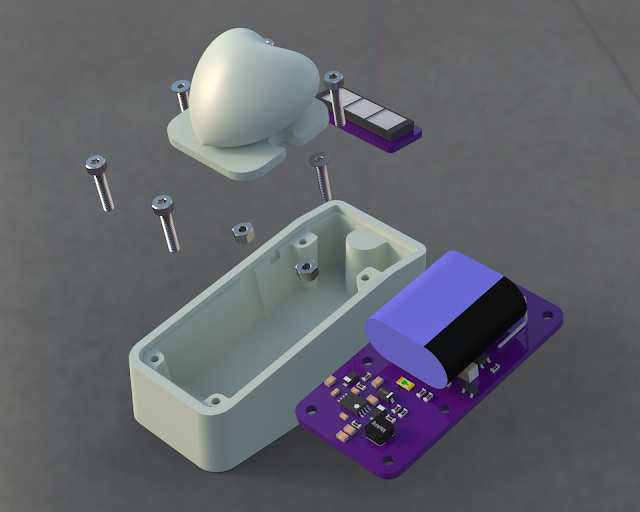
The biggest one was the battery. More specifically, the fact he couldn’t use one. The lifetime of most rechargeable batteries is measured in hundreds of cycles, which for a device which will be charged by solar every day, means the battery is going to start showing its age in only 4 to 5 years. That simply wasn’t going to cut it.

[ANTALIFE] did some digging and realized that the solution was to use a supercapacitor, specifically the AVX SCMS22C255PRBA0. This is little wonder is rated for a staggering half million cycles, which in theory means that even with daily use it should still take a charge in the year 3300. In practice of course there are a lot of variables which will reduce that lifetime such as temperature fluctuations and the Earth being conquered by apes; but no matter what caveats you put on the figure it should still make 30 years without breaking a sweat.

Similar thought was given to choosing a solar cell with a suitably long lifetime, and he did plenty of testing and experimentation with his charging circuit, including some very nice graphs showing efficiency over time, to make sure it was up to snuff. Finally he walks the reader though his light-sensitive ring oscillator circuit which gives the device its pleasing “breathing” effect once the lights go down.

We’d love to bring you an update on this device in 30 years to see how close [ANTALIFE] got, but as we’re still trying to work the kinks out of the mobile version of the site we can’t make any guarantees about what the direct-brain interface version of HaD might look like. In the meantime though, you can read up on the long term battle between supercapacitors and traditional batteries.

Continue reading “Solar Heart Engineered To Beat For Decades”

Wonderful Sculptural Circuits Hide Interactive Synthesizers

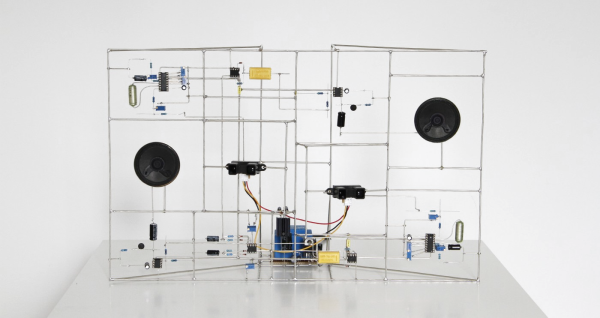
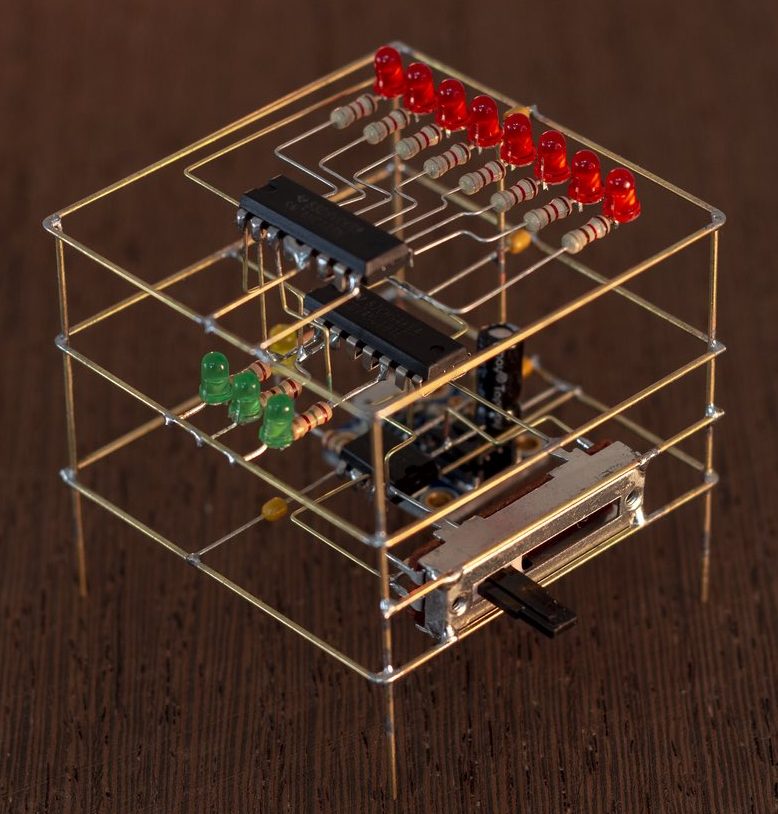
When it rains, it pours (wonderful electronic sculpture!). The last time we posted about freeform circuit sculptures there were a few eye-catching comments mentioning other fine examples of the craft. One such artist is [Eirik Brandal], who has a large selection of electronic sculptures. Frankly, we’re in love.

A common theme of [Eirik]’s work is that each piece is a functional synthesizer or a component piece of a larger one. For instance, when installed the ihscale series uses PIR sensors to react together to motion in different quadrants of a room. And the es #17 – #19 pieces use ESP8266’s to feed the output of their individual signal generators into each other to generate one connected sound.

Even when a single sculpture is part of a series there is still striking variety in [Eirik]’s work. Some pieces are neat and rectilinear and obviously functional, while others almost looks like a jumble of components. Whatever the style we’ve really enjoyed pouring through the pages of [Eirik]’s portfolio. Most pieces have demo videos, so give them a listen!

If you missed the last set of sculptural circuits we covered this month, head on over and take a look at the flywire circuits of Mohit Bhoite.

Thanks [james] for the tip!

Adding Vector Art To Your Eagle Boards

Badgelife and the rise of artistic PCBs are pushing the envelope of what can be done with printed circuit boards. And if you’re doing PCB art, you really want to do it with vectors. This is a surprisingly hard problem, because very few software tools can actually do DXFs and SVGs properly. Never fear, because [TallDarknWeirdo] has the solution for you. It’s in Eagle, and it uses Illustrator and Inkscape, but then again this is a hard problem.

The demonstration article for this example is just a Christmas tree. It’s somewhat topical green soldermask is standard, FR4 looks like wood, and silver and gold and all that. [TallDarknWeirdo] first split up this vector art into its component pieces — soldermask, bare FR4, and copper — then imported it into Inkscape to make the SVGs. This was then thrown into an online tool that creates something Eagle can understand. The results are better than importing bitmaps, resulting in much cleaner lines in the finished board.

Quick word of warning before we get into this, though: if you’re reading this in 2019 or later, this info might be out of date. Autodesk should be releasing a vector import utility for Eagle shortly, and we’re going to be taking a deep dive into this tool and complaining until it works. Until then, this is the best way to get vector art into Eagle.

Oh, and [TallDarknWeirdo] is none other than [Bradley Gawthrop], who’s put more time in crimping wires than anyone else we know.

Flywire Circuits At The Next Level

The technique of assembling circuits without substrate goes by many names; you may know it as flywiring, deadbugging, point to point wiring, or freeform circuits. Sometimes this technique is used for practical purposes like fixing design errors post-production or escaping 
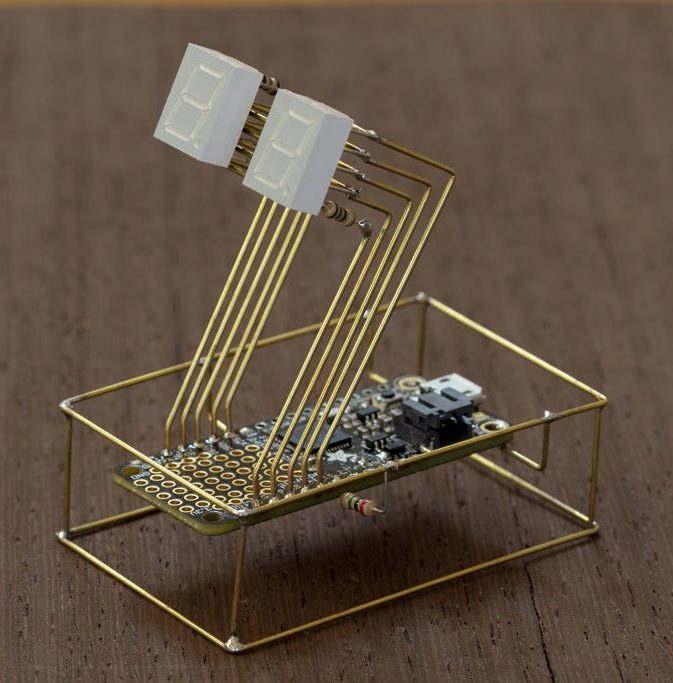
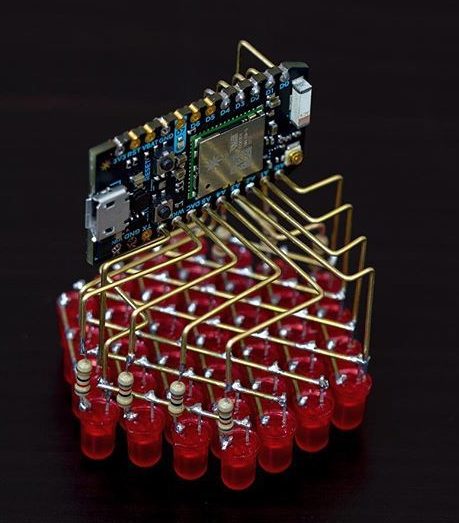
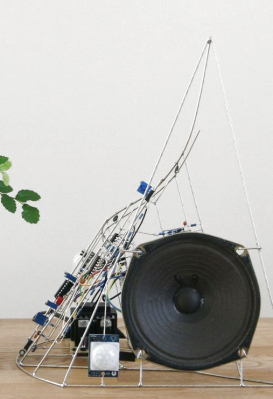
tiny BGA components (ok, that one might be more cool than practical). Perhaps our favorite use is to create art, and [Mohit Bhoite] is an absolute genius of the form. He’s so prolific that it’s difficult to point to a particular one of his projects as an exemplar, though he has a dusty blog we might recommend digging through [Mohit]’s Twitter feed and marveling at the intricate works of LEDs and precision-bent brass he produces with impressive regularity.

So where to begin? Very recently [Mohit] put together a small wheeled vehicle for persistence of vision drawing (see photo above). We’re pretty excited to see some more photos and videos he takes as this adorable little guy gets some use! Going a little farther back in time there’s this microcontroller-free LED scroller cube which does a great job showing off his usual level of fit and finish (detail here). If you prefer more LEDs there’s also this hexagonal display he whipped up. Or another little creature with seven segment displays for eyes. Got those? That covers (most) of his last month of work. You may be starting to get a sense of the quality and quantity on offer here.

We’ve covered other examples of similar flywired circuits before. Here’s one of [Mohit]’s from a few years ago. And another on an exquisite headphone amp encased in a block of resin. What about a high voltage Nixie clock that’s all exposed? And check out a video of the little persistence of vision ‘bot after the break.

Thanks [Robot] for reminding us that we hadn’t paid enough attention to [Mohit]’s wonderful work!

Continue reading “Flywire Circuits At The Next Level”

The (UV) Writing’s On The Wall

[Michael Karliner]’s Belshazzar, named for the Biblical character upon whose wall the writing appeared, is a unique light painting machine, that tracks an array of UV LEDs across a glow-in-the-dark background to paint transient dot-matrix letters in light. It was one of many cyberpunk-themed art pieces in Null Sector at the 2018 Electromagnetic Field hacker camp this summer.

The row of LEDs hangs down from a carriage that traverses a tubular rail, and is edged forward by means of a stepper motor driving a roller. This arrangement delivers the benefit that it can be scaled for displays of any length. The LEDs are driven from an Arduino via a Texas Instruments TLC5940 PWM driver ship.The result can be seen in the video below the break, and those who saw it at EMF may remember it tracing suitably dystopian phrases.

Continue reading “The (UV) Writing’s On The Wall”

Sprite_TM’s Magic Paintbrush

When it comes to hackers we love, there’s no better example than Jeroen Domburg, a.k.a. Sprite_TM. Sprite’s now working for Espressif, makers of the fantastic ESP8266 and ESP32, where he created a miniature Game Boy and turned this PocketSprite into a real product. He’s installed Linux on a hard drive, and created a Matrix of virtualized Tamagotchis. In short, if you’re looking for someone who’s building the coolest, most technical thing of sometimes questionable utility, you need look no further than Sprite_tm.

Sprite was back at this year’s Superconference, and again he’s bringing out the big guns with awesome hardware hacks. This time, though, Sprite is tapping into his artistic side. Sprite is very accomplished in making PCB art and DaveCAD drawings, but actual art is something that’s been out of reach. No problem, because you can just buy an inkjet printer and make your own art. Sprite’s doing something different, and he’s turning his inkjet into a Magic Paintbrush.

Continue reading “Sprite_TM’s Magic Paintbrush”