Geocache Locator Is The Gift That Keeps On Giving

Depending on how you look at things, the holidays could be seen as either an excuse to spend money or an excuse to get creative. We imagine many Hackaday readers would rather head to their workbench than the mall when it comes time for gift giving, and [Sean Hodgins] is no different. He came up with the idea of hiding geocaches around his nephew’s neighborhood and building him a locator device to find them. The locator itself is intended to grow with his nephew, allowing him to reprogram it or use its parts for something completely different down the road.

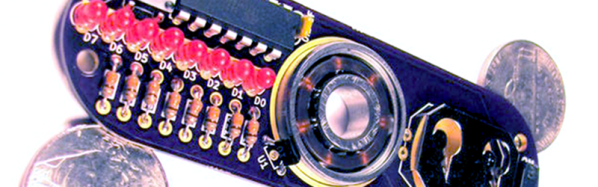
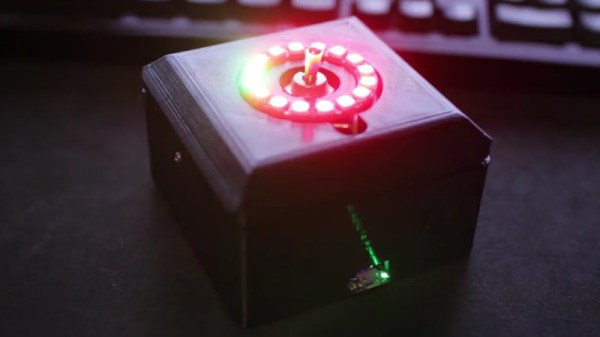
The main components tucked inside of the 3D printed case of the locator are an Adafruit Trinket, a GPS receiver, and a compass module. The Adafruit NeoPixel Ring is of course front and center, serving as the device’s display. To power the device there’s an old battery, a LiPo charger circuit, and a 5V converter.

One of the goals for the project was that it could be constructed out of things [Sean] already had laying around, so some concessions had to be made. The Trinket ended up having too few pins, the compass lacks an accelerometer, and the switches and buttons are a bit clunky for the build. But in the end it comes together well enough to get the job done, and at least he was able to clear some stuff out of his parts bins.

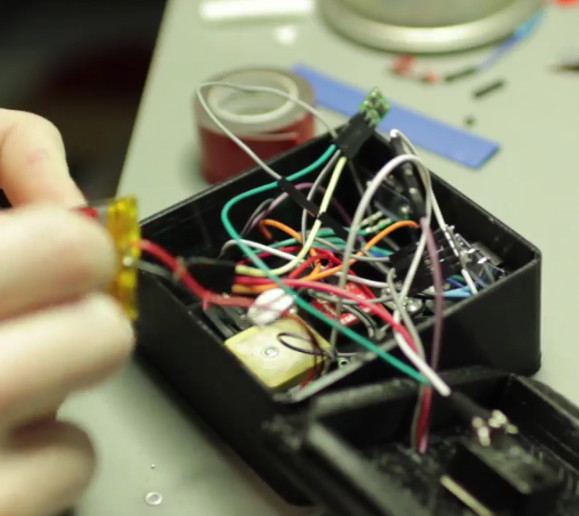
To allow its owner to disassemble and potentially rebuild it into something else later, no soldered joints were used in the construction of the locator. Everything is done with jumper wires, which lead to some interesting problem solving such as using a strip of pin header as a bus bar of sorts. A bit of heat shrink over the bundle holds everything together and prevents shorts.

Location-aware gadgets happen to be an extremely popular gift choice among the hacker crowd. We’ve covered everything from devices cobbled together from trash to hardware which could pass for a commercial product.

Continue reading “Geocache Locator Is The Gift That Keeps On Giving”

Light Switch For The Lazy

[Will Donaldson] has whipped up a quick hack for anyone thinking of dipping their toe into home automation — or otherwise detest flicking off the bedroom light before navigating their way to their bed: a remote control light switch!

This remote switch uses a sg90 servo, an Arduino Uno, and pairs of ATtiny85s with HC-05 Bluetooth modules assembled on protoboards. The 3D printed mount screws easily on top of a standard light switch cover while still allowing the switch to be flipped the old-fashioned way. It’s also perfect as a temporary solution — [Donaldson] is presently renting his apartment — or for those unwilling to mess with the mains power of their abode.

Continue reading “Light Switch For The Lazy”

Upgrading A USB Soldering Iron!

Seeing the popularity of the TS-100 soldering iron, GitHub user [ole00] found himself desirous of a few of its features, but was put off by its lack of a power supply. What is a hacker to do? Find a cheaper option, and hack it into awesomeness.

[ole00] stumbled across the inexpensive ZD-20U and — despite a handful (sorry!) of issues — saw potential: it’s compact, lightweight, and powered via a USB power cable. Wanting to use as much of the ZD-20U’s original board as possible, the modifications were restricted to a few trace cuts and component swaps. The major change was swapping out the 555 timer IC controlling the iron with am ATtiny13a MCU to give it a bit more control.

Continue reading “Upgrading A USB Soldering Iron!”

Finally, A Fidget Spinner We Can Love

We’ve been frankly mystified at the popularity of fidget spinners. After all, we can flip an ink pen around just fine. However, [MakersBox] just sold us on what he calls the geek spinner. The fact that the spinner is actually a PCB and has parts on it, would probably have been cool enough. However, the spinner also has a persistence of vision LED set up and can display 12 characters of text as it spins. Because the board is simple and uses through hole components, it would be a great project for a budding young hacker. You can see a video below.

The instructions are geared towards someone attempting their first project, too. If you know how to solder and insert a DIP IC, you might find you’ll skim them, but it is pretty straightforward. The 8 LEDs on one side operate from an ATTiny CPU, which you can program with an Arduino. The spinner has a hall effect sensor and a magnet to figure out the index position of the spin — crucial for displaying text.

Although the board attempts to balance the components, the battery side is apparently a little heavy. The suggestion is to add some weight using some hardware or solder to that side. Speaking of solder, the bearing in the center solders to the PCB. That’s going to take a lot of heat, so maybe you can finally use Dad’s soldering gun that has been gathering dust under your bench.

We liked the polar graph provided to help you set up the code for your own messages. The text implies there is a picture of one of these graphs filled out, but we think he forgot to include that picture. However, it is clear enough how to use it, and it would make it very easy to make your own text or any design that the spinner could produce.

This isn’t the first POV spinner, by the way. [MakersBox] has a nice set of acknowledgments for projects he’s seen or borrowed from, but the other one he mentions uses surface mount. Granted, surface mount isn’t a problem for most people these days, but starting out, it might be nice to stick with a through-hole design. If you want a more useful spinner, you can always make some music.

Continue reading “Finally, A Fidget Spinner We Can Love”

Continuity Tester Uses The ATtiny85’s Comparator

There’s an inside joke among cyclists – the number of bikes you need is “n+1”, where “n” is your current number of bikes. The same probably also applies to the number of tools and equipment a hacker needs on their workbench. Enough is never enough. Although [David Johnson-Davies] has a couple of multimeters lying around, he still felt the urge to build a stand-alone continuity tester and has posted details for a super-simple ATtiny85 based Continuity Tester on his blog. For a device this simple, he set himself some tall design goals. Using the ATtiny85 and a few SMD discretes, he built a handy tester that met all of his requirements and then some.

The ATtiny85’s Analog Comparator function is perfectly suited for such a tester. One input of the comparator is biased such that there is a 51 ohm resistor between the input and ground. The output of the comparator toggles when the resistance between the other input and ground is either higher or lower than 51 ohms. Enabling internal pullup resistors in the ATtiny85 not only takes care of proper biasing of the comparator pins, but also helps reduce current consumption when the ATtiny85 is put to sleep. The test current is limited to 100 μA, making the tester suitable for use in sensitive electronics. And enabling the sleep function after 60 seconds of inactivity reduces standby current to just about 1 μA, so there is no need for a power switch. [David] reckons the CR927 button cell ought to last pretty long.

For those interested in building this handy tester, [David] has shared the Eagle CAD files as well as the ATtiny85 code on his Github repository or you could just order out some boards from OSHpark.

DIY Pyrography Power Supply

Ever wanted to try your hand at wood burning? If you already threw away your first soldering iron—you know the one: plugged straight in to the wall, no temperature control, came with a thick piece of tin foil to rest it on—don’t despair. Pyrography pens don’t cost that much. The variable power supply they plug into, though: that’s another story. Those cost more than they probably should.

[td0g] took the plunge into pyrography a while back, and wanted to build his own controller from an old ATX power supply. Why not? It should be more than capable of doing the job. Even the most heavy-duty pyrography pens only draw 10A, and the 3.3V line showed to be rated for 30A. All [td0g] had to do was add a PWM with a MOSFET and a ‘Tiny85.

The project nearly became Fail of the Week fodder after [td0g] saw huge voltage spikes across the MOSFET. A 47kΩ resistor took care of those, and a heat sink salvaged from the junk bin will prolong the transistor’s life. [td0g] added a push button that cycles through five heat settings, and an LED to show the status. After that, all he had to do was add a male RCA input to connect the pens he already has.

Okay, so you wouldn’t be caught dead dropping money on some fancy power supply for this new hobby. Don’t want to buy pens, either? Roll your own from a plasma arc lighter.

Bluetooth Bedroom Clock!

When [decino]’s old bedroom clock finally bit the dust, he built himself a new one from scratch for fun and functionality.

Initially, he wanted to solder Adafruit NeoPixel lights onto four prototype boards, using a mini-USB for power and a DS1307 to keep the time. However, after soldering the board for the first digit and realizing that carrying on with the other three would be a huge pain, he switched to etching the boards instead — a far more efficient solution. In keeping with this time-saving mindset, he added a Bluetooth module that would allow him to update the clock from his phone whenever the DS1307 started dropping minutes or whenever daylight savings time is in effect.

Continue reading “Bluetooth Bedroom Clock!”