Why Wait? Just Plate Your Own PCB Vias

[Jan Mrázek] is a pro when it comes to rolling his own PCBs. He can crank out a 6/6 mil double-sided PCB in 45 minutes flat. As a challenge to his prowess, he decided to experiment with plating through-hole PCBs at home, because sometimes you just can’t wait for China to deliver the goods.

The key here is to make a non-conductive surface—the walls of holes drilled in a sheet of copper clad–conductive. While there are some established ways of doing this at home, the chemicals are difficult to source. When his local supplier started stocking colloidal graphite paint, which is used to prevent ESD and fix non-working remote control buttons, he decided to try it.

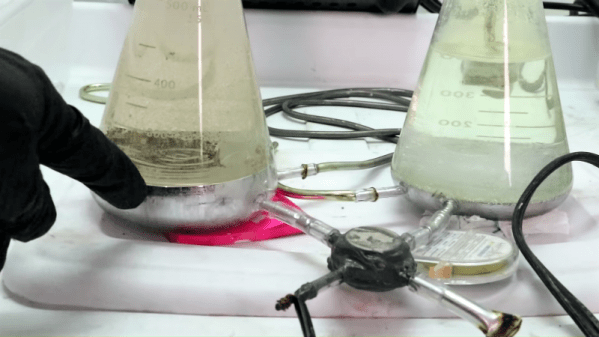
[Jan] drilled up a board with holes ranging from 0.1mm up to 8mm, polished it, and gave it an acetone bath. He sprayed each side with graphite and cured it at 100 °C for 20 minutes. At this point, wall hole resistance measured 21 Ω. [Jan] wet-sanded away the graphite and set up an electroplating bath. Right away, he could see a layer of copper forming on the holes. After 90 minutes, he polished the board again and separated the vias to prepare for the real test: solder. This time, every hole except the smallest size reported a resistance of 0.1 Ω. But they all sucked solder through the vias, making this experiment a success.

[Jan] concluded that this is a simple and effective process, but is rarely worth the effort. We wonder how the simplicity of this method compares to drilling wells instead of holes, filling them with conductive ink, and then drilling the rest of the via.

Via [Dangerous Prototypes]

Coffee, Conspiracy, And Citizen Science: An Introduction To Iodometry

I take coffee very seriously. It’s probably the most important meal of the day, and apparently the largest overall dietary source of antioxidants in the United States of America. Regardless of whether you believe antioxidants have a health effect (I’m skeptical), that’s interesting!

Unfortunately, industrially roasted and ground coffee is sometimes adulterated with a variety of unwanted ‘other stuff’: corn, soybeans, wheat husks, etc. Across Southeast Asia, there’s a lot of concern over food adulteration and safety in general, as the cost-driven nature of the market pushes a minority of vendors to dishonest business practices. Here in Vietnam, one of the specific rumors is that coffee from street vendors is not actually coffee, but unsafe chemical flavoring agents mixed with corn silk, roasted coconut husks, and soy. Local news reported that 30% of street coffee doesn’t even contain caffeine.

While I’ve heard some pretty fanciful tales told at street side coffee shops, some of them turned out to be based on some grain (bean?) of truth, and local news has certainly featured it often enough. Then again, I’ve been buying coffee at the same friendly street vendors for years, and take some offense at unfounded accusations directed at them.

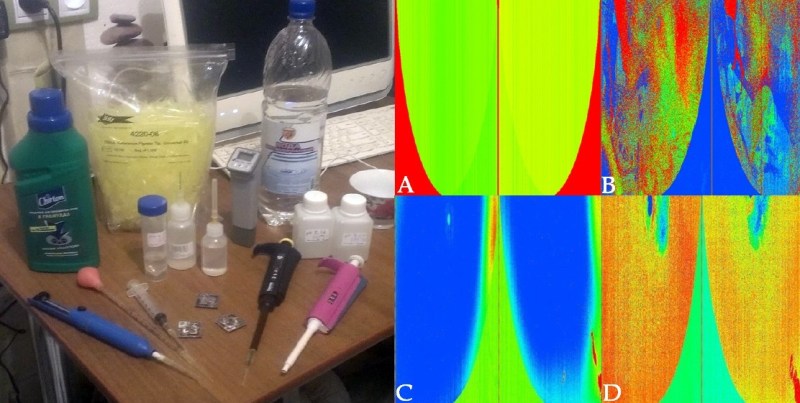
This sounds like a job for science, but what can we use to quantify the purity of many coffee samples without spending a fortune? As usual, the solution to the problem (pun intended) was already in the room:

Continue reading “Coffee, Conspiracy, And Citizen Science: An Introduction To Iodometry”

Thermite Creates A Sword

Thermite can cut cars in half but [TheBackyardScientist] relies on its ability to create rather than destroy. In fact, thermite was the key component when he casts a solid metal sword. The casting doesn’t require a furnace since the heat is produced by the thermite itself.

In case it wasn’t abundantly clear: this procedure is not without risk.

[TheBackyardScientist] compares two types of iron oxide, red and black, then judges their usability based on the post-ignition mass. His goal is to get the most metal from a single reaction. He also adds some stainless steel beads to improve the quality of the casting and to utilize some of the excess heat.

With encouragement from his neighbors and a couple of trials with fire bricks, buckets, and sand, [TheBackyardScientist] is successful. The resulting sword is treated, given a handle, sharpened, then scientifically tested with a variety of things found in a regular kitchen.

If you look in the background of [TheBackyardScientist]’s workshop, you may notice his molten PEWter gun. This steel sword is an upgrade from his recycled pewter sword a few years ago.

Continue reading “Thermite Creates A Sword”

Restoring A Tonka Truck With Science

The yellow Tonka Truck. Instantly recognizable by any child of decades past, that big metal beast would always make you popular around the sandbox. There were no blinking lights to dazzle, no noises to be heard (unless you count the hard plastic wheels rolling on concrete), even the dumping action is completely manual. But back then, it was a possession to be treasured indeed.

So it’s perhaps no surprise that there is a certain following for these classic trucks today, though like with most other collectibles, a specimen in good condition can be prohibitively expensive. The truck that [PoppaFixIt] found in the trash was certainly not one of those specimens, but with some patience and knowledge of basic chemistry, he was able to bring this vintage toy back to the present.

The first step was to disassemble the truck. Before they switched over to Chinese mass production, these trucks were built with actual rivets. After drilling them out and unfolding the little metal tabs that toy makers loved back in the day, he was able to separate the metal body of the truck from the plastic detail bits. The plastic parts just needed a fresh coat of paint, but the rusted metal body would need a bit more attention.

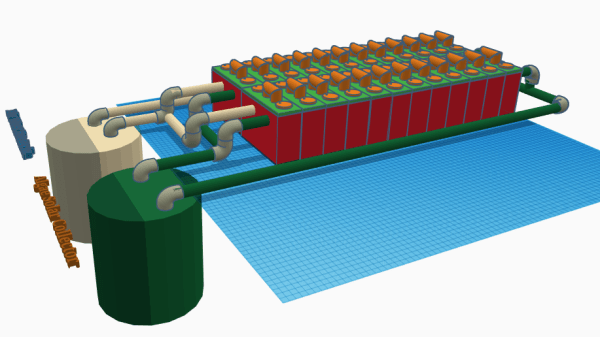
Remembering a tip he read online, [PoppaFixIt] decided to attempt electrolytic rust removal to get the metal parts back into serviceable condition. A big plastic bin, some washing soda, and old steel window weights for his sacrificial anodes was all the equipment he needed for the electrolysis tank. To power the chemical reaction he used a standard 12 volt car battery and charger wired in parallel; this step is important, as he notes most newer chargers are smart enough not to work unless they see a real battery connected.

After running the setup overnight, the collected rust and junk on the window weights was proof enough the process worked. From there, it was just a fresh coat of yellow paint, a new sticker kit from eBay, and his Tonka truck was ready to face another 30+ years of service.

If you’re looking to restore things larger than a child’s toy, you may be interested in the much larger electrolytic setup we’ve covered previously. Of course if you’re really pressed for time, you could try blasting the rust away with a laser.

Tinning Solution From The Hardware Store

Making your own printed circuit board at home often leads to a board which looks homemade. Exposed copper is one of the tell-tale signs. That may be your aesthetic and we won’t cramp your style, but exposed copper is harder to solder than tinned copper and it likes to oxidize over time. Tinning at home can bring you a step closer to having a full-featured board. In the video after the break, famed chemist [nurdrage] shows us how to make tinning solution at home in the video below the break.

There are only three ingredients to make the solution and you can probably find them all at a corner hardware store.

  • Hydrochloric acid. Also known as muriatic acid.
  • Solid lead-free solder with ≥ 95% tin
  • Silver polish containing thiourea

Everything to pull this off is in the first three minutes of the video. [nurdrage] goes on to explain the chemistry behind this reaction. It doesn’t require electricity or heat but heat will speed up the reactions. With this kind of simplicity, there’s no reason to make untinned circuit boards in your kitchen anymore. If aesthetics are very important, home tinning yourself allows you to mask off certain regions and have exposed copper and tin on the same board.

[nurdrage] is no stranger to Hackaday, he even has an article here about making your own PCB etchants and a hotplate to kick your PCB production into high gear.

Thanks for the tip, [drnbutyllithium].

Continue reading “Tinning Solution From The Hardware Store”

Chemotransfer For DIY PCBs

Making PCBs with the toner transfer method has been around since you could buy your traces at Radio Shack. There are a million techniques for removing copper from sheets of fiberglass, from milling to using resist pens, to the ubiquitous laser printer toner transfer. Here’s a technique we haven’t seen before. [Darko Volk] is calling this ‘chemotransfer’. It’s mostly a laser printer toner transfer process, but the toner is transferred from paper to copper with the help of a special mix of solvents.

This chemotransfer process is almost identical to the usual process of making a toner transfer PCB. First, the design is printed in reverse on dextrin-coated paper, the paper is placed down on polished copper, the entire assembly is sent through a laminator, and finally the board is etched with the chemical of your choice. The key difference here is a solvent applied to the copper just before the design is laid down. [Darko Volk] made a mixture of 25% “cleaning petrol” (benzene, naphtha, or gasoline, or some sort of light hydrocarbon, apparently), 5% linseed oil, and 70% isopropanol. This apparently aids in releasing the toner from the paper and sticking it down to the copper.

From there, the process is effectively a standard toner transfer process. [Darko Volk] is using a solution of sodium persulphate for the etch, and rigged a camera up to a CNC machine for the drilling.

This process can be expanded to two-layer boards very easily using a light table to align the layers of paper before placing them down on the copper. You can check out a video of the fabrication of a single side and double sided board below.

Thanks [Andrej] for the tip.

Continue reading “Chemotransfer For DIY PCBs”

Cheap 3D Printers Make Cheaper(er) Bioprinters

In case you missed it, prices on 3D printers have hit an all time low. The hardware is largely standardized and the software is almost exclusively open source, so it makes sense that eventually somebody was going to start knocking these things out cheap. There are now many 3D printers available for less than $300 USD, and a few are even dipping under the $200 mark. Realistically, this is about as cheap as these machines are ever going to get.

A startup by the name of 3D Cultures has recently started capitalizing on the availability of these inexpensive high-precision three dimensional motion platforms by co-opting an existing consumer 3D printer to deliver their Tissue Scribe bioprinter. Some may call this cheating, but we see it for what it really is: a huge savings in cost and R&D time. Why design your own kinematics when somebody else has already done it for you?

Despite the C-3PO level of disguise that 3D Cultures attempted by putting stickers over the original logo, the donor machine for the Tissue Scribe is very obviously a Monoprice Select Mini, the undisputed king of beginner printers. The big change of course comes from the removal of the extruder and hotend, which has been replaced with an apparatus that can heat and depress a standard syringe.

At the very basic level, bioprinting is performed in the exact same way as normal 3D printing; it’s merely a difference in materials. While 3D printing uses molten plastic, bioprinting is done with organic materials like algae or collagen. In the Tissue Scribe, the traditional 3D printer hotend has been replaced with a syringe full of the organic material to be printed which is slowly pushed down by a NEMA 17 stepper motor and 8mm leadscrew.

The hotend heating element and thermistor that once were used to melt plastic are still here, but now handle warming the metal frame used to hold the syringe. In theory these changes would have only required some tweaks to the firmware calibration to get working. Frankly, it makes perfect sense, and is certainly a much easier to pull off than some of the earlier attempts at homebrew biological printers we’ve seen.

We won’t comment on the Tissue Scribe’s price point of $999 USD except to say that in the field of bioprinters, that’s pocket change. Still, it seems inevitable that somebody will build and document their own bolt-on biological extruder now that 3D Cultures has shown how simple it really is, so they may find themselves undercut in the near future.

If all this talk of hot extruded collagen has got you interested, we’ve seen some excellent resources on the emerging field of bioprinting that will probably be right up your alley.

Continue reading “Cheap 3D Printers Make Cheaper(er) Bioprinters”