A truly random number is something that is surprisingly difficult to generate. A typical approach is to generate the required element of chance from a natural and unpredictable source, such as radioactive decay or thermal noise. By contrast it is extremely easy to generate numbers that look random but in fact follow a predictable sequence. A shift register with feedback through an XOR of its output and one of its stages will produce a continuous stream of pseudo-random bits that repeat after a set period.
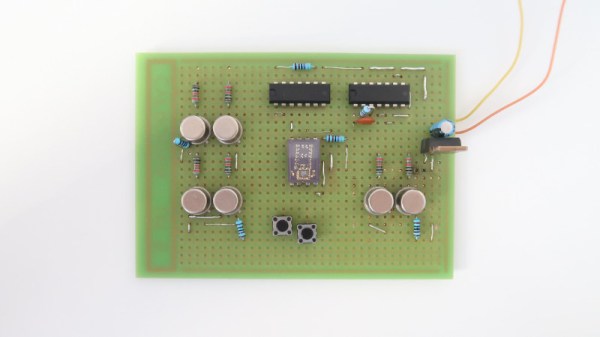
[KK99] has created the simplest possible pseudo-random binary sequence generator, using a three-bit shift register. It’s realised on a pleasingly retro piece of perfboard, with a CD4047 as clock generator and a 74HC164 shift register doing the work. Unusually the XOR gate is made from discrete transistors, 2N3053s in bulky TO39 packages, and for a particularly old-fashioned look a vintage HP LED display shows the currently generated number. A relatively useless pseudo-random sequence with a period of seven bits is the result, but the point of this circuit is to educate rather than its utility. You can see it in operation in the video below the break.
We had a demonstration of the dangers of using a pseudo-random sequence back in 2016. The German military cipher nicknamed “Tunny” by British codebreakers relied upon a mechanical sequence generator, and the tale of its being cracked led to the development of Colossus, the first stored-program electronic computer.
Continue reading “The Simplest Of Pseudo Random Number Generators”