Holograms, From Your Plotter

When mass-printed holograms appeared on magazines in the 1980s they were a huge novelty, before degrading to the level of kids’ stickers in the years since. At the time they were seen as not for ordinary people to make, but the truth is they can be created without lasers or an optics lab. [Jordan Matelsky] is here to show us how they can be made using as humble a device as a pen plotter.

The effect of an interference pattern from a set of fine lines in a thin film can be demonstrated at its simplest with an oily finger and a mobile phone screen, and once he’s demonstrated that he takes us through some of the theory involved in shifting the light to make an image. There are some false starts with different materials, but eventually he shows us some finished holograms scribed on the polycarbonate of a CD case. It seems you really can make a hologram with a pen plotter. If these images interest you, we’ve looked deeper into the subject in the past. Meanwhile, one of the plotter-scribed holograms can be seen below. Continue reading “Holograms, From Your Plotter”
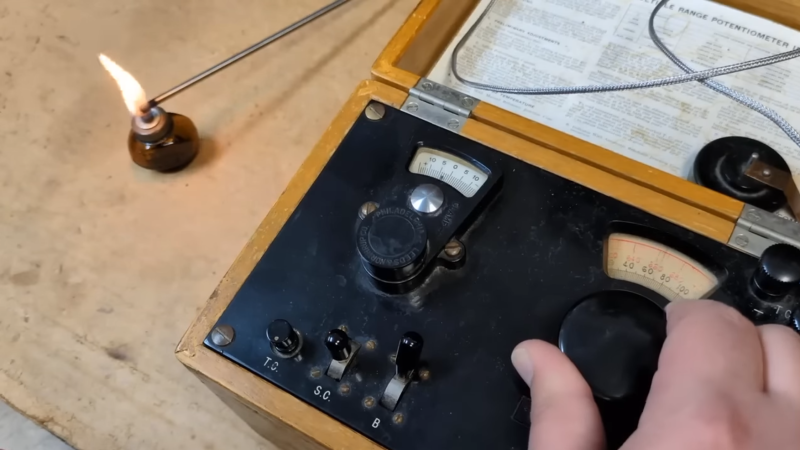
A man's hand is shown adjusting a black Bakelite dial on the front panel of an instrument. The instrument is contained in a wooden box, and to the left of the box, a thermocouple is inserted into the flame of an alcohol burner.

Reading A Thermocouple With Mercury And A Potentiometer

If you’ve ever thought about the nomenclature of electrical components, potentiometer stands out as a strange name, etymologically suggesting something like a voltmeter. In fact, the component took its name from a voltage-measuring instrument also named the potentiometer. [Alnwlsn] recently took a look at one such device, which was integrated into a thermometer, and the Weston cell used to calibrate it.

The potentiometer (instrument) has a galvanometer at its heart. One side of the galvanometer is connected to the center lead of a potentiometer (component) which spans a voltage source; the other side is connected to a reference voltage. The potentiometer can be adjusted until no current flows through the galvanometer, at which point both sides match the reference voltage. The reference voltage source can then be replaced with some other source, which can then be measured relative to the reference by adjusting the potentiometer until both the voltages match. The reference voltage source is a Weston cell, which uses two mercury electrodes, one amalgamated with cadmium, to produce a stable 1.018 volt reference; despite being 74 years old, this particular cell still measured at 1.017 volts.

In this case, the potentiometer was made to measure the voltage produced by a thermocouple. After calibrating the potentiometer and connecting an iron-constantan thermocouple, [Alnwlsn] tested it with ice and boiling water, and in each case it proved accurate. In a more extreme test, it captured the temperature difference between the base and the tip of an alcohol flame.

For a bit more on the history of similar devices, check out the history of Weston Electrical Instruments.

Continue reading “Reading A Thermocouple With Mercury And A Potentiometer”

Sharkfin Bites Attack Shark

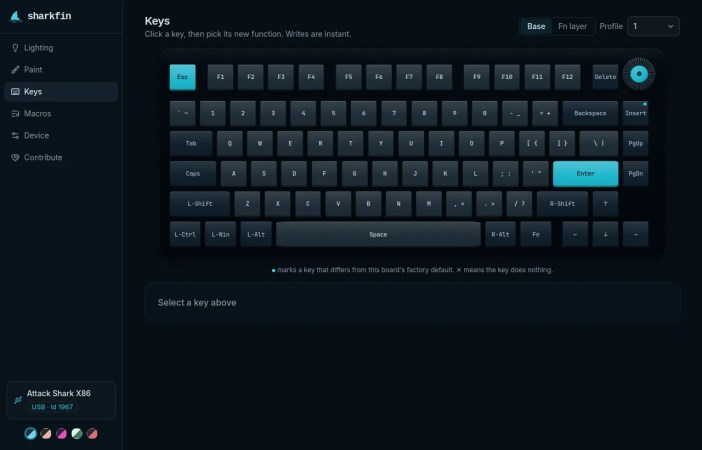
The Attack Shark is a modern keyboard with fancy magnetic keyswitches, macros, configurable blinky LEDs, and more. The problem is that the configuration software only works on Windows, so [JR Lanteigne] set out to fix that. Along the way, he completely worked out the configuration protocol that this keyboard needs, and wrote the comfortable sharkfin web-app so that you can flash yours too.

Don’t have an Attack Shark? Well, you might have one of the 522 other boards that are made on the same ROYUAN hardware, but are re-branded under 100 different names. Want to find out if yours is supported? Look it up in the list here, or just plug it in and find out.

[RJ]’s path to reverse engineering the config protocol wasn’t entirely straightforward, but since the “Windows only” application was actually an Electron app under the hood, he patched it to run on Linux and logged a few configuration sessions. Of course there are gotchas like two different firmware generations and the fact that writing to flash too fast put the keyboard into a boot loop, but after these problems were surmounted, it just remained to map all of the bytes out, and wrap it all up in a user-friendly application.

We don’t have one of these fancy-schmancy keyboards, but if we did, we’d certainly be glad to have the configuration protocol documented. Nothing is worse than finding out that the company that made your keyboard has gone belly-up, and you’re left with a backlight setup that doesn’t match your new deskpad. If you’re a keyboard-head and you don’t already follow [Kristina]’s series, well you should.

E-ink Writing Deck Rocks A Typewriter Aesthetic

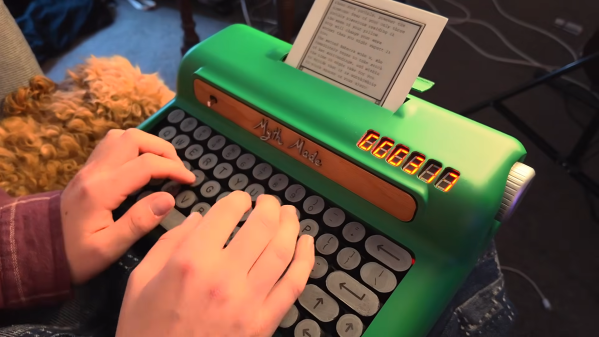
[Myth Made] has a goal to get into writing. However, she likes to do things the aesthetic way, rather than the easy way. Thus, she has eschewed simple word processing on a conventional computer, instead choosing to build a remarkably attractive writing deck styled after a classic typewriter.

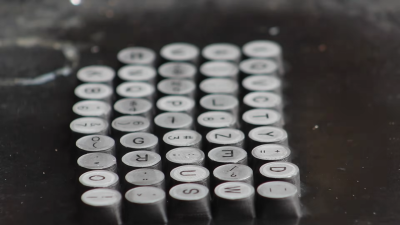
The keycap marking technique is worth watching the video for on its own.

The build began with a mechanical keyboard with a compact layout. The square keycaps were swapped out for custom 3D printed versions that were rounded to suit the desired look. [Myth Made] used a neat technique where the caps were colored in with a paint marker and then ran through a laser engraver to bond the paint to the surface to make all the key markings.

With the input side sorted, the rest of the build could progress. The typewriter shell was printed in multiple parts, and then welded together with acetone. This was then covered with an ABS-acetone solution that helped remove some of the surface artifacts, before priming and paint. As for the electronics side, a Raspberry Pi Zero runs the show, hooked up to a Waveshare e-ink display which can be cranked up and down like a piece of paper coming out of a typewriter. There’s also a lovely 7-segment display which displays the current word count.

It’s a fun build that looks utterly joyous to use. Sometimes leaning into the aesthetic side of a project is what makes it so magical.

Continue reading “E-ink Writing Deck Rocks A Typewriter Aesthetic”

Calculator UI Is More Complex Than You Might Think

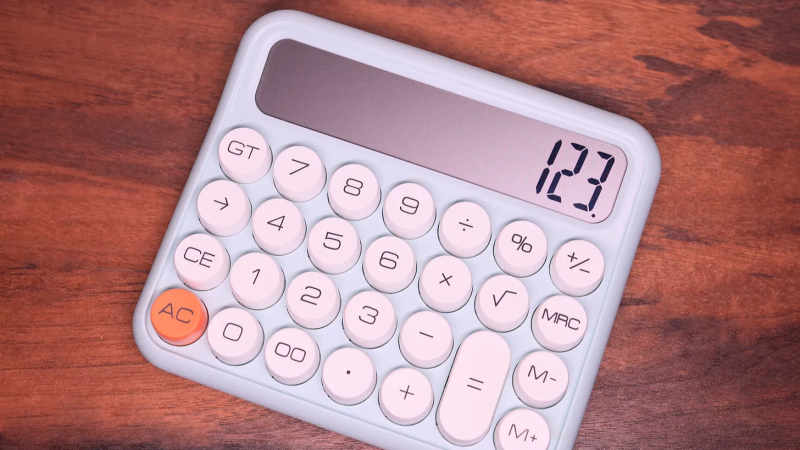
Calculators are so ubiquitous and so familiar that they are easy to take for granted in many different ways. [lcamtuf] points out one that has probably never occurred to many of us: the user interface for a calculator is an unexpectedly complex thing.

The internal logic to support sequential inputs and multiple operators in a way that feels intuitive is a complex thing.

Resolving something like 1 + 2 = is pretty straightforward but complexity compounds rapidly after that, with numerous special cases. Let’s imagine one decides to program a simple calculator UI as a weekend project. The development process might look a little like this:

  1. User types in 1 + 2 = and the calculator displays 3. What happens if the user immediately presses -?
  2. No problem, just consider the result of the previous operation as an already-there input. So we’ll have 3 - for this next operation, and wait for more.
  3. Unless we should have treated that - as a negative sign for whatever number is coming next, making it a negative number? No, ignore that. Just treat whatever results from pressing equals as a pre-typed input.
  4. Unless the user hits a number. Because if they hit 2 (for example) then we’ll have a 32 and not a 2 which they probably, definitely don’t expect. So that’s a special case and we should insert a clear if that happens.
  5. Oh, better clear if the user enters a decimal, too.
  6. I’m going to need a coffee…

And that’s just the tip of the iceberg. Imagine trying to figure all this out for the very first time, without the benefits of habit and history to fall back on.

The fact is that supporting the apparently trivial behavior of a simple calculator requires an underlying complex state machine that deals with all kinds of special cases in order to make the UI feel intuitive. And that’s just for a basic four-function calculator; we haven’t even touched on how special keys like % should behave.

We know [lcamtuf] speaks from experience, not just because of their deep knowledge of calculator history but because they rolled their own calculator that uses voltmeters as digit displays and there’s nothing like actually implementing something to make one appreciate it.

A person's hand is shown holding a glass flask in a dark room. An orange-red glow is emanating from the flask in a patches, forming a splash-like pattern near the base of the flask.

A Sloshing-Mercury-Powered Neon Light

In 1675, while transporting a barometer by night, the astronomer Jean Picard noticed a glow inside its glass tube, just above the mercury. As the mercury sloshed and splashed across the surface of the glass, a static electric charge had built up, which was discharging by ionizing the residual gas molecules inside the evacuated tube. [Styropyro] recreated this effect, and found that the dim glow could be made much stronger by adding some noble gas to the tube.

It starts with a simple recreation: he took a volumetric flask, attached a narrow glass stem to the mouth, added some mercury to the flask, evacuated it with a vacuum pump, and sealed off the glass stem. This produced a faint glow when shaken, but it was only really visible under very low light. When [Styropyro] brought it near a Tesla coil, however, it did glow much more brightly.

Backfilling an identical flask with neon to about 40 millitorr produced a much more spectacular result (a low pressure in the tube is necessary, but moderate pressure variations don’t significantly alter the effect). When shaken even slightly, this neon-containing flask produced a bright orange-red glow just above the surface of the mercury. Points of obstruction, such as those in a zig-zag tube, produced a brighter glow. A krypton-containing tube glowed blue, but less brightly than the neon tube.

Since this is, essentially, a triboelectric effect, other materials besides mercury should work; [Styropyro] tested several materials, and found that pieces of Teflon produced a faint glow, and copper beads a somewhat brighter glow. Unfortunately, Galinstan, the obvious replacement for mercury, wets and coats glass, preventing a charge buildup.

Without an added noble gas, the standard glow of barometric light comes from the excitation of mercury vapors, a glow which can also be seen in mercury rectifiers, and which excites the phosphors of fluorescent light bulbs.

Continue reading “A Sloshing-Mercury-Powered Neon Light”

Bad Apple On A Karaoke Machine

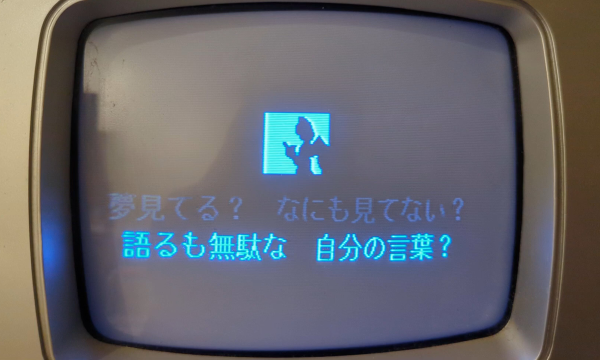
CD+Graphics was a format that never really caught on. It let music discs pack some graphics, maybe liner notes, and mostly song lyrics into the otherwise empty space on a CD. It was never intended for displaying full-motion video, but that didn’t stop [Adam Gashlin] from getting a Bad Apple, with lyrics, running on any device that will play CD+G.

The main challenge is that CD+G gives you 300 screen commands per second, which is plenty for updating text on the 48×16 blocks as the lyrics scroll by. But if you want to send custom blocks and draw images, that’s 2.5 seconds per screen: a lousy framerate.

[Adam]’s first trick is to drop the resolution way down, which gets him into the 8 FPS range. Only update the blocks that change pushes this up to a respectable 17-20 FPS. But you can see the updates, and that’s distracting. It really needed buffering.

If you don’t know Bad Apple, it’s in black and white. And like many old graphics engines of the day, CD+G uses a dynamic palette of colors. [Adam] uses this to pack four frames into one, switching between them using palette swapping. (Absolutely check out his “rainbow” version of the video to see how the palette-swapping trick works.)

In the end, his demo has audio, triple-buffered video, and lyrics at 16.3 FPS. It’s slower than the fastest video-only version, but it looks so good, and [Adam]’s explanation of all of the graphics tricks he uses to get there is the real star of the show.

If you want to see Bad Apple running on yet more minimal hardware, how about a 16×2 LCD? Or a much more ridiculous implementation? How’s regexes in Vim for absurd? Got any Bad Apple hacks of your own? Let us know in the comments or the tips line. You can never have too many.