Attitude indicators are super useful if you’re flying a plane, particularly in foggy conditions or over water. They help you figure out which way the plane is pointing relative to the unforgiving ground below. [Hack Modular] has been toying with a few, and even figured out how to get them powered up!
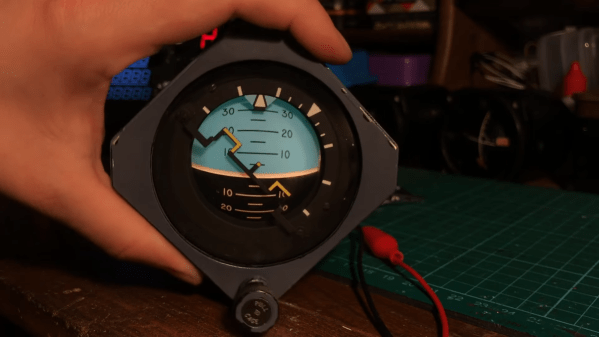
The attitude indicators use spinning gyroscopes to present a stable artificial horizon when a plane is in motion. Airworthy models are highly expensive, but [Hack Modular] was experimenting with some battered surplus examples. He sets about opening the delicate gauges, noting the seals and other features intended to protect the equipment inside. We get a great look at the gimbals and the reset mechanism used to zero out the device. He then pulls a classic mechanic’s trick, robbing a few screws from Peter to reassemble Paul.
We wouldn’t trust the gauges for flight duty, but they look great when powered up, all lit and spinning. They have the beautiful vintage glow that you only get from filament bulbs and deftly painted instrumentation. While avionics don’t come cheap off the shelf, it’s worth tinkering with cheap older gear if you can find it. The engineering involved, even in older equipment, is truly impressive. Video after the break.
Continue reading “Vintage Artificial Horizon Is Beautiful In Motion”