Homebrew Telephone Exchange Keeps The Family In Touch, In The House And Beyond

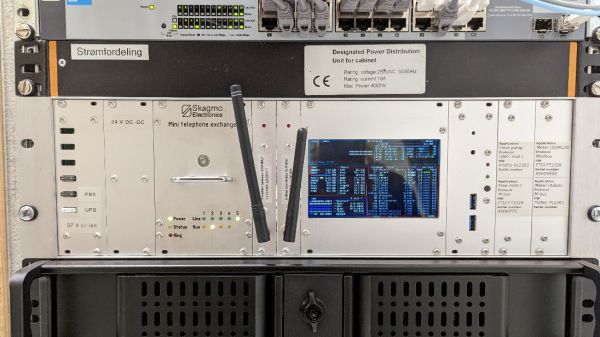
It doesn’t happen often, but every once in a while we stumble upon someone who has taken obsolete but really cool phone-switching equipment and built a private switched telephone in their garage or basement using it. This private analog phone exchange is not one of those, but it’s still a super cool build that’s probably about as ambitious as getting an old step-by-step or crossbar switch running.

Right up front, we’ll stipulate that there’s absolutely no practical reason to do something like this. And hacker [Jon Petter Skagmo] admits that this is very much a “because I can” project. The idea is to support a bunch of old landline phones distributed around the house, and beyond, in a sort of glorified intercom system. The private exchange is entirely scratch-built, with a PIC32 acting as the heart of the system, performing such tasks as DTMF decoding, generating ring voltage, and even providing a CAN bus interface to his home automation system.

The main board supports five line interface daughterboards, which connect each phone to the switch via an RJ11 jack. The interface does the work of detecting when a phone goes off-hook, and does the actual connection between any two phones. A separate, special interface card provides an auto-patch capability using an RDA1846S RF transceiver module; with it, [Jon Petter] can connect to any phone in the system from a UHF handy-talkie. Check out the video below for more on that — it’s pretty neat!

We just love everything about this overengineered project — it’s clearly a labor of love, and the fit and finish really reflect that. And even though it’s not strictly old school, POTS projects like this always put us in the mood to watch the “Speedy Cutover” video one more time.

Continue reading “Homebrew Telephone Exchange Keeps The Family In Touch, In The House And Beyond”

Celebrating A Decade Of Bootleg Hackaday Merch

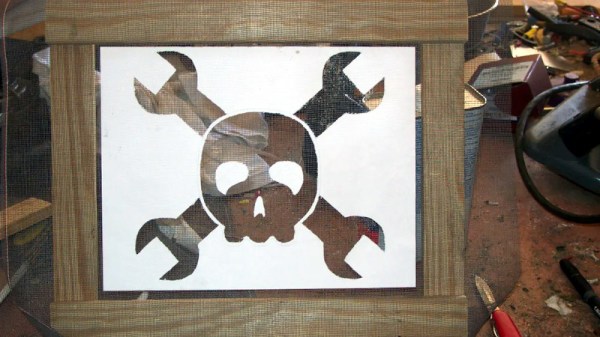
A listener of the podcast recently wrote in to tell us that, in the process of trying to purchase a legitimate Hackaday t-shirt, they discovered this 2012 Instructable from [yeltrow] that covers how you can cheaply crank out your own Wrencher shirts via screen printing.

Now historically, as long as you’re not trying to make a buck off of our name, we’ve never felt the need to stop folks from putting our logo on their projects. So we’re not too concerned that somebody was making Wrencher shirts, especially since they were almost certainly for their own personal use. Though the fact that [yeltrow] apparently described the project as a “Hackster-Style shirt” to try and avoid using our name ended up being a prophetic 4D chess meta-joke that you couldn’t make up if you tried. Continue reading “Celebrating A Decade Of Bootleg Hackaday Merch”

Roll-On Deodorant Controller Heats Up Racing Game

What do you get when you combine roll-on deodorant containers and a soccer ball with an optical mouse and an obscure 90s Japanese video game about racing armadillos? Well, you get a pretty darn cool controller with which to play said game, we must admit.

We hardly knew they were still making roll-on deodorant, and [Tom Tilley] is out here with three empties with which to hack. And hack he does — after thoroughly washing and drying the containers three, he sawed off the ball-holding bit just below the business part and fit each into the roll-on’s lid. Then [Tom] constructed a semi-elaborate cardboard-and-hot-glue thing to hold them in an equilateral triangle formation. Out of nowhere, he casually drops a fourth modified roll-on ball over an optical mouse, thereby extending the power of lasers to the nifty frosted orb.

Finally, [Tom] placed the pièce de résistance — the soccer ball — on top of everything. The mouse picks up the movement through the middle roll-on, and the original three are there for stability and roll-ability purposes. At last, Armadillo Racing can be played in DIY style. Don’t get it? Don’t sweat it — just check out the brief build video after the break.

Continue reading “Roll-On Deodorant Controller Heats Up Racing Game”

Recreating A Numpad For The ADM-3A

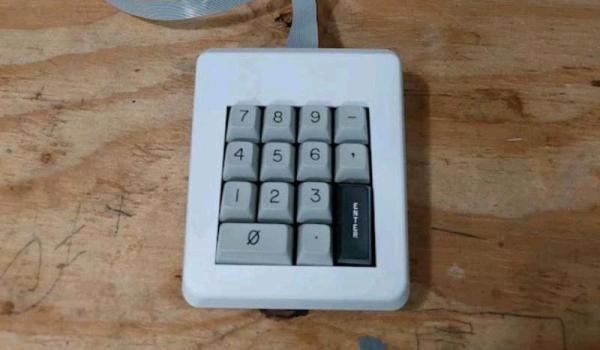
[Evan] already had a working ADM-3A (a dumb terminal from 1976) but was starting to eye the accessories hungrily. He had only seen the numpad on Wikipedia and in the manual. So when he found some authentic stackpole numpads on a surplus sale, he grabbed them and converted them to be ADM-3A compatible.

Looking at the schematic for the ADM-3A, [Evan] figured out that the numpad was parallel to the keyboard matrix, not adjacent. This meant that pressing a five on the keyboard was electrically equivalent to pressing a five on the keyboard. So holding shift while punching on the numpad leads to some unexpected characters for those of us used to more modern keyboards. Since [Evan] only needed to make one or two of these, he soldered wires directly to switch contacts in the matrix that the ADM-3A expects. A 3d printed housing, some rubber feet, and a ribbon cable later, it was done. While it looks slightly different from the original, the vibe is right, and given that it is a stackpole switch, it has the same feel. With the spare numpads, he created a replacement PCB that runs QMK and connects to a more modern computer via USB-C. The files for the 3d printed housing are also up on GitHub, along with the PCBs and QMK configuration files.

If you’re interested in what more you can do with an ADM-3A, why not hook it up to a Raspberry Pi?

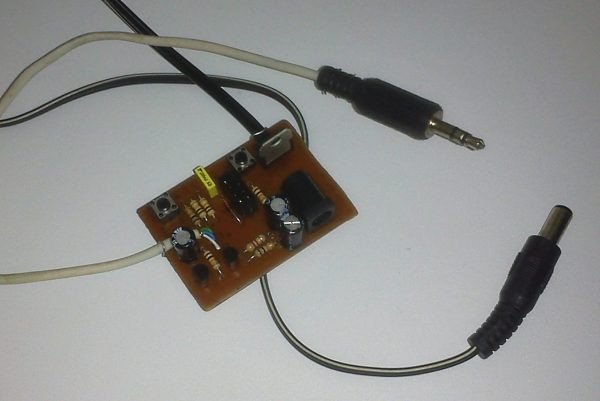
A small brown PCB with various components on it. There is a headphone cable and DC barrel connector cable coming out of it.

Put Your Serial Port On The Web

Today, everything from your computer to your dryer has wireless communications built in, but devices weren’t always so unencumbered by wires. What to do when you have a legacy serial device, but no serial port on the computer you want to connect? [vahidyou] designed a wireless serial dongle to solve this conundrum.

Faced with a CNC that took instructions over serial port, and not wanting to deal with the cabling involved in a serial to USB adapter, [vahidyou] turned to an ESP8266 to let his computer and device talk wirelessly. The hand-made PCB connects via a 3.5 mm headphone jack to DB9 adapter which he describes in another article. While [vahidyou] did write a small Windows program for managing the device, it is probably easier to simply access it in a web browser from any device you have handy.

Want to see another wireless serial port application? This Palm Portable Keyboard Bluetooth dongle will let you type in comfort on the go, or you can use a PiModem to get your retrocomputer online!

Fifteen Flat CRTs And A Bunch Of Magnets Make For Interactive Fun

If you were a curious child growing up when TVs were universally equipped with cathode ray tubes, chances are good that you discovered the effect a magnet can have on a beam of electrons. Watching the picture on the family TV warp and twist like a funhouse mirror was good clean fun, or at least it was right up to the point where you permanently damaged a color CRT by warping the shadow mask with a particularly powerful speaker magnet — ask us how we know.

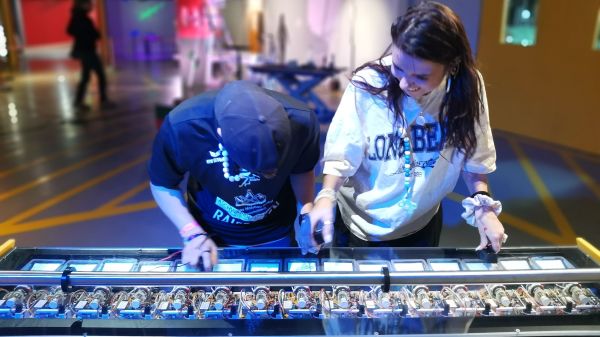
To bring this experience to a generation who may never have seen a CRT display in their lives, [Niklas Roy] developed “Deflektron”, an interactive display for a science museum in Switzerland. The CRTs that [Niklas] chose for the exhibit were the flat-ish monochrome tubes that were used in video doorbell systems in the late 2000s, like the one [Bitluni] used for his CRT Game Boy. After locating fifteen of these things — probably the biggest hack here — they were stripped out of their cases and mounted into custom modules. The modules were then mounted into a console that looks a little like an 80s synthesizer.

In use, each monitor displays video from a camera mounted to the module. Users then get to use a selection of tethered neodymium magnets to warp and distort their faces on the screen. [Niklas] put a lot of thought into both the interactivity of the exhibit, plus the practical realities of a public installation, which will likely take quite a beating. He’s no stranger to such public displays, of course — you might remember his interactive public fountain, or this cyborg baby in a window.

Continue reading “Fifteen Flat CRTs And A Bunch Of Magnets Make For Interactive Fun”

Zen And Glowing Air Bubble Displays

When you work in a medium for long enough, and you learn how it works more and more deeply, you eventually become its master. [Yukio Shinoda] is probably master of the LED bubble display.

She started out with an idea, back in 1994, of a column of water and an array of solenoids to inject air, making patterns in the bubbles. Time passed, and she began to realize these works, first in water and then switching over to glycerine for slower, more predictable, and more spherical bubbles. The latest version realizes her initial vision, after 29 years, with an 8×8 array of nozzles making 3D shapes in the slowly rising columns. Continue reading “Zen And Glowing Air Bubble Displays”