When you’re putting together a computer workstation, what would you say is the cleanest setup? Wireless mouse and keyboard? Super-discrete cable management? How about no visible keeb, no visible mouse, and no obvious display?
That’s what [Basically Homeless] was going for. Utilizing a Flexispot E7 electronically raisable standing desk, an ASUS laptop, and some other off-the-shelf parts, this project is taking the idea of decluttering to the extreme, with no visible peripherals and no visible wires.
There was clearly a lot of learning and much painful experimentation involved, and the guy kind of glazed over how a keyboard was embedded in the desk surface. By forming a thin layer of resin in-plane with the desk surface, and mounting the keyboard just below, followed by lots of careful fettling of the openings meant the keys could be depressed. By not standing proud of the surface, the keys were practically invisible when painted. After all, you need that tactile feedback, and a projection keeb just isn’t right.
Moving on, never mind an ultralight gaming mouse, how about a zero-gram mouse? Well, this is a bit of a cheat, as they mounted a depth-sensing camera inside a light fitting above the desk, and built a ChatGPT-designed machine-learning model to act as a hand-tracking HID device. Nice idea, but we don’t see the code.
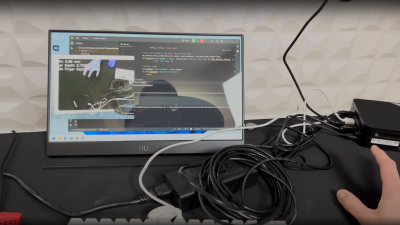
The laptop chassis had its display removed and was embedded into the bottom of the desk, along with the supporting power supplies, a couple of fans, and a projector. To create a ‘floating’ display, a piece of transparent plastic was treated to a coating of Lux labs “ClearBright” transparent display film, which allows the image from the projector to be scattered and observed with sufficient clarity to be usable as a PC display. We have to admit, it looks a bit gimmicky, but playing Minecraft on this setup looks a whole lotta fun.
Many of the floating displays we’ve covered tend to be for clocks (after all timepieces are important) like this sweet HUD hack.


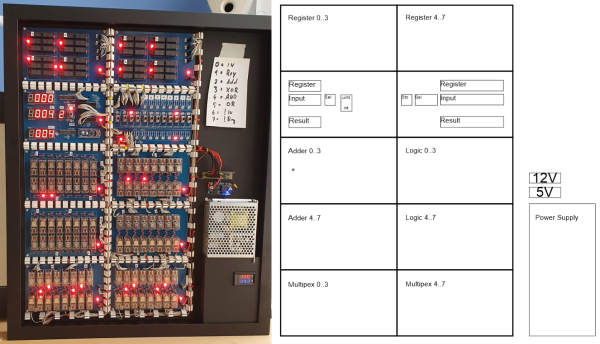
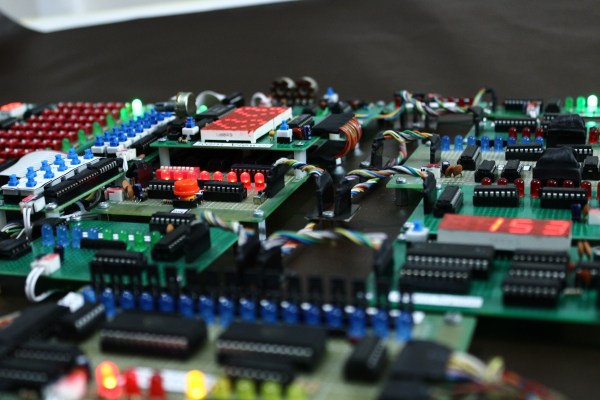
 operating on 4-bits. To handle a byte-length word, boards are simply cascaded, making a total of eight. The register, adder, logic function, and multiplex boards are the heart of the build with an additional two custom boards for visualization (using an Arduino for convenience) and IO forming the interface. After all, a basic CPU is just an ALU and some control around it, the magic is really in the ALU.
 but that’s the job of a separate board. The adder function is the most basic, simply a pair of half-adders and an OR-gate to handle the chaining of the carry inputs and generate the carry chain output.
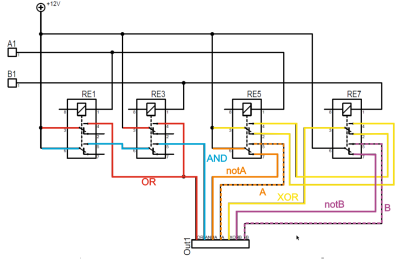