The project's hardware, including the ESP32 camera module, stuffed into the GoPro-intended waterproof shell. The camera portion of the ESP32 module sticks out exactly where the GoPro's camera would be. To the left, a hacked ESP32-CAM module is shown.

Hackaday Prize 2022: Solar-Harvesting ESP32 Camera Is Waterproof, Repeatable

[alberto nunez] shows off his sleek build of a solar-harvesting ESP32 camera – waterproof, somewhat energy-efficient, and able to be built by more-or-less anyone. For that, he’s chosen fairly jellybean components – an ESP32-CAM module with a matching protoboard, a small solar cell, a LiFePO4 battery, and a waterproofed GoPro shell that all of these parts neatly fit into.

A BQ25504 energy harvesting chip is used to ensure the ‘solar’ part of the project can meaningfully contribute to the project’s power budget, with energy otherwise mainly provided by the LiFePo4 battery. Since this battery’s nominal voltage is 3.2 V, it can be wired straight to ESP32’s power input and there’s no need for a regulator – thus, that one got mercilessly desoldered. [alberto] has also modded the board using a FET to gate power to the ESP32-CAM module’s camera, with all of these hacks bringing the board’s deep sleep current from 2.8 mA to 0.8 mA. Not great for a low-power device, but not terrible for something you can build so easily. Plus, it’s waterproof, dust-resistant, and quite robust!

These ESP32 camera modules are seriously nifty – we see them put to good use on the regular. Whether you need to detect motion in your Halloween project, decode your water meter readings, or perhaps merely a security camera, it’s worth having a few in your toolbox. Maybe even pick up a programming helper for these while you’re at it!

Ultimate Bokeh With A Projector Lens

Bokeh is a photography term that’s a bit difficult to define but is basically soft, aesthetically pleasing background blur, often used to make a subject stand out. Also called “background separation” or “subject isolation”, achieving it optically requires a fast lens with an aperture below 2.8 or preferably lower. These lenses can get very expensive, but in the video after the break [Matt] from [DIY Perks] blows all the commercially available options out of the water. Using an old episcope projector, he built a photography rig with background separation equivalent to that of a non-existent 35mm f0.4 lens.

Unlike most conventional projectors used to project a prerecorded image, episcopes were used to project an image of physical objects, like books. To use this lens directly in a camera is impossible, due to the size of the imaging circle projected out the back of the lens. At a diameter of 500mm, there is simply no imaging sensor available to capture it. Instead, [Matt] built a projection screen for the image and photographed it from the opposite side with a normal camera.

The projection screen was made by sandwiching a sheet of diffuser film between two sheets of clear acrylic held in a frame of aluminum extrusions. To block out all other light, [Matt] added aluminum shrouds on either side of the screen, which also serves to mount the lens and a camera. The shroud on the lens’ side is mounted on a separate aluminum frame, enabling the image to be focused by adjusting the distance between the screen and lens. Linear rods and bearings on 3D printed mounts allow smooth motion, while a motor-driven lead screw connected to a wired remote does the actual adjustment. The gap between the two halves was covered with bellows made from black paper. Continue reading “Ultimate Bokeh With A Projector Lens”

Digital “Toy” Camera, Made For Tilt-Shift And Other Analog-Like Experimenting

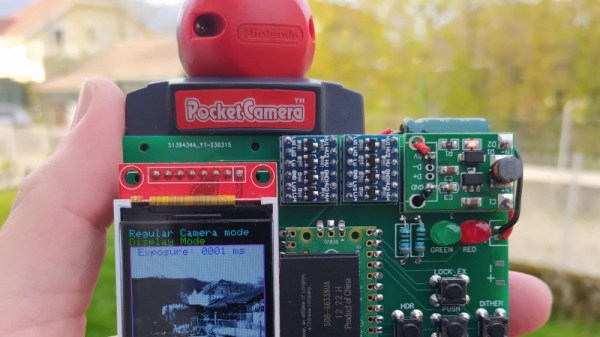
Like many others, [volzo] loves playing with photography in a playful and experimental way. Oddball lenses, vintage elements, and building from kits is what that world looks like. But that kind of stuff is really the domain of film cameras, or at least it was until [volzo] created his Digital Toy Camera design. The result? A self-built, lomography-friendly digital camera that allows for all kinds of weird and wonderful attachments and photo shenanigans.

3D-printed mounts and magnetic attachment makes swapping parts a breeze.

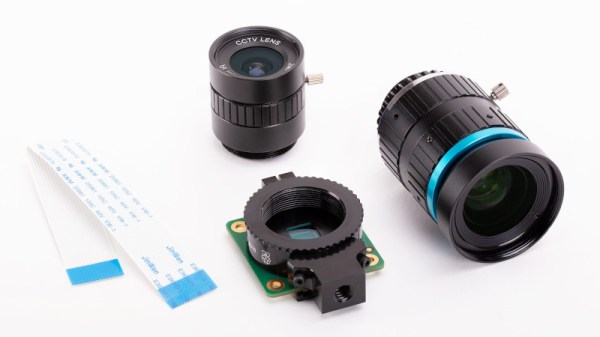
To make a DIY digital camera that allowed that kind of play, the first problem [volzo] had to solve was deciding on an image sensor. It turns out that sourcing image sensors as an individual is a pretty cumbersome process, and even if successful, one still needs to write a driver and create things from the ground up. So, the guts of [volzo]’s creations use the Raspberry Pi and camera sensor ecosystem and M12 lenses, a decision that allows him to focus on the rest of the camera.

3D printing, a bit of CNC machining, and some clever design yields a “toy” camera: simple, inexpensive, and enabling one to take a playful and experimental approach to photography. The design files are available on GitHub, and there are some neat elements to the design. Magnetic mounts allow for easy swapping of lens assemblies, and a M12 x 0.75 tap cuts perfect threads into 3D-printed pieces for M12 lenses.

Heat-set inserts also provide robust fastening that can hold up to disassembly and re-assembly (and don’t miss that our own [Joshua Vasquez] has shared how best to design for and use heat-set inserts.)

[volzo] has a fantastic video to accompany his project; give it a watch (embedded below, under the page break) and see if you don’t come away with some inspiration of your own.

Continue reading “Digital “Toy” Camera, Made For Tilt-Shift And Other Analog-Like Experimenting”

On the left side, there's a smartphone. On the right side, there's a hairdryer turned on. On the smartphone screen, you can see the working end of the hairdryer shown, as well as a jet of air coming out of that end. In the background, there's an LCD screen showing a noise pattern.

Observe Airflow Using Smartphone And Background-Oriented Schlieren

Multiple people have recently shared this exciting demonstration (nitter) with us – visualizing airflow using a smartphone, called ‘background-oriented schlieren’. On a hot summer day, you might see waves in the air – caused by air changing density as it warms up, and therefore refracting the light differently. Schlieren photography is an general set of techniques for visualizing fluid flow, but of course, it can also be applied to airflow. In this case, using some clever optical recognition tricks, this schlieren method lets you visualize flow of air using only your Android smartphone’s high resolution camera and a known-pattern printed background! Continue reading “Observe Airflow Using Smartphone And Background-Oriented Schlieren”

The OpenMV board inside a security camera shell on the left, an AprilTag on smartphone's screen on the right

Use AprilTags To Let Guests Open Your Front Gate

[Herb Peyerl] is part of a robotics team, and in his robotics endeavours, learned about AprilTags; small QR-code-like printable patterns that are easily recognizable by even primitive machine vision. Later on, when thinking about good ways to let his guests through his property’s front gate, the AprilTags turned out to be a wonderful solution. Now all he needs to do is send his guest a picture of the appropriate AprilTag, which they can present to the camera at his front gate using their smartphone.

He used an OpenMV board for this – thanks to its wide variety of available libraries, the AprilTag recognition is already baked in, and the entire script is merely a hundred lines of MicroPython. An old surveillance camera gave up its dome-shaped housing, and now the OpenMV board is doing guest access duty on a post in front of his property’s front gate. He’s shared the code with us, and says he’s personally running a slightly modified version for security reasons — not that a random burglar is likely to stumble upon this post anyway. Besides it looks like the gate would be easy for a burglar to jump over without any need for security bypass, and the convenience benefits of this hack are undeniable.

In the unlikely chance a burglar is reading this, however, don’t be sad. We do happen to have a bunch of hacks for you, too. There’s far less secure systems out there, from building RFID keyfobs to gated community access control systems, sometimes all you need is a 12 V battery. If you’re not into burglary, that’s okay too — we’ve covered other guest access hacks before, for instance, this ESP8266-powered one.

Converting A Sigma Lens To Canon, Digital Functionality Included

These days, camera lenses aren’t just simple bits of glass in sliding metal or plastic housings. They’ve often got a whole bunch of electronics built in as well. [Dan K] had just such a lens from Sigma, but wanted to get it working fully with a camera using the Canon EF lens fitting. Hacking ensued.

The lens in question was a Sigma 15-30mm f/3.5-4.5 EX DG, built to work with a Sigma camera using the SA mount. As it turns out, the SA mount is actually based on the Canon EF mount, using the same communications methods and having a similar contact block. However, it uses a mechanically different mounting bayonet, making the two incompatible.

[Dan] sourced a damaged EF lens to provide its mount, and modified it on a lathe to suit the Sigma lens. A short length of ribbon cable was then used to connect the lens’s PCB to the EF mount’s contacts. When carefully put back together, the lens worked perfectly, with functional auto-focus and all.

It goes to show that a little research can reveal possibilities for hacking that we might otherwise have missed. [Dan] was able to get his lens up and running on a new camera, and has taken many wonderful pictures with it since.

We’ve seen some great lens hacks over the years, from 3D printed adapters to anamorphic adapters that create beautiful results. If you’ve got your own mad camera hacks brewing up, drop us a line!

ESP32 Camera Slider Build Keeps Things In Perspective

We’ve seen a lot of camera slider builds here at Hackaday, and for good reason: having one really lets you take your project documentation, especially videos, to the next level. It’s one of those force multiplier builds — after you’ve completed it, it can help you make all your future projects just that much better. But we’re also no strangers to seeing these projects become overly complex, which can often make it difficult for others to replicate.

But that’s not the case here. The motorized camera slider that [Sasa Karanovic] recently sent our way does exactly what you’d expect, and little else. That’s not meant as a dig — sometimes the best approach is to keep it simple. Unless you’re a professional photographer or videographer, it’s unlikely you need a complicated motion rig. This design is perfect for the hacker or maker who wants to spruce up their project videos, but doesn’t want to spend months fiddling with the design. Continue reading “ESP32 Camera Slider Build Keeps Things In Perspective”