Yes, Of Course Someone Shot The Eclipse On A Game Boy Camera

This one shouldn’t surprise us, but there is something particularly enjoyable about seeing the total eclipse of the Sun through a Game Boy camera.

The Game Boy got its camera accessory back in 1998 when CCD-based cameras with poor resolution were just becoming widely available to the public. This camera can capture 128×112 pixel images in the four value grey scale for which the handheld is so loved.

Having taken part in eclipse mania ourselves we can tell you that unless you did some serious research and prep for photographing the thing, this makes as much sense as pulling out your smartphone did. We posit that it certainly produced a more pleasing result.

[jhx] says this is more a weird halo effect of the shot than it is a quality image of totality. At this resolution, the moon-covered Sun should be very few pixels in size, right? But fidelity is for photographers, this is for hackers. Getting the digital image off of the Game Boy camera involved using an Interact Mega Memory cartridge on a Game Boy Pocket to transfer it over, then using a USB 64M cartridge to copy from the Mega Memory and ultimately to a computer.

Glamour shots ain’t easy, yo. But it is possible to read images directly off the Game Boy camera thanks to some reverse engineering work.

[via Kotaku]

Live Stream To YouTube By Pointing A Box And Pressing A Button

YouTube has the ability to do live streaming, but [Tinkernut] felt that the process could be much more straightforward. From this desire to streamline was born the Raspberry Pi based YouTube live streaming camera. It consists of a Raspberry Pi with some supporting hardware and it has one job: to make live streaming as simple as pointing a box and pressing a button. The hardware is mostly off-the-shelf, and once all the configuration is done the unit provides a simple touchscreen based interface to preview, broadcast live, and shut down. The only thing missing is a 3D printed enclosure, which [Tinkernut] says is in the works.

Getting all the software configured and working was surprisingly complex. Theoretically only a handful of software packages and functionality are needed, but there were all manner of gotchas and tweaks required to get everything to play nice and work correctly. Happily, [Tinkernut] has documented the entire process so others can benefit. The only thing the Pi is missing is a DIY onboard LED lighting and flash module.

Shoot The Eclipse With A Phone And Do Not Go Blind

So you want to photograph Eclipse 2017 but you don’t want to rush out and buy an expensive DSLR just for the event? Not a problem, if you build this simple smartphone filter and occluder.

It all started innocently enough for [Paul Bryson] with his iPhone and a lens from those cheap cardboard eclipse glasses we’re starting to see everywhere. Thinking that just taping the filter over the stock lens would do, [Paul] got a painful faceful of sunshine when he tried framing a shot. Turns out the phone body was not big enough to blot out the sun, and besides, the stock lens doesn’t exactly make for a great shot. So with an iPhone telephoto lens affixed to a scrap of wood and a properly positioned filter, [Paul] has a simple rig that’ll let him get some great pre-totality shots of the eclipse, and it’ll be easy to bust out the phone for two minutes of totality selfies. Looks like this setup would be easy to adapt to other phones, too.

We’re all over Eclipse 2017, from Hackaday Eclipse Meetups in at least four different points along the path of totality to experiments on relativity to citizen science efforts so you can get in on the action too. Mark your calendars – August 21 will be here before you know it.

How To Take Pictures Of PCBs

While we’ve covered light box builds and other DIY photography solutions, general picture-snapping tips and tricks are a bit out of the purview of what we normally write about. Nevertheless, [Alain] just put up a great tutorial for taking pictures of PCBs. This is a great skill to have — no one cares about what you’ve built unless you have a picture of it — and the same techniques can be applied to other small bits and bobs of electronic equipment.

As with all matters of photography, light is important. [Alain] built a DIY light box using two cheap outdoor square LED panels and some scrap wood. There’s really nothing to this build: just build a box that holds soft, diffused light.

A camera is a little more complicated than a box, and here [Alain] is using an entry-level DSLR with a kit lens. The takeaway here is to set the aperture to the highest number (or smallest hole) possible while still keeping a reasonable shutter speed. This increases the depth of field and produces a picture where the board and the tops of components are in focus.

There are a few more tips for getting the best PCB pics possible including shooting in RAW for Aperture or Lightroom, getting a macro lens, and using a tripod. Like all things, there’s a law of diminishing returns, and even with a smartphone camera and a DIY light box, you can produce some fantastic pics of PCBs.

DIY Illuminator For UV Fluorescence Photography

The image shown is the mineral Hackmanite, which fluoresces under ultraviolet lighting. However, not all UV is created equal, and that makes a difference if you’re into UV imaging. The image for this article is from [David Prutchi] and shows the striking results of using different wavelengths of UV. [David] goes into detail on how to make your own DIY Long, Medium, and Short-wave UV Illuminator complete with part numbers and wiring diagram. The device isn’t particularly complicated; the real work was determining the exact part numbers and models of lamp, filters, and ballasts required to get the correct results. [David] has done that work and shared it for anyone interested in serious UV fluorescence photography, along with a white paper on the process.

We’ve seen [David]’s work before. We featured his DIY short-wave UV imager in the past, and his DOLPi camera project was a 2015 Hackaday Prize finalist. It’s clear he really knows his stuff, and genuinely enjoys sharing his discoveries and work.

Two-Bit Astrophotography

The Game Boy Camera is a 128×112 pixel sensor from 1998 that was probably the first digital camera in many, many homes. There’s not much you can do with it now, besides replicate old Neil Young album covers and attempting and failing to impress anyone born after the year 1995. Nevertheless, screwing around with old digital cameras is cool, so [Alex] strapped one fo these Game Boy Cameras to an old telescope.

For any astrophotography endeavor, the choice of telescope is important. For this little experiment, [Alex] used a 6” Fraunhofer telescope built in 1838 at the Old Observatory of Leiden. The Game Boy with Camera was attached to the scope using a universal cell phone adapter. Apparently the ‘universal’ in this universal cell phone adapter is accurate – the setup was easy and [Alex] quickly got an image of a clocktower on his Game Boy.

Turning to the heavens, [Alex] took a look at the most interesting objects you can see with a 6-inch telescope. Images of the moon turned out rather well, with beautiful 2-bit dithering along the terminator. Jupiter was a bright white spot in a sea of noise, but [Alex] could see four slightly brighter pixels orbiting where Stellarium predicted the Galilean moons would be.

Was this experiment a success? Between cloudy nights and a relatively small telescope, we’re saying yes. These are pretty impressive results for such a terrible digital camera.

Featured Image

Go Go Camera Slider

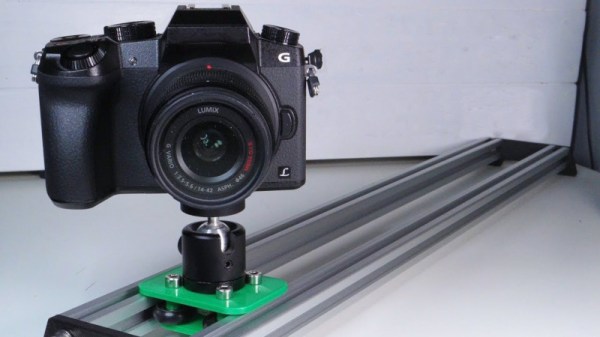
Are your arms getting tired from pushing your camera back and forth across your camera slider? That must be the case with [Max Maker], which led him to convert his manual slider into a motorized one.

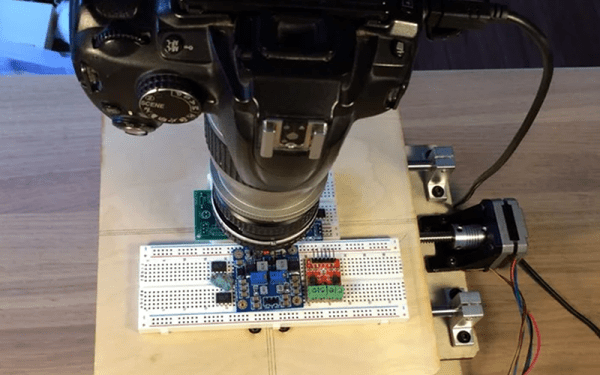
The electronics are minimal — an Arduino Micro, a few toggle switches, A4988 Stepper Driver, 12V battery pack, and the ever popular NEMA 17 stepper motor. If you’re wondering why we said ‘switches’ instead of ‘switch’, it’s because 4 of the switches are used to select a time frame. The time frame being how long it takes for the slider to move from one end to the other.

Fabrication shown off in the video below will net you a few new tricks. Our favorite is how he makes a template for the NEMA motor using masking tape. After completely covering the face of the motor with tape, he clearly marks the mounting holes and colors in the shape of the motor plate as if he were doing frottage. Then just pull the tape off as one and stick it onto the slider rack.

Not including the cost of the slider itself, the parts list came out to be around $75. Even if you don’t yet own a slider, this a great first adventure into building a CNC machine. It is one degree of freedom and the hard parts have already been taken care of by the manufacturer of the slider. Get used to using belts and programming for stepper motors and you’ll be whipping up your own 3D printer with a fancy belt scheme for the Z-axis.

Continue reading “Go Go Camera Slider”