Dissecting The Elusive Wax Motor

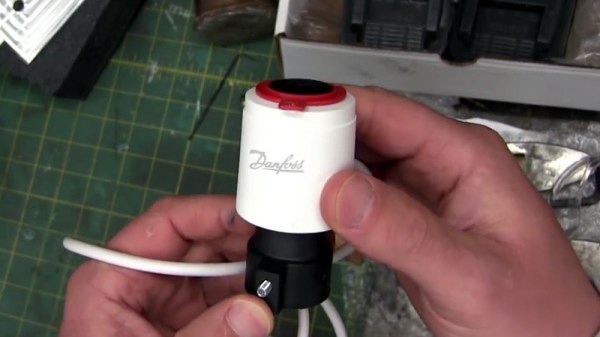
We’d wager most readers aren’t intimately acquainted with wax motors. In fact, a good deal of you have probably never heard of them, let alone used one in a project. Which isn’t exactly surprising, as they’re very niche and rarely used outside of HVAC systems and some appliances. But they’re fascinating devices, and once you’ve seen how they work, you might just figure out an application for one.
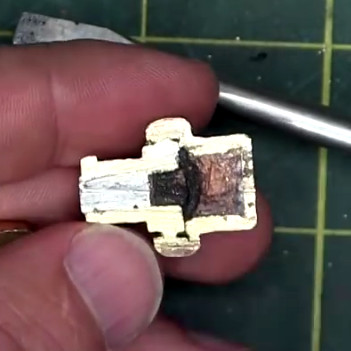
[AvE] recently did a complete teardown on a typical wax motor, going as far as cutting the thing in half to show the inner workings. Now we’ve seen some readers commenting that everyone’s favorite foul-mouthed destroyer of consumer goods has lost his edge, that his newer videos are more about goofing off than anything. Well we can’t necessarily defend his signature linguistic repertoire, but we can confidently say this video does an excellent job of explaining these little-known gadgets.

The short version is that a wax motor, which is really a linear actuator, operates on the principle that wax expands when it melts. If a solid block of wax is placed in a cylinder, it can push on a piston during the phase change from solid to liquid. As the liquid wax resists compression, the wax motor has an exceptionally high output force for such a small device. The downside is, the stroke length is usually rather short: for the one [AvE] demonstrates, it’s on the order of 2 mm.

By turning heat directly into mechanical energy, wax motors are often used to open valves and vents when they’ve reached a specific temperature. The common automotive engine thermostat is a classic example of a wax motor, and they’re commonly found inside of dishwashers as a way to open the soap dispenser at the proper time during the cycle.

This actually isn’t the first time we’ve featured an in-depth look at wax motors, but [AvE] actually cutting this one in half combined with the fact that the video doesn’t look like it was filmed on a 1980’s camera makes it worth revisiting the subject. Who is going to build a wax motor power device for the Power Harvesting Challenge in the 2018 Hackaday Prize?


Continue reading “Dissecting The Elusive Wax Motor”

Learn Six Oscilloscope Measurements With One Arduino

We won’t mention names, but we are always dismayed to see people twist knobs randomly on a scope until it shows a good picture. These days, there’s the dreaded auto button, too, which is nearly as bad. If you haven’t spent the time to learn how to properly use a scope [Bald Engineer] has a great introduction to making six measurements with an Arduino as a test device.

To follow along you’ll need an Arduino UNO and a two-channel (or better) scope. Actually, most of the measurements would probably work on any Arduino, but there are some that require the separate USB to serial chip like that found on the UNO and similar boards.

The six measurements are:

  1. The auto reset programming pulse
  2. Capture and decode serial data
  3. Noise on the power rail
  4. Observe probe loading effects
  5. PWM duty cycle
  6. The timing of pin manipulation code

Some of these measurements use a bit of Arduino code, while others just make use of the circuitry on the board no matter what software is running.

Not only does the post show you where to make the measurements and what the result should look like, there’s also a discussion of what the measurement means and some suggested things to try on your own.

If you go through this post, you might also enjoy learning more about probes. If you are feeling adventurous, you can even build your own current probe.

Making Electronics Just Got 25% More Expensive In The US

As reported by the BBC, the United States is set to impose a 25% tariff on over 800 categories of Chinese goods. The tariffs are due to come into effect in three weeks, on July 6th. Thousands of different products are covered under this new tariff, and by every account, electronic designers will be hit hard. Your BOM cost just increased by 25%.

The reason for this tariff is laid out in a report (PDF) from the Office of the United States Trade Representative. In short, this tariff is retaliation for the Chinese government subsidizing businesses to steal market share and as punishment for stealing IP. As for what products will now receive the 25% tariff, a partial list is available here (PDF). The most interesting product, by far, is nuclear reactors. This is a very specific list; one line item is, ‘multiphase AC motors, with an output exceeding 746 Watts but not exceeding 750 Watts’.

Of importance to Hackaday readers is the list of electronic components covered by the new tariff. Tantalum capacitors are covered, as are ceramic caps. Metal oxide resistors are covered. LEDs, integrated circuits including processors, controllers, and memories, and printed circuit assemblies are covered under this tariff. In short, nearly every bit that goes into anything electronic is covered.

This will hurt all electronics manufacturers in the United States. For a quick example, I’m working on a project using half a million LEDs. I bought these LEDs (120 reels) two months ago for a few thousand dollars. This was a fantastic buy; half a million of the cheapest LEDs I could find on Mouser would cost seventeen thousand dollars. Sourcing from China saved thousands, and if I were to do this again, I may be hit with a 25% tariff. Of course; the price on the parts from Mouser will also go up — Kingbright LEDs are also made in China. Right now, I have $3000 worth of ESP-12e modules sitting on my desk. If I bought these three weeks from now, these reels of WiFi modules would cost $3750.

There are stories of a few low-volume manufacturers based in the United States getting around customs and import duties. One of these stories involves the inexplicable use of the boxes Beats headphones come in. But (proper) electronics manufacturing isn’t usually done by simply throwing money at random people in China or committing customs fraud. These tariffs will hit US-based electronics manufacturers hard, and the margins on electronics may not be high enough to absorb a 25% increase in the cost of materials.

Electronics made in America just got 25% more expensive to produce.

Move Over Aluminum: Cast Iron For The Home Foundry

When it comes to choice of metals that can be melted in the home foundry, it’s a little like [Henry Ford]’s famous quip: you can melt any metal you want, as long as it’s aluminum. Not that there’s anything wrong with that; there’s a lot you can accomplish by casting aluminum. But imagine what you could accomplish by recycling cast iron instead.

It looks like [luckygen1001] knows a thing or two about slinging hot metal around. The video below shows a fairly expansive shop and some pretty unique tools he uses to recycle cast iron; we were especially impressed with the rig he uses to handle the glowing crucibles from a respectful distance. The cast iron comes from a cheap and abundant source: car disc brake rotors. Usually available free for the asking at the local brake shop, he scores them with an angle grinder and busts them into manageable chunks with a hammer before committing them to the flames. The furnace itself is quite a thing, running on a mixture of diesel and waste motor oil and sounding for all the world like a jet engine starting up. [luckygen1001] had to play with the melt, adding lumps of ferrosilicon alloy to get a cast iron with better machining properties than the original rotors. It’s an interesting lesson in metallurgy, as well as a graphic example of how not to make a flask for molding cast iron.

Cast iron from the home shop opens up a lot of possibilities. A homemade cast aluminum lathe is one thing, but one with cast iron parts would be even better. And if you use a lot of brake rotors for your homebrew cast iron lathe, it might require special handling.

Continue reading “Move Over Aluminum: Cast Iron For The Home Foundry”

General Purpose I/O: How To Get More

The first program anyone writes for a microcontroller is the blinking LED which involves toggling a general-purpose input/output (GPIO) on and off. Consequently, the same GPIO can be used to read digital bits as well. A traditional microcontroller like the 8051 is available in DIP packages ranging from 20 pins to 40 pins. Some trade the number of GPIOs for compactness while other devices offer a larger number of GPIOs at the cost of complexity in fitting the part into your design. In this article, we take a quick look at applications that require a larger number of GPIOs and traditional solutions for the problem.

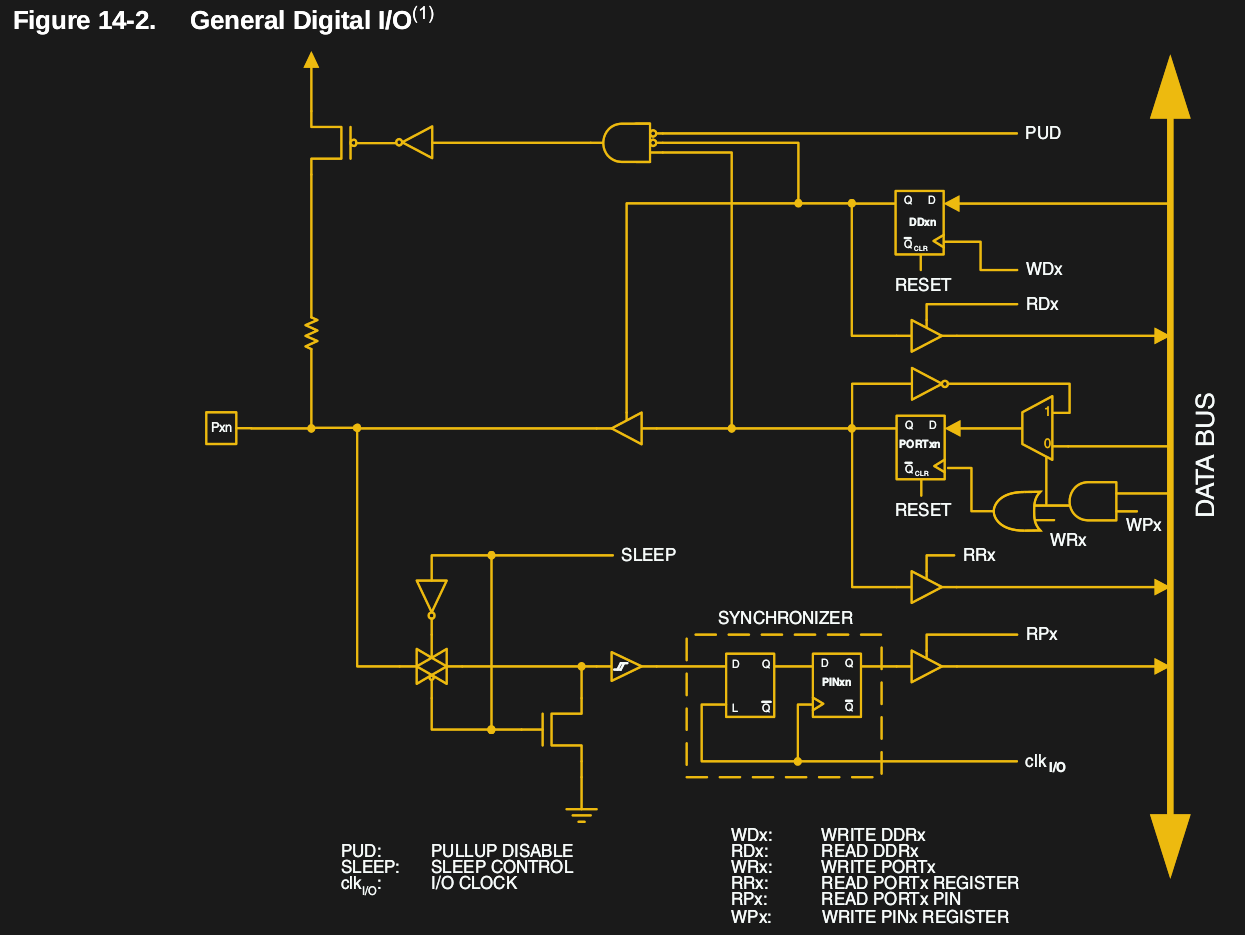
A GPIO is a generic pin on an integrated circuit or computer board whose behavior, including whether it is an input or output pin, is controllable by the user at runtime. See the internal diagram of the GPIO circuit for the ATmega328 for reference.

Simply put, each GPIO has a latch connected to a drive circuit with transistors for the output part and another latch for the input part. In the case of the ATmega328, there is a direction register as well, whereas, in the case of the 8051, the output register serves as the direction register where writing a 1 to it sets it in output mode.

The important thing to note here is that since all the circuits are on the same piece of silicon, the operations are relatively fast. Having all the latches and registers on the same bus means it takes just one instruction to write or read a byte from any GPIO register.
Continue reading “General Purpose I/O: How To Get More”

VCF East 2018: Cactus, Retro Because It Wants To Be

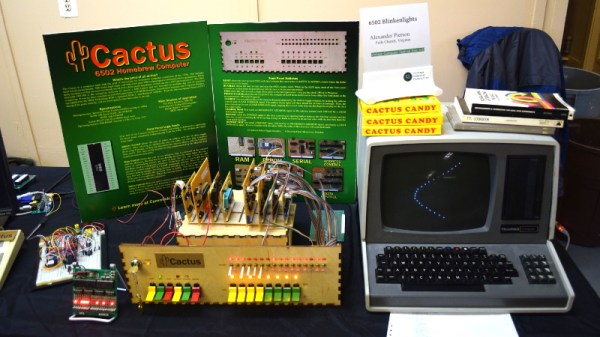
Among the rows of digital dinosaurs, one blinking front panel stood out. It certainly looked the part of a retro computer; with banks of blinking LEDs and multicolored paddle switches. But upon closer inspection, the laser cut wooden front panel betrays the fact that this machine is an impostor. It may have the appearance of a machine from the heady days where home computers looked like they could have doubled as a prop on the bridge of Kirk’s Enterprise, but it’s actually a product of much more modern provenance.

It’s called the Cactus, a love letter to the homebrew microcomputers of the 1970’s, designed and built by somebody at least 20 years too young to have experienced them the first time around. Alexander Pierson created the Cactus not because he had fond memories of putting together an Altair 8800 in 1975, but because he’s fascinated with the retro computer experience: the look of the front panel, the satisfying clunk of era-appropriate switches, and the idea that the computer’s inner workings aren’t an abstract black box but rather something you can interact with and study. Judging by all the attention the Cactus got at VCF East XIII, he’s not the only one.

Let’s take a look at everything Alexander poured into this retrocomputer build.

Continue reading “VCF East 2018: Cactus, Retro Because It Wants To Be”

The Flight Of The Seagull: Valentina Tereshkova, Cosmonaut

That the Cold War was a tense and perilous time in history cannot be denied, and is perhaps a bit of an understatement. The world stood on the edge of Armageddon for most of it, occasionally stepping slightly over the line, and thankfully stepping back before any damage was done.

As nerve-wracking as the Cold War was, it had one redeeming quality: it turned us into a spacefaring species. Propelled by national pride and the need to appear to be the biggest kid on the block, the United States and the Soviet Union consistently ratcheted up their programs, trying to be the first to make the next major milestone. The Soviets made most of the firsts, making Sputnik and Gagarin household names all over the world. But in 1962, they laid down a marker for a first of epic proportions, and one that would sadly stand alone for the next 19 years: they put the first woman, Valentina Tereshkova, into space.

Continue reading “The Flight Of The Seagull: Valentina Tereshkova, Cosmonaut”