Steel Battalion Controller Grows Up And Gets A Job

We’re going to go out on a limb here and say that the controller for Steel Battalion on the original Xbox is the most impressive video game peripheral ever made. Designed to make players feel like they were really in the cockpit of a “Vertical Tank”, the controller features dual control sticks, three pedals, a gear selector, and dozens of buttons, switches, and knobs. Unfortunately, outside of playing Steel Battalion and its sequel, there’s not a whole lot you can do with the monstrous control deck.

HID Report Descriptor

But now, nearly 20 years after the game released, [Oscar Sebio Cajaraville] has not only developed an open source driver that will allow you to use the infamous mech controller on a modern Windows machine, but he’s part of the team developing a new game that can actually be played with it. Though gamers who are imagining piloting a futuristic combat robot in glorious 4K might be somewhat disappointed to find that this time around, the Steel Battalion controller is being used to operate a piece of construction equipment.

In his blog post, [Oscar] focuses on what it took to develop a modern Windows driver for a decades old controller. It helps that the original Xbox used what was essentially just a rewiring of USB 1.0 for its controllers, so connecting it up didn’t require any special hardware. Unfortunately, while the controller used USB to communicate with the console, it was not USB-HID compliant.

As it turns out, Microsoft actually provides an open source example driver that’s specifically designed to adapt non-HID USB devices into a proper game controller the system will recognize. This gave [Oscar] a perfect starting point, but he still needed to explore the controller’s endpoints and decode the data it was sending over the wire. This involved creating a HID Report Descriptor for the controller, a neat trick to file away mentally if you’ve ever got to talk to an oddball USB device.

In the end, [Oscar] created a driver that allows players to use the Steel Battalion controller in his game, BH Trials. Unfortunately there’s something of a catch, as drivers need to be signed by a trusted certification authority before Windows 10 will install them. As he can’t quite justify the expense of this step, he’s written a second post that details what’s required to turn driver signing off so you can get the device working.

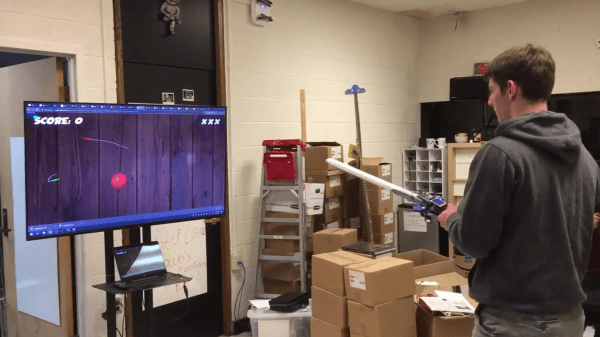
Earlier this year we saw an incredible simulator built around the Steel Battalion controller, were an external “coach” could watch you play and give you tips on surviving the virtual battlefield. But even that project still used the original game; hopefully an open source driver that will get this peripheral working on Microsoft’s latest OS will help spur the development of even more impressive hacks.

Continue reading “Steel Battalion Controller Grows Up And Gets A Job”

Null Shard Build Blurs Line Between Game And Reality With Laser Cutting, Mold Making, 3D Printing

In The Room Three, players are tasked with collecting mysterious objects known as “Null Shards”. But it seems one player, who goes by the name [Juiceman], took this challenge a bit literally. Starting with promotional art released for the game, he embarked on an epic journey to create a replica “Null Shard” that ended up looking so good that one of them is currently residing in a place of honor at the headquarters of developer Fireproof Games.

The developers had previously released image files to create a papercraft version of the Null Shard on their website, so [Juiceman] based his initial CAD work on these designs. But it turned out the surface texture was a little too complex to laser etch into acrylic without making a soupy mess. He simplified it a bit, while trying to retain the overall effect. From the superb laser-etched acrylic master he made a silicone mold started casting the eight triangular panels needed for two copies of the Shard.

To hold it all together [Juiceman] create a “skeleton” pyramid by first experimenting with designs on a traditional plastic FDM printer. After a few tries he had a workable design and switched over to a laser sintering machine, giving the final frame a gorgeous texture. With the cast panels installed and a few coats of paint, he had his Null Shards.

The final step was to turn down a piece of ash to make a nice base, and 3D print the feet and “claw” mount for the Shard using the same laser sintering process. The finished product looks fantastic, and apparently lives on a shelf next to a similarly constructed replica of the “Lament Configuration” puzzle cube from the Hellraiser films. [Juiceman] says the two replicas are the first entries into his “Geometries of Hell” collection, which incidentally, we’ve decided will officially be the name of our first metal album. All we need to do now is learn how to play instruments.

We’ve previously looked at how 3D printing and a dash of dedication can create some incredible prop builds, and once upon a time, we even ran a Sci-Fi Contest that challenged our readers to bring their favorite movie and game objects into the real world. Builds like this are a perfect example of what happens when a dedicated hacker or maker gets inspired by a piece of entertainment that really resonates with them.

[Thanks to Lauren for the tip]

DIY 40FPS 16bpp Platformer On A Cortex M0+

Sure, you can play a bunch of retro games on a Raspberry Pi, but if you’re really hardcore, you build your own retro console and write your own games for it. [Nicola Wrachien]’s entry into this year’s Hackaday prize is his DIY Cortex M0+ game console and the platform game he wrote to test the hardware.

The board that [Nicola] is using is the uChip, a small DIP board based around a ATSAMD21 (the same chip that runs the Arduino Zero). That, along with a 160×128 TFT LCD screen, makes up the bulk of the hardware. A carrier board holds both of these as well as several buttons and an OpAmp.

The ATSAMD21 chip has decent hardware DMA that [Nicola] is using to get the frame rate needed. Since the DMA hardware and the CPU can work at the same time, while the DMA is handling one chunk of graphics, the CPU is working on the next chunk. Using this system, [Nicola] is able to get a better framerate than originally designed. Take a look at [Nicola]’s webpage for more details on the algorithm used.

In order to create a level in the platformer that [Nicola] made to show off the console, [Nicola] created a full blown level editor in Java. Using the editor, you can place the tiles and sprites and set their behaviours. The map can then be exported in an optimized format for loading on to the hardware and into the game.

A video showing off the game is after the break. There’s no shortage of great DIY consoles on the site — check out this impressive vector console, or if RetroPie is more your thing, take a look at this DIY Zelda-playing device.

Continue reading “DIY 40FPS 16bpp Platformer On A Cortex M0+”

Running Doom On A Doomed GPS

What’s the first thing you think of when you see an old GPS navigation system for sale cheap at a garage sale? Our research indicates that 100% of people would wonder if it could run Doom; at least that’s what we conclude from the single data point we have, anyway. [Jason Gin] asked and answered the question — with a resounding yes — about his recent acquisition.

The unit in question is a Magellan RoadMate 1412 running Windows CE. After some playing, [Jason] found that simply connecting the unit to a computer via USB caused all the application files to appear as a FAT-formatted volume. Replacing the obviously-named “MapNavigator.exe” with a copy of TotalCommander/CE allowed browsing around the filesystem.

This revealed that much was missing from the CE install, including the Explorer shell and command prompt. Either could be used to launch Doom with the required command-line arguments. Luckily, [Jason] had another trick ready, namely using MortScript (a scripting engine) to launch the Doom executable. This worked like a charm, and after a few tweaks, he now has a dedicated demo box.

We say “demo box” instead of “Doom machine” because without a keyboard, you can’t actually play the game — only view the demo. In a valiant attempt, he connected a USB OTG connector, but the GPS doesn’t seem to recognize input devices, only USB storage devices. Keep at it, [Jason], we’d love to see you crack this one!

[Jason] is no stranger to hacking Windows CE devices. Last time we checked in, the target was a KeySight DSO1102G oscilloscope.

Continue reading “Running Doom On A Doomed GPS”

How To Play Doom – And More – On An NES

Doom was a breakthrough game for its time, and became so popular that now it’s essentially the “Banana For Scale” of hardware hacking. Doom has been ported to countless devices, most of which have enough processing ability to run the game natively. Recently, this lineup of Doom-compatible devices expanded to include the NES even though the system definitely doesn’t have enough capability to run it without special help. And if you want your own Doom NES cartridge, this video will show you how to build it.

We featured the original build from [TheRasteri] a while back which goes into details about how it’s possible to run such a resource-intensive game on a comparatively weak system. You just have to enter the cheat code “RASPI”. After all the heavy lifting is done, it’s time to put it into a realistic-looking cartridge.

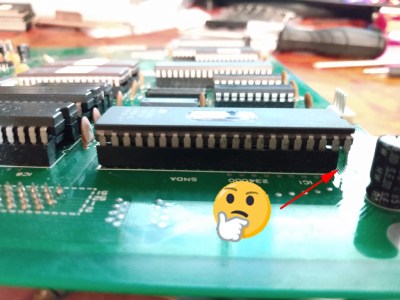
To get everything to fit in the donor cartridge, first the ICs in the cartridge were removed (except the lockout IC) and replaced with custom ROM chips. Some modifications to the original board have to be soldered together as well, since the new chips’ pinouts don’t match perfectly. Then, most of the pin headers on the Raspberry Pi and the supporting hardware have to be removed and soldered together. Then, [TheRasteri] checks to make sure that all this extra hardware doesn’t draw too much power from the NES and overheat it.

The original project was impressive on its own, but with the Doom cartridge completed this really makes it the perfect NES hack, and also opens up the door for a lot of other custom games, including things like Mario64.

Continue reading “How To Play Doom – And More – On An NES”

Trimmed Dreamcast Board Makes For Perfect Portable

In the last year or so we’ve been seeing an array of portable game system builds based around “trimmed” Wii motherboards which have literally been cut down to a fraction of their original size. It turns out that most of the board is dedicated to non-essential functions, with the core Wii system contained within one specific area that can be isolated with a steady hand. But as [Gman] shows in his latest build, the same concept can also be applied to the Sega Dreamcast.

But of course, there’s a bit more to it than just taking a hacksaw to a Dreamcast motherboard. [Gman] had to supplement the trimmed system with quite a bit of additional hardware, such as a power management board he originally designed for portable Wii projects.

Other components were specifically built for this project. For example there’s a custom PCB that handles emulating the Dreamcast controller using a PIC32MZ microcontroller. He’s also using a LM49450 to pull digital audio from the motherboard over I2S, completely bypassing the analog output.

While not currently functioning, [Gman] also included an SPI OLED display and the hardware necessary to emulate basic functionality of the system’s unique Visual Memory Unit (VMU) right in the front of the system. We’re looking forward to seeing him revisit this feature in the future when he’s got the software side of things worked out.

The Nintendo 2DS inspired enclosure is completely 3D printed. A Prusa i3 with textured PEI bed was used to achieve the gorgeous dappled look on the system’s front panel, while the buttons were done on a Form 2 SLA printer. With a mold made from the printed buttons, [Gman] was able to cast the final pieces using a variety of colors until he found a combination he was happy with.

If you’re not Team Sega and would rather hack up your own tiny versions of Nintendo’s hardware, look no further than this fully functional trimmed Wii built into an Altoids tin.

Another World On The Apple II

What’s more fun than porting an old game released for an old system such as the Apple IIgs to its 10-year-older predecessor, the Apple II from 1977? Cue [Deater]’s port of the classic video game ‘Another World‘ to the original Apple II. As was fairly obvious from the onset, the main challenges were with the amount of RAM, as well as with the offered graphics resolutions.

Whereas the Apple II could address up to 48 kB of RAM, the 16-bit Apple IIgs with 65C816 processor could be upgraded to a maximum of 8 MB. The graphics modes offered by the latter also allowed ‘Another World’ to run at a highly playable 320×200, whereas the ported version is currently limited to the ‘low resolution’ mode at 40×48 pixels.

The game itself still needs a lot of work to add missing parts and fix bugs, but considering that it has been implemented in 6502 assembler from scratch, using just the gameplay of the IIgs version as reference, it’s most definitely an achievement which would have earned [Deater] a lot of respect back in the late ’80s as well.

Feel free to check out the Github page for this project, grab a floppy disk image from the project page and get playing. Don’t forget to check out the gameplay video linked after the break as well.

Continue reading “Another World On The Apple II”