A Retro Gaming Console For The New Generation

Ostensibly the ESPboy is an open-source hackable game engine built as an IoT platform for STEM education and play, but there’s no way [RomanS] could have been inspired by anything other than retro gaming consoles from the near past. For anyone who grew up playing with Tamagotchi pets or Palm Pilots, this project is going to be a major throwback.

The Saint Petersburg-based microcontroller hobbyist utilizes a ESP8266 microcontroller to build a series of modules for different game play modes, including a TFT display, GSM phone, MP3 player, GPS navigator, FM radio, and keyboard module. He has plans to build even more modules, including a LoRa messenger and thermal camera, to really expand the system’s capabilities.

Since the board has built-in WiFi, firmware can be uploaded to the device without a wired connection and compiler. The nature of the project makes the board compatible with the Arduino IDE and Micropython, which makes hacking the software even easier.

A TP4056 battery charging module charges the LiPo, although depending on the battery capacity, the charging current (set by the R3 resistor on the controller) does require some change. A MCP4725 I2C DAC is used for smooth driving the LCD’s backlight. In order to extend the battery life, the battery controller uses sleep mode to periodically wake up to measure and send data, which allows it to extend its battery life without external power. There’s also transistor driven buzzers that provide a little extra feedback to the user when playing games, complete with a variable resistor to adjust the sound volume.

A number of free pins run along the periphery for connecting to other modules, including pins for GPIO extension, sensor adapters, connectors to addressable LEDs, and an extension slot for actuators. For anyone interested in making their own version of the ESPboy, the PCB schematics are accessible online.

Projects like the Arduboy have shown that a small microcontroller-based game system can be equal parts fun and educational, so we’ve been excited to see more of these types of projects popping up during the course of the 2019 Hackaday Prize.

Continue reading “A Retro Gaming Console For The New Generation”

Pie Face Game Rigged To Throw Pie At Anyone But You

Pie Face is a game that does pretty much what you’d expect from the title. Players sit in front of a spring loaded arm, taking turns to twist a crank. Eventually, one unlucky player will release the arm and be splattered with whipped cream to the enjoyment of the group. [Harrison] wasn’t one to leave things to chance, however, so decided to rig the game.

Instead of allowing the spring-loaded arm to be released by the internal rotating drum, [Harrison] had a better idea. The drum was sanded smooth, to remove the teeth used by the release mechanism. Then, the release mechanism was replaced with a servo, controlled by an Arduino Nano fitted with a Bluetooth module. With just a tap on his smart phone, [Harrison] can trigger the game, guaranteeing his friends get the cream every time.

It’s a tidy build, and one that takes care to avoid detection with subtle design. Had he not released a Youtube video on the build, [Harrison]’s friends would likely be none the wiser. If your thirst for cheating is still unsated, consider loading your dice for a round of Settlers of Catan. Video after the break.

Continue reading “Pie Face Game Rigged To Throw Pie At Anyone But You”

When Your Car Breaks Down, Simply Hack It Into A Simulator

When [Nishanth]’s Subaru BRZ came to a sudden halt, he was saddened by the wait to get a new engine installed. Fortunately, he was able to cheer himself up by hacking it into a car simulator in the mean time. This would have the added benefit of not being limited to just driving on the Road Atlanta where the unfortunate mishap occurred, but any course available on Forza and similar racing games.

On paper it seemed fairly straight-forward: simply tap into the car’s CAN bus for the steering, throttle, braking and further signals, convert it into something a game console or PC can work with and you’re off to the races. Here the PC setup is definitely the cheapest and easiest, with a single part required: a Macchina M2 Under the Dash kit ($97.50). The XBox required over $200 worth of parts, including the aforementioned Macchina part, an XBox Adaptive Controller and a few other bits and pieces. And a car, naturally.

https://www.notion.so/image/https%3A%2F%2Fs3-us-west-2.amazonaws.com%2Fsecure.notion-static.com%2Fd49697c6-29ae-4b4d-a27b-e2da019d32de%2FUntitled.png?table=block&id=ed4e1bf2-91c6-4494-8e0f-f10964620869&width=5120&cache=v2

The Macchina M2 is the part that listens to the CAN traffic via the OBD2 port, converting it into something that resembles a USB HID gamepad. So that’s all a matter of plug’n’play, right? Not so fast. Every car uses their own CAN-based system, with different peripherals and addresses for them. This means that with the Macchina M2 acquired, [Nishanth]’s first task was to reverse-engineer the CAN signals for the car’s controls.

At this point the story is pretty much finished for the PC side of things, but the XBox One console is engineered to only accept official peripherals. The one loop-hole here is the Adaptive Controller, designed for people with disabilities, which allows the use of alternative inputs. This also enables using a car as an XBox One controller, which is an interesting side-effect.

Continue reading “When Your Car Breaks Down, Simply Hack It Into A Simulator”

Tinker Pilot Project Cranks Cockpit Immersion To 11

One of the more interesting ideas being experimented with in VR is 1:1 mapping of virtual and real-world objects, so that virtual representations can have physically interaction in a normal way. Tinker Pilot is a VR spaceship simulator project by [LLUÍS and JAVI] that takes this idea and runs with it, aiming for the ability to map a cockpit’s joysticks, switches, and other hardware to real-world representations. What does that mean? It means a virtual cockpit with flight sticks, levers, and switches that have working physical versions that actually exist exactly where they appear to be.

A few things about the project design caught our eye. One is the serial communications protocol intended to interface easily with microcontrollers, allowing for feedback between the program and any custom peripherals. (By the way, this is the same approach Kerbal Space Program took with KSPSerialIO, which enables custom mission control hardware at whatever level of complexity a user may wish to implement.)

The possibilities are demonstrated starting around 1:09 in the teaser trailer (embedded below) in which a custom controller is drawn up in CAD, then 3D-printed and attached to an Arduino, and finally the 3D model is imported into the cockpit as a 1:1 representation of the actual working unit, with visual positional feedback.

Unlike this chair experiment we saw which attached a Vive Tracker to a chair, there is no indication of needing positional trackers on individual controls in Tinker Pilot. In a cockpit layout, controls can be reasonably expected to remain in fixed positions relative to the cockpit, meaning that they can be set up as 1:1 representations of a physical layout and otherwise left alone. The kind of experimentation that is available today even to individual developers or small teams is remarkable, and it’s fascinating to see the ideas being given some experimentation.

Continue reading “Tinker Pilot Project Cranks Cockpit Immersion To 11”

Pew Pew In The Palm Of Your Hand

It’s often said that “getting there is half the fun”, and we think that can be just as true when building hardware as it is during the roadtrip to your favorite hacker con. Many of us enjoy the process of planning, designing, and building a new gadget as much as playing with it when it’s done. We get the impression [Radomir Dopieralski] feels the same way, as he’s currently working on yet another iteration of his PewPew project.

For the uninitiated, [Radomir] has already created a number of devices in the PewPew line, which are designed to make programming games on “bare metal” easier and more approachable for newcomers by using CircuitPython.

The original version was a shield for the Adafruit Feather, which eventually evolved into a standalone device. The latest version, called the M4, includes many niceties such as a large TFT screen and an acrylic enclosure. It’s also switched over to the iconic Game Boy layout, to really drive home that classic gaming feel.

As [Radomir] explains, previous versions of the PewPew were designed to be as cheap and easy to manufacture as possible, since they were to be used in game programming workshops. But outside of that environment, they left a little something to be desired. With the M4, he’s created something that’s much closer to a traditional game system. In that respect it’s a bit like the Arduboy: you can still use it to learn game development, but it’s also appealing enough that you might just play other people’s games on it instead.

That Game Cartridge Isn’t As Straightforward As You’d Think

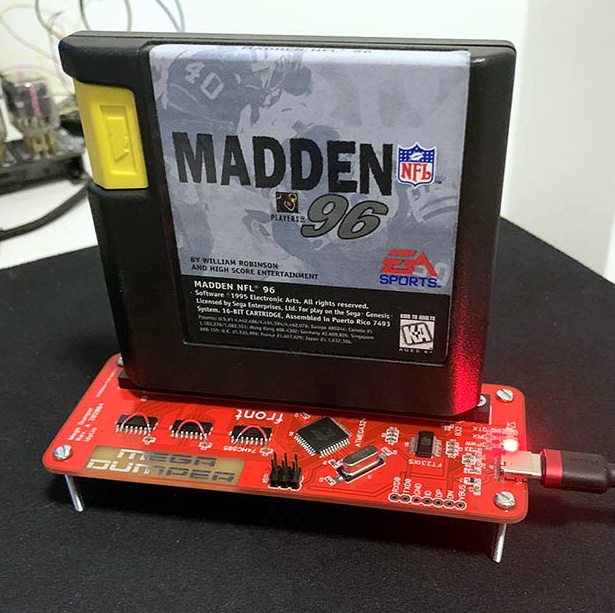
Classic games consoles played their games from cartridges, plastic bricks that held a PCB with the game code on it ready to be run by the console hardware. You might therefore expect them to be an easy prospect for emulation, given that the code can be extracted from whatever ROM they contain. But as anyone with an interest in the subject will tell you, some cartridges included extra hardware to boost the capabilities of their games, and this makes the job of an emulator significantly more complex.

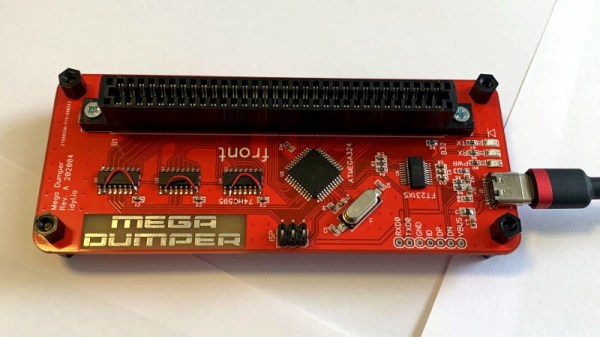
[Byuu] has penned an article exploring this topic across a variety of consoles, with in-depth analyses of special-case cartridges. We see the obvious examples such as the DSP coprocessors famously used on some SNES games, as well as Nintendo’s Super Game Boy that contained an entire Game Boy on a chip.

But perhaps more interesting are the edge-case cartridges which didn’t contain special hardware. Capcom’s Rockman X had a copy protection feature that sabotaged the game if it detected RAM at a frequently used save game address emulated by copiers. Unfortunately this could also be triggered accidentally, so every one of the first generation Rockman X cartridges had a manually attached bodge wire that a faithful emulator must replicate. There is also the case of the Sega Genesis F22 Interceptor, which contained an 8-bit ROM where most cartridges for this 68000-powered platform had a 16-bit part. Simple attempts to copy this cartridge result in the upper 8 bits having random values due to the floating data lines, which yet again an emulator must handle correctly.

It’s a subject with a variety as huge as the number of console developers and their games, and a field in which new quirks are constantly being unearthed. While most of us don’t spend our time peering into dusty cartridges, we’re grateful for this insight into that world.

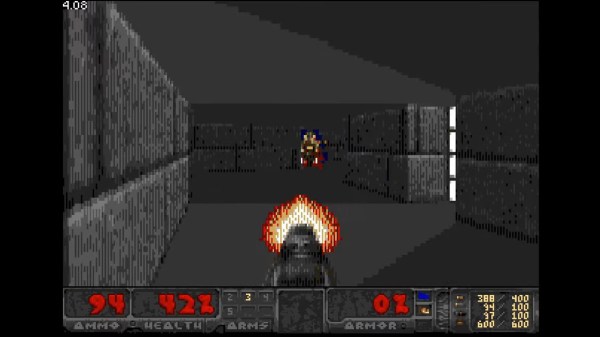
We’ve visited the world of emulators a few times before, such as when we looked at combatting in-game lag.

Upping The Story-Telling Game With Dialog And The Å-Machine

During the decades since Infocom released their interactive story game Zork to world-wide acclaim for microcomputers, the genre of interactive fiction (IF) is still immensely popular, with a surprising number of modern IF works targeting Infocom’s original Z-Machine runtime for 8-bit micocomputers. We’ve seen a number of improved runtimes and languages for the platform over the years, with [Linus Åkesson]’s Dialog language a newcomer.

Covering the technical details about the language in this thread at IntFiction, the interesting aspect about this language is that while it has a compiler that compiles it to Z-code for the Z-Machine, [Linus] has also implemented a new runtime, called the ‘Å-Machine‘, since ‘Å’ follows ‘Z’ in the alphabet (if you’re Swedish, that is). This runtime should allow for larger stories and other features that make better use of more resources, while still allowing smaller stories to work on old hardware. Unfortunately the only Å-Machine implementation at this point is written in JavaScript, which is not known to work particularly well on Commodore 64 or even Amiga 500 systems.

As for Dialog itself, its documentation provides a detailed overview of the language’s capabilities, which claims to be inspired by both Inform 7 and Prolog. Its goals are to be easy to follow, with a minimal number of language concepts, and high performance. As the documentation notes, many Z-Machine based stories exist today that are unplayable on vintage hardware due to lack of optimization.

We covered Zork and the Z-Machine a while ago in some detail. We think it’s great to see that there’s still so much interest in the platform. Maybe someone will write an Å-Machine implementation for a Commodore or MSX system one of these days to see how it compares to Infocom’s Z-Machine. Here’s to another few decades of the Zork-legacy.