Ikea Furniture Hacks Make Accessibility More Accessible

The ThisAbles project is a series of 3D-printed IKEA furniture hacks making life easier for those without full use of their bodies. Since IKEA furniture is affordable and available across most of the planet, it’s the ideal target for a project that aims to make 3D-printed improvements accessible to everyone.

These hacks fit all meanings of the word “accessible”: Available worldwide, affordable, and helping people overcome physical barriers of everyday living. ThisAbles has support of multiple organizations including IKEA Israel. In their short introductory video (embedded below the break) they explained their process to find ways to make big impacts with simple 3D-printed modifications. From bumpers protecting furniture against wheelchair damage, to handles that allow drawers to be opened without fine fingertip control. Each of these designs also fit the well-known IKEA aesthetic, including their IKEA style illustrated manuals.

The site launched with thirteen downloadable solutions, but they have ambitions for more with user feedback. There’s a form where people can submit problems they would like to see solved, or alternatively, people can submit solutions they’ve already created and wish to share with the world. Making small changes to commodity IKEA furniture, these 3D printed accessories will have far more impact on people’s lives than the average figurine trinket on Thingiverse. It’s just the latest way we can apply hacker ingenuity to help others to do everything from simple daily tasks to video gaming.

[via Washington Post]

Continue reading “Ikea Furniture Hacks Make Accessibility More Accessible”

[Caleb Kraft] Brings Us The Moon, On A Budget

As you might expect from one of our most illustrious alumni, [Caleb Kraft] is a rather creative fellow. Over the years he’s created some absolutely phenomenal projects using CNC routers, 3D printers, laser cutters, and all the other cool toys the modern hacker has access to. But for his latest project, a celebration of the full Moon, he challenged himself to go low-tech. The Moon is something that anyone on Earth can look up and enjoy, so it seemed only fitting that this project should be as accessible to others as possible.

[Caleb] started this project by looking for high-resolution images of the Moon, which was easy enough. He was even able to find sign shops that were more than happy to print a giant version for him. Unfortunately, the prices he was quoted were equally gargantuan. To really be something that anyone could do, this project needed to not only be easy, but as affordable as possible. But where do you get a giant picture of the Moon for cheap?

He eventually found a source for Moon shower curtains (we told you he was creative), which fit the bill perfectly. [Caleb] says they aren’t nearly as detailed as the original images he found, but unless you’ve got your face pressed up against it you’ll never notice anyway. To make the round frame, he used PEX tubing from the hardware store and simply stapled the curtain directly to the soft plastic. The hardest part of the whole project is arguably getting the curtain flat and taut on the PEX ring.

Technically you could stop now and have a pretty slick piece of art to hang on your wall, but [Caleb] took the idea a bit farther and put a strip of RGB LEDs along the inside of the ring. The shower curtain material does a decent enough job of diffusing the light of the LEDs to make it look pretty good, though there’s certainly some room for improvement if you want to get a more even effect over the entire surface. While you’re at it, you might as well add in some additional electronics so the lighting matches the current phase of the real-life Moon.

On the other hand, if you’re willing to settle for a far more diminutive version of Luna and don’t mind using those highfalutin hacker tools that [Caleb] decided to avoid for the good of mankind, we’ve got a project you might be interested in.

Continue reading “[Caleb Kraft] Brings Us The Moon, On A Budget”

Old Wireless Switches Join The Internet Of Things

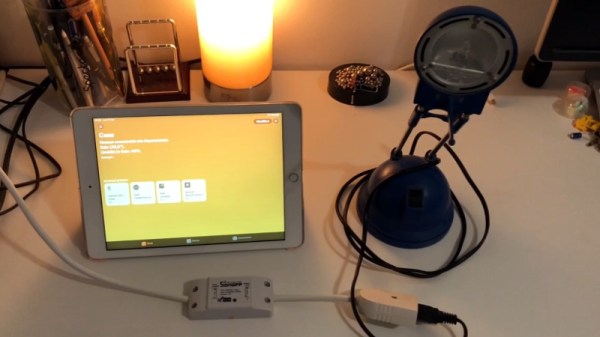
Just about any appliance comes in an internet enabled version nowadays. However, even the oldest gear can be switched on and off with an Internet connected power socket. [Bill] is in the process of automating his home, and found some old radio controlled power sockets that badly needed to join the 21st Century. Hacking ensued.

The first set of switches [Bill] came across were easy to work with. Eager to keep things as functional as possible, ESP8266s with Tasmota firmware were wedged into the enclosures. With a bit of circuit sleuthing, [Bill] was able to set up the switches to respond to commands from both the ESP8266 as well as the original push buttons and radio remote.

[Bill] later came across some black switches, which were not up to his standards. These switches were gutted entirely, being used only for their mains plug and enclosure. The relays inside were replaced with 5V versions which were easier to trigger from the ESP8266’s outputs.

[Bill[ readily admits that the cost benefits over buying off-the-shelf Sonoff modules don’t really add up, but good hackers rarely let such concerns get in the way of a fun project. Around these parts, we see plenty of hacks to automate your house – like this zero-intrusion light switch mod. Happy hacking!

The Joy Of Properly Designed Embedded Systems

The ages-old dream of home automation has never been nearer to reality. Creating an Internet of Things device or even a building-wide collection of networked embedded devices is “easy” thanks to cheap building blocks like the ESP8266 WiFi-enabled microcontroller. Yet for any sizable project, it really helps to have a plan before getting started. But even more importantly, if your plan is subject to change as you work along, it is important to plan for flexibility. Practically, this is going to mean expansion headers and over-the-air (OTA) firmware upgrades are a must.

I’d like to illustrate this using a project I got involved in a few years ago, called BMaC, which grew in complexity and scope practically every month. This had us scrambling to keep up with the changes, while teaching us valuable lessons about how to save time and money by having an adaptable system architecture.

Continue reading “The Joy Of Properly Designed Embedded Systems”

Whirling Sawblades Turn Foam Packaging Into Wall Insulation

If you’re like us, the expanded polystyrene (EPS) foam inserts that protect many packages these days are a source of mixed feeling. On the one hand, we’re glad that stuff arrives intact thanks to the molded foam inserts. But it seems so wasteful, especially when chucking it in the garbage can. If only it could be effectively recycled.

It turns out that it can be, if you equip yourself with this spinning “sawblades of doom” EPS recycler. It comes by way of [HowToLou], who was looking for a way to insulate a wall on the cheap. Almost all commercially available insulating materials – fiberglass batts, blown-in cellulose, expanding polyisocyanurate – are pretty pricey. Foam packing pieces are pretty easy to come by, though, and usually free for the taking. [Lou]’s method of turning them into insulation is a box containing four circular saw blades mounted to a piece of threaded rod and spun by a cordless drill. The blades are mounted askew on the rod for better reduction of the foam; [Lou] chose to use wire to hold the blades down, while we’d have printed up some slanted arbors and bolted the blades down more firmly. A chicken wire prefilter keeps the big chunks from clogging a blower made from an old bathroom exhaust fan, which does a great job of filling the wall cavities with pulverized EPS nuggets. The video below has all the details.

Honestly, the box is a little scary, and we have doubts that [Lou] will be able to get enough foam to finish the job, but it’s still a clever little hack. Grinding things up seems to be a theme for him; check out his leaf collector or his apple cider press.

Continue reading “Whirling Sawblades Turn Foam Packaging Into Wall Insulation”

The Heat Is On With This ESP8266 Controlled Sauna

We’ll be perfectly honest: sitting inside a heated box sounds just a bit too much like torture for our tastes. But if we did somehow find ourselves in possession of a fancy new sauna, we’d more than likely follow in the footsteps of [Al Betschart] and make the thing controllable with the ESP8266. After all, if you’re going to be cooked alive, you might as well do it on your own terms.

The sauna itself was purchased as a kit, and included an electric heater controlled by a thermostat. As explained in his detailed documentation, [Al] integrated a Sonoff TH16 into the original heater circuit so he could control power to the coils remotely. The TH16 also includes support for a thermal sensor, which allowed him to get a reading on the sauna’s internal temperature. The new electronics were mounted in a weather-proof box on the back of the sauna, complete with an external WiFi antenna to help get a good signal back to the house.

At this point the project could technically be done if all you wanted was remote control, but [Al] wanted to create a replacement firmware for the Sonoff that was specifically geared towards the sauna. So he came up with some code that uses MQTT to connect the heater to his home automation system, and allows configuring things like the maximum temperature and how long the sauna will run before turning itself off.

Interestingly, the company who makes these saunas thought the work [Al] did to integrate their product into his home automation system was so impressive they actually interviewed him about it and put it up on their site for others who might be inspired by his work. We’ve covered a lot of hacks to consumer devices here at Hackaday, and it’s exceedingly rare for a company to be so supportive of customers fiddling around with their products (especially in a case like this where there’s a real chance of burning your house down), so credit where credit is due.

The last time we brought you a sauna hack it was quite literally in a van down by the river, so the addition of an ESP8266 certainly brings this more into our comfort zone. Figuratively, if not literally.

[Thanks to Jon for the tip.]

Forget The Kiln, These Tiles Were Made On A Prusa

Where does your mind go when you think of 3D printed parts? Running off hard to find replacement components? Maybe spinning up a bespoke electronics enclosure? Occasionally the little boat that you can compare to the little boats of others online? All reasonable enough answers. But thanks to the work of [Matthew Wentworth], you might have a new mental image to associate with the smell of melting PLA: decorative Portuguese Azulejo tiles.

As difficult as it might be to believe, the tiles you’re seeing here weren’t made on some exotic ceramic printer, but a standard Prusa i3 MK3. Well, at least they started on the 3D printer. As you might have guessed, there’s a bit more involved than that.

That said, the idea is actually quite simple. The printed “tile” is just the base plate, plus the raised elements that will eventually be seen on the surface. Everything else is just a void, which naturally saves a lot on printing time and material. Once the print is done, premixed spackling paste is pushed into all of the open areas and the top is made as smooth as possible with a putty knife. The filled tile is then left to dry for 24 hours or so.

Once it’s dried, you take the tile outside and sand the top down with a palm sander (or by hand, if you have the patience). This not only smooths out the spackle, but eventually will expose and then smooth the top parts of the print. Once everything is nice and silky, it gets sprayed with a semi-gloss clear coat to both protect it and give it that authentic looking shine.

[Matthew] actually created his designs based on images of real Azulejo tiles he found online, but really any sort of image that has raised elements like this could be made to work. If anyone out there decorates their home with 3D printed Jolly Wrencher tiles, you know where to send the pictures. Interestingly, these aren’t the first tiles we’ve seen made out of plastic, but we’ve got to admit these ones would look quite a bit more appealing on your kitchen walls.