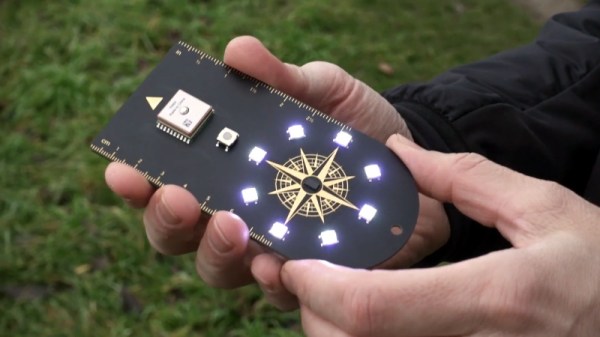
In Pirates of the Caribbean, Captain Jack Sparrow has an enchanted compass that points to what the holder wants most in life. The Pizza Compass created by [Joe Grand] is basically the same thing, except it’s powered by a Particle Boron instead of a voodoo spell. Though depending on who’s holding the thing, we imagine they’d even point in the same direction.
[Joe] was tasked by Wired to design and produce the Pizza Compass in three weeks, a process which was documented in the video below. Being the Badgelife luminary that he is, the final product looks far more attractive than it has any business being. In addition to the Particle Boron that slots in on the back of the handheld PCB, there’s a GlobalTop PA6H GPS module, a LSM303DLHC compass, and eight NeoPixels that correspond to the points on the silkscreen compass.
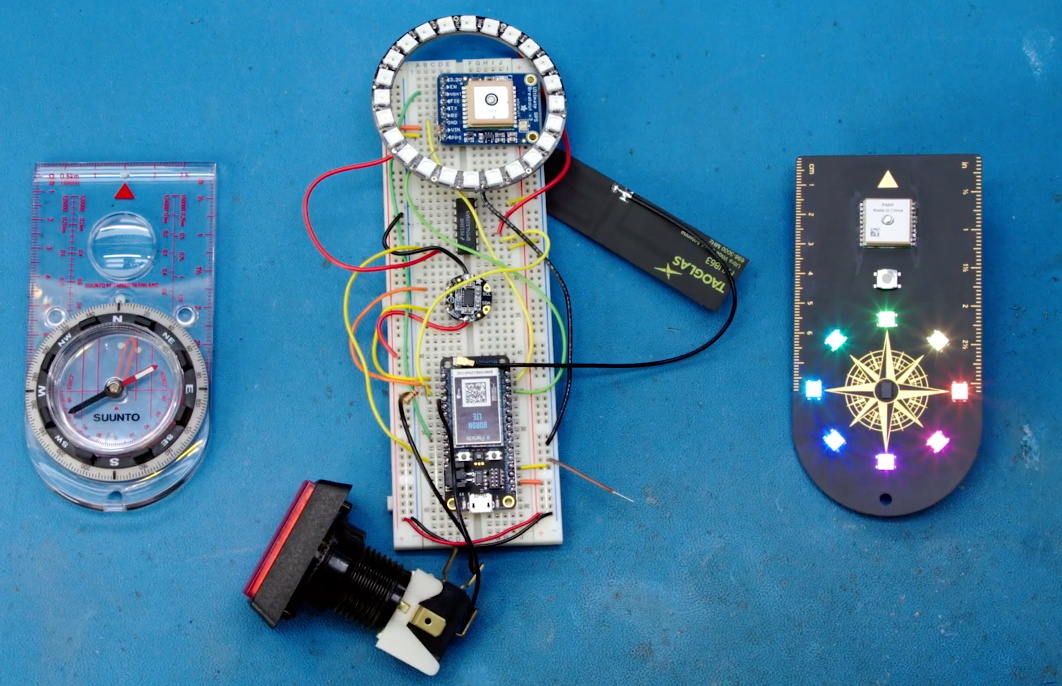
Using the device is simple, just press the button and then walk around trying to keep the top-most LED lit. Behind the scenes, the Boron is pulling down the coordinates of the closest pizza place as reported by Google’s API, and comparing that to the user’s current GPS location. In practice that means the Pizza Compass isn’t concerned with nuances like streets or buildings, so its up to the user to figure out how best to stay on the desired heading. So rather than just following some turn-by-turn directions, there’s some proper navigation involved if you want that fresh slice.
If you don’t like pizza, you could reprogram the compass to point to whatever quest-worthy resource you wish. As explained at the end of the video, [Joe] wanted this to be an open source project so it could easily be adapted for different tasks by the community. Though honestly, it’s pretty weird if you don’t like pizza.
We’ve actually covered a very similar device in the past that would point the user to the closest White Castle or Five Guys, but with all due respect to that project, the Pizza Compass is in another league. When you’ve got the talent and experience of [Joe Grand] on the team, even the most mundane of gadgets ends up looking like a piece of art.
Continue reading “Open Source Pizza Compass Will Show You The Way”