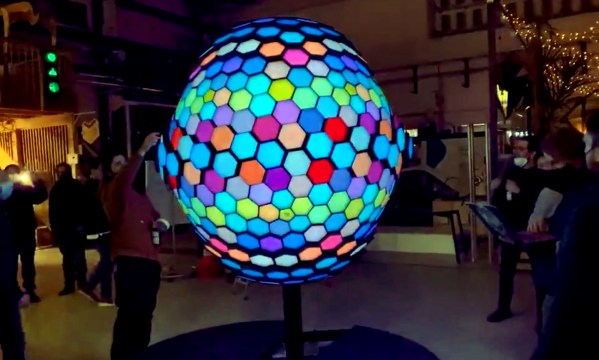
Marvelously conceived and exquisitely executed, this huge ball made up of hexagon tiles combines the best of blinky LEDs and animatronics into one amorphic ball.
The creation of [Nicholas Perillo] of Augmentl along with [MindBuffer], full details of the “morph v2” project have not yet been published. However, some tantilizing build progress is documented on [Nicholas’] Insta — most especially through the snapshots in the story thread spanning the last seven months. The scope of the project is brought into focus with time lapse video of hundreds of heat-set inserts, bundles of twisted wire, a pile of 1500 sliding rails, cases full of custom-order stepper motors, and thick cuts of copper bus bars to feed power up the shaft and out to the panels.
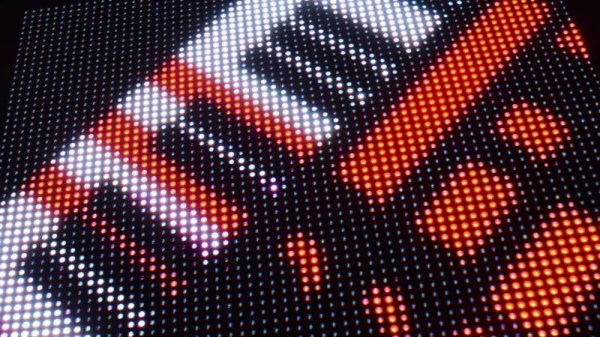
The demo video after the break is mesmerizing, shot by [nburdy] during a demo at MotionLab Berlin where it was built. Each hex tile is backed by numerous LEDs and a stepper motor assembly that lets it move in and out from the center of the ball. Somehow it manages to look as though it’s flowing, as they eye doesn’t pick up spaces opening between tiles as they are extended.
The Twitter thread fills in some of the juicy details: “486 stepper motors, 86,000 LEDs and a 5 channel granular synth engine (written by @_hobson_ no less, in @rustlang of course).” The build also includes speakers mounted in the core of the ball, hidden behind the moving LED hexes. The result is an artistic assault on reality, as the highly coordinated combinations of light, sound, and motion make this feel alive, otherwordly, or simply a glitch in the matrix. Watching the renders of what animations will look like, then seeing it on the real thing drives home the point that practical effects can still snap us out of our 21st-century computer-generated graphics trance.
It’s relatively easy to throw thousands of LEDs into a project these days, as PCBA just applies robots to the manufacturing problem. But motion remains a huge challenge beyond a handful of moving parts. But the Times Square billboard from a few years ago and the Morph ball both show it’s worth it.
As you’ve guessed from the name, this is the second Morph ball the team has collaborated on. Check out details of v1, a beach ball sized moving LED ball.
Continue reading ““MORPH” LED Ball Is A There-Is-No-Spoon, Reality-Bending Art Installation” →