Even among those of us with a penchant for repairing electronics, there are some failures which are generally considered too severe to come back from. A good example is liquid damage in a laptop; with so many components and complex circuits crammed into such a small area, making heads or tails of it once the corrosion sets in can be a real nightmare. Especially in the case of an older laptop, the conventional wisdom is to try and recover your files and then buy a new one.
But as we’ve come to learn, [Jason Gin] is not a man who often finds himself concerned with conventional wisdom. After finding an older MacBook with suspected liquid damage, he decided to see what it would take to restore it to working order. According to a note on the device, the screen was dead, the USB ports were fried, the battery didn’t take a charge, and it wouldn’t boot. No problem then, should be easy.
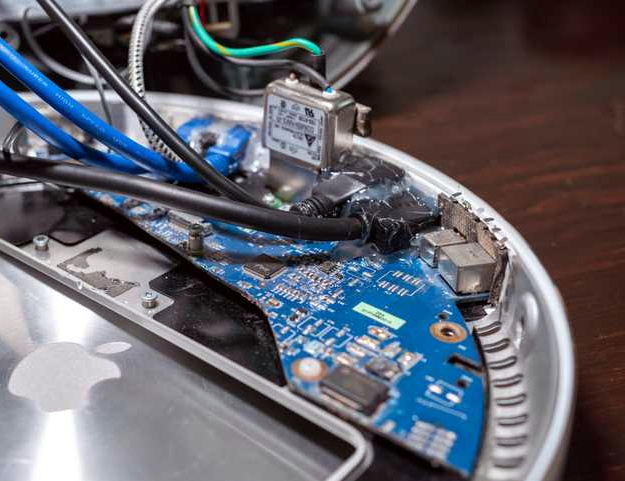
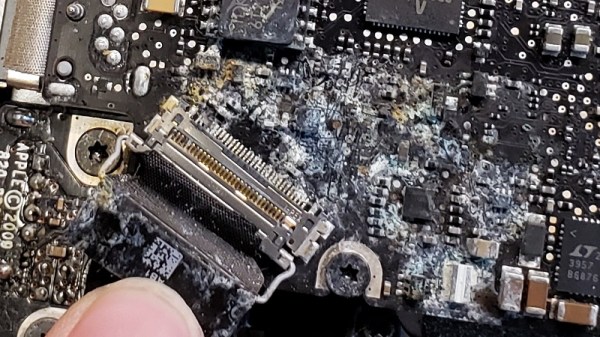
 Upon opening up the circa-2012 laptop, [Jason] found the machine to be riddled with corrosion. We’re not just talking surface gunk either. After giving everything a good cleaning with isopropyl alcohol, the true extent of the damage became clear. Not only had traces on the PCB rotted away, but there were many components that were either damaged or missing altogether. Whatever spilled inside this poor Mac was clearly some nasty stuff.
[Jason] used OpenBoardView to pull up schematics and diagrams of the motherboard, and started the arduous task of visually comparing them to his damaged unit. In some areas, the corrosion was so bad he still had trouble locating the correct traces and pads. But with time and effort, he was able to start probing around and seeing what components had actually given up the ghost.
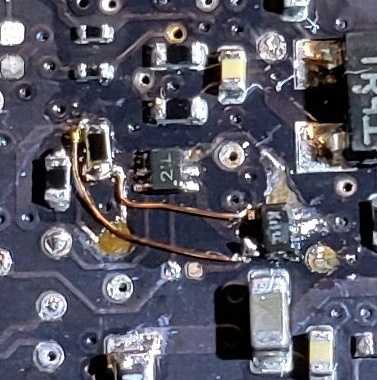
For the USB ports it ended up being a bad 10-microfarad ceramic capacitor, but for the LCD, he ended up having to replace the entire backlight driver IC. The prospect of working on this tiny BGA-25 device might have been enough for some to throw in the towel, but compared to the hand-soldered magnet wire repairs required elsewhere on the board, [Jason] says the installation of the new LP8550 chip was one of the easier aspects of the whole operation.
The write-up is a great read if you like a good repair success story, and we especially like the way he documented his diagnosis and resulting work on a per-system basis. It makes it much easier to understand just how many individual fires [Jason] had to put out. But if you’re more interested in feats of steady-handed soldering, check out his recent project to add a PCI-E slot to the Atomic Pi.

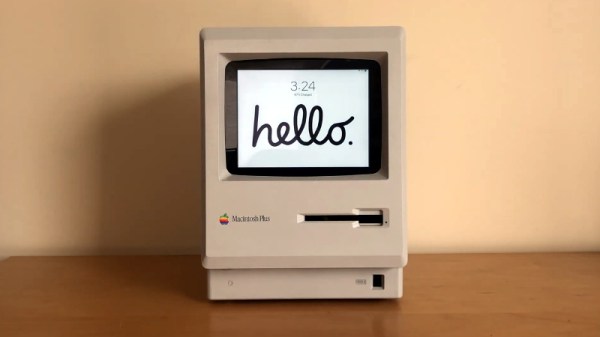


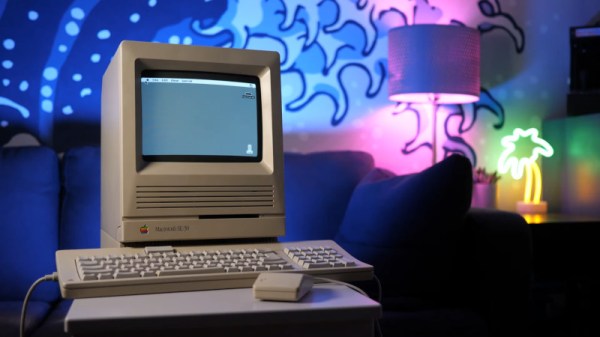
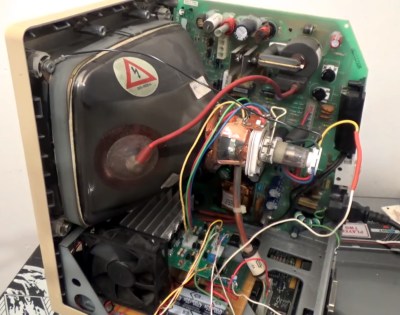 The hack starts with the opening of a Macintosh, which naturally requires a long screwdriver with the right tip. Setting the stage for things to come, this is achieved by soldering together a couple of existing tools to get the reach he needs. [Jason] then proceeds to install a brightness control for the main electron gun, as well as deflection drivers and a spot killing circuit. Everything is done with the intention of the hack being reversible, as [Jason] didn’t wish to sacrifice a good Macintosh Plus just for the sake of having some fun.


