A Single SSD’s Journey From System 7 To High Sierra

With some time to kill and an array of old Apple computers on hand, [Pierre Dandumont] wondered if he could continuously upgrade a single OS drive from the oldest system he had, System 7.1 on a Performa 630, to the latest version of MacOS on a MacBook Air. He recalled watching an old video which demonstrated a continuous upgrade from DOS to Windows 10 (we think this video from 2016 may be the one), which gave him the inspiration for this journey. [Pierre] documents his efforts on his blog (in French; English translated link is here).

Along the way, he installed 24 different operating systems

  • System 7.1.2, 7.5
  • Mac OS 7.6
  • Mac OS 8.0, 8.1, 8.5, 8.6
  • Mac OS 9.0, 9.1, 9.2
  • Mac OS X 10.0 – 10.11
  • macOS 10.12, 10.13

on seven Mac computers

  • Performa 630 (ca. 1994, Motorola 68040)
  • Power Mac G3 Beige (ca. 1997, Motorola PowerPC 730)
  • Power Mac G3 Blue (ca. 1999, Motorola PowerPC 730)
  • Power Mac G4 Digital Audio (ca. 2001, Motorola PowerPC 7400)
  • Mac mini G4 (ca. 2005, Motorola PowerPC 7447)
  • Mac mini 2009 (Intel Core 2 Duo Penryn)
  • MacBook Air 2012 (Intel Core i5/i7)

across three of the four processor families spanned by the Macintosh line of computers since their introduction in 1984. You can see in the lead photo the success, where the Mac OS 8 search tool Sherlock is shown in the dock of a MacBook Air running High Sierra.

Continue reading “A Single SSD’s Journey From System 7 To High Sierra”

Handheld Hackintosh Runs Mac OS On LattePanda

We’ve seen a huge influx of bespoke portable computers over the last couple of years thanks to availability of increasingly powerful single-board computers. The vast majority of these have been ARM powered using something like the Raspberry Pi 4, and naturally, run Linux. Only a handful have run on x86 hardware, usually because whoever built it wanted to be able to run Windows.

But this handheld x86 Hackintosh running the latest Mac OS on the LattePanda Alpha is truly something unique. Creator [iketsj] claims it to be a world’s first, and after a bit of searching, we’re inclined to agree. While others have installed Mac OS on the LattePanda to create Hackintosh laptops, this would indeed appear to be the first handheld computer to utilize this particular hardware and software blend.

Like other custom portables we’be seen, this one starts with a 3D printed enclosure. The overall design reminds us a bit of the YARH.IO we covered last year, and even borrows the trick of reusing the membrane and PCB of one of those miniature keyboard/pointer combos. Which in this case ends up being especially important, as in keeping with Apple’s own portable Mac OS machines, the screen on this handheld doesn’t support touch.

We especially like how the integrated Arduino on the LattePanda is being used in conjunction with some MOSFETs to control power to the handheld’s LCD, keyboard, and fans. While it sounds like the fans are currently running at full throttle, [iketsj] mentions he does intend on adding automatic speed control in the future. A dedicated “chassis controller” like this makes a lot of sense, and is something we imagine will only become more common as these portable builds become increasingly complex.

Now that we’ve seen a custom portable computer running Mac OS, are we due to see a whole new wave of cyberdecks sporting Cupertino’s software in the future? Maybe not. As [iketsj] points out at the end of this video, Apple’s switch from x86 to their own in-house silicon will almost certainly mean the death of the Hackintosh project within the next few years, bringing a fascinating era of computer hacking to a close.

Continue reading “Handheld Hackintosh Runs Mac OS On LattePanda”

30-Year-Old Macintosh SE/30 Gets A Brand New Logic Board

Some time ago, [Bolle] got the idea to redraw the Macintosh SE/30 schematics in Eagle. Progress was initially slow, but over the past month (and with some prodding and assistance from fellow forum frequenter [GeekDot]), he’s taken things a step further by creating a fully functional replacement Macintosh SE/30 logic board PCB.

By using the available schematics, the project didn’t even require much reverse engineering. Though he plans for more modernization in later iterations, this design is largely faithful to the original components and layout, ensuring that it is at least basically functional. He did update the real time clock battery to a CR2032 and, as a benefit of redrawing all the traces, he was able to use a 4-layer PCB in place of the costly 6-layer from Apple’s design.

The board came back from fabrication looking beautiful in blue; and, once he had it soldered up and plugged in, the old Mac booted on the very first try! A copy-paste mistake with the SCSI footprints led to some jumper wire bodging in order to get the hard drive working, but that problem has already been fixed in the next revision. And, otherwise, he’s seen no differences from the original after a few hours of runtime.

Recreating old Macintosh logic boards almost seems like its own hobby these days. With the design and fabrication capabilities now accessible to hobbyists, even projects that were once considered professional work are in reach. If you’re interested in making your own PCB designs, there are many resources available to help you get started. Alternatively, we have seen other ways to modernize your classic Macs.

[Thanks to techknight for the tip!]

Get Apple To Track Your Bluetooth Devices For You

Apple’s “Find My” service allows users to track their missing devices by leveraging a worldwide network of location-aware iGadgets. With millions of iPhones and Macs out in the wild listening for the missing device’s Bluetooth advertisements and relaying their findings to the Cupertino Mothership, it’s a highly effective way of tracking hardware so long as it stays in relatively urban areas. Unfortunately, the system is completely proprietary and non-Apple devices aren’t invited to play.

Or at least, that used to be the case. A project recently released by the [Secure Mobile Networking Lab] called OpenHaystack demonstrates how generic devices can utilize Apple’s Find My network by mimicking the appropriate Bluetooth Low Energy (BLE) broadcasts. Currently they have a firmware image for the BBC micro:bit, as well as a Python script for Linux, that will allow you to spin up an impromptu Find My target. But the team has also published all the information required to implement similar functionality on other BLE-capable devices and microcontrollers, so expect the list of supported hardware to grow shortly.

Diagram showing how the Apple Find My system worksSomewhat ironically, while OpenHaystack allows you to track non-Apple devices on the Find Me tracking network, you will need a Mac computer to actually see where your device is. The team’s software requires a computer running macOS 11 (Big Sur) to run, and judging by the fact it integrates with Apple Mail to pull the tracking data through a private API, we’re going to assume this isn’t something that can easily be recreated in a platform-agnostic way. Beyond the occasional Hackintosh that might sneak in there, it looks like Tim Cook might have the last laugh after all.

It’s not immediately clear how difficult it will be for Apple to close this loophole, but the talk of utilizing a private API makes us think there might be a built-in time limit on how long this project will be viable. After all, Big Tech doesn’t generally approve of us peons poking around inside their machinations for long. Though even if Apple finds a way to block OpenHaystack, it’s expected the company will be releasing “AirTags” sometime this year which will allow users to track whatever objects they like through the system.

Recreating The Mac SE Logic Board

When [Kai Robinson] found himself faced with the difficult task of saving as many Mac SE’s as he possibly could, the logical but daunting answer was to recreate the Mac SE logic board for machines that would otherwise be scrapped. These machines are over 30 years old and the PRAM battery often leaks, destroying parts and traces. Given that the logic board is a simple through-hole two four-layer board, how hard could it be?

The first step was to get some reference photos so [Kai] set to desoldering everything on the board. The list of components and the age of solder made this an arduous task. Then a composite image was produced by merging images together using a scanner and some Inkscape magic. in graphics software.

Rather than simply putting the pins in the right place and re-routing all the netlists, [Kai] elected instead to do a copy, trace for trace of the original SE board. [Kai] and several others on the forum have been testing the boards and tracking down the last few bugs and kinks in the design. An unconnected pin here and an improperly impedance matched resistor there. Hopefully, soon they’ll have Gerbers and design files ready for anyone should they need a new logic board PCB.

It’s no secret that we love the Macintosh SE here at Hackaday. We’ve seen new custom cases for it and now new PCBs for it. It does cause the mind to ponder though and wonder, what’s next?

Thanks [Toru173] for sending this one in!

FTDI VCP Chips With Custom PIDs Not Working On MacOS 11 Big Sur

An anonymous reader pinged us about an issue that affects people who jumped onto the latest-and-greatest OS from the Apple gardens: USB devices that stop working due to the FTDI-based USB solution. At its core appears to be that the built-in FTDI driver provided by Apple (AppleUSBFTDI.dext) only supports FTDI chips which provide the standard FTDI vendor and product ID (e.g. 0x0403 and 0x6001 respectively for the FT232R). Many products however set a custom product ID (PID) to differentiate their device, though in the thread some mention that there are driver issues even with the default VID/PID combination.

Over the past years, Apple has been restricting and changing the way kernel extensions (KExt) and driver extensions (DExt) are handled. As these FTDI chips are often used for virtual com port (VCP) purposes, such as with Arduino boards and USB-TTL adapters, this is a rather cumbersome issue that would affect anyone using Big Sur in combination with such a hardware device.

So far only the FTDI team has been somewhat responsive based on the support forum thread, with Apple seemingly rather silent on the issue.

An IMac All-In-One’s New Life

There’s a sleek form factor for desktop computers known as an “all-in-one” that enrobes a computer in a monitor. While the convenience of having all your computing in a neat package has some nice benefits, it comes with an unfortunate downside. Someday the computer inside is going to be old and outdated in comparison to newer machines. While a new OS goes a long way towards breathing life into an old machine, [Thomas] has decided to take the path less travelled and converted an old iMac all-in-one into a discrete monitor.

The iMac in question is the 20″ iMac G5 iSight (A1145) with an LG-Philips LM201W01-STB2 LCD panel. Looking back, [Thomas] would recommend just ordering an LCD driver controller kit from your favourite auction house. But for this particular modification, he decided to do things a little bit more manually and we’re quite glad he did.

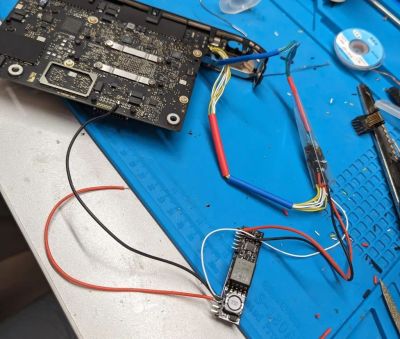
Luckily for [Thomas], the panel supports TMDS (which both DVI and HDMI are compatible with). So the next step was to figure out the signalling wires and proper voltages. After some trouble caused by a mislabeled power line on the iMac PCB silk-screen (12v instead of 3.3v), he had all the wires identified and a plan starting to form. The first step was a circuit to trick the inverter into turning on with the help of a relay. The female HDMI plug with a breakout board was added and sticks out through the old firewire port. The minuscule wires in the display ribbon cable to the monitor were separated and soldered onto with the help of [Thomas’] daughter’s microscope. Resistances were checked as HDMI relies on impedance matched pairs. To finish it off, an old tactile toggle switch offers a way to turn the monitor on and off with a solid thunk.

We love seeing old hardware being repurposed for new things. This project nicely complements the iMac G4 Reborn With Intel NUC Transplant we saw earlier this year, as they both try to preserve the form factor while allowing a new computer to drive the display.