Demystifying The ESP8266 With A Series Of Tutorials

If your interest has been piqued by the inexpensive wireless-enabled goodness of the ESP8266 microcontroller, but you have been intimidated by the slightly Wild-West nature of the ecosystem that surrounds it, help is at hand. [Alexander] is creating a series of ESP8266 tutorials designed to demystify the component and lead even the most timid would-be developer to a successful first piece of code.

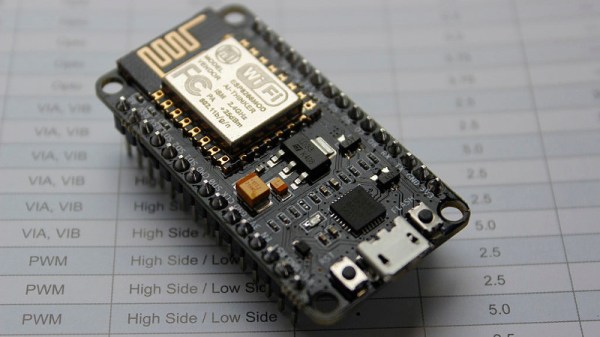
If you cast your mind back to 2014 when the ESP8266 first emerged, it caused great excitement but had almost no information surrounding it. You could buy it on a selection of modules, but there were no English instructions and no tools to speak of. A community of software and hardware hackers set to work, resulting in a variety of routes into development including the required add-ons to use the ever-popular Arduino framework. Four years later we have a mature and reliable platform, with a selection of higher-quality and well supported boards to choose from alongside that original selection.

The tutorials cover the Arduino and the ESP, as well as Lua and the official SDK. They are written for a complete newcomer, but the style is accessible enough that anyone requiring a quick intro to each platform should be able to gain something.

Our community never ceases to amaze us with the quality of the work that emerges from it. We’ve seen plenty of very high quality projects over the years, and it’s especially pleasing to see someone such as [Alexander] giving something back in this way. We look forward to future installments in this series, and you should keep an eye out for them.

An Arduino Watch Without A Clock

When you show up at a party wearing this bare PCB watch, there are effectively two possible reactions you might receive from the other people there. Either they are going to snicker at the nerd who’s wearing a blinking circuit board on their wrist in public, or they are going to marvel at the ridiculously low part count. We’ll give you one guess as to which reaction you’d likely get at any event Hackaday is involved in.

Designed and built by [Electronoobs], this extremely simple watch consists of a ATmega328P microcontroller, a dozen LEDs with their associated 200 Ω resistors, and a battery. There’s also a single push button on the front which is used to not only set the watch, but turn the LEDs on when you want to check the time. Short of dropping down to one LED and blinking out the time, it’s hard to imagine a timepiece with fewer components than this.

You’re probably wondering how [Electronoobs] pulled this off without an external clock source for the ATmega328P chip. The chip actually has an internal 8 MHz oscillator that can be used, but you need to flash the appropriate bootloader to it first. Accordingly, the backside of the PCB has both SPI and a UART solder pads for external bootloader and firmware programming.

As you might expect, there’s a downside to using the internal oscillator: it’s not very good. The ATmega328P spec sheet claims a factory calibrated accuracy of ±10%, and [Electronoobs] has found that equates to a clock drift of around 15 seconds per day. Not exactly great, but considering the battery only lasts for two days anyway, it doesn’t have much of an impact in this case.

Compared to other “analog” LED watches we’ve seen, the simplicity of this build is really quite remarkable. The closest competitor we’ve seen so far is this slick binary watch.

Continue reading “An Arduino Watch Without A Clock”

Simulate PIC And Arduino/AVR Designs With No Cloud

I’ve always appreciated simulation tools. Sure, there’s no substitute for actually building a circuit but it sure is handy if you can fix a lot of easy problems before you start soldering and making PCBs. I’ve done quite a few posts on LTSpice and I’m also a big fan of the Falstad simulator in the browser. However, both of those don’t do a lot for you if a microcontroller is a major part of your design. I recently found an open source project called Simulide that has a few issues but does a credible job of mixed simulation. It allows you to simulate analog circuits, LCDs, stepper and servo motors and can include programmable PIC or AVR (including Arduino) processors in your simulation.

The software is available for Windows or Linux and the AVR/Arduino emulation is built in. For the PIC on Linux, you need an external software simulator that you can easily install. This is provided with the Windows version. You can see one of several videos available about an older release of the tool below. There is also a window that can compile your Arduino code and even debug it, although that almost always crashed for me after a few minutes of working. As you can see in the image above, though, it is capable of running some pretty serious Arduino code as long as you aren’t debugging.

Continue reading “Simulate PIC And Arduino/AVR Designs With No Cloud”

Ask Hackaday Answered: The Tale Of The Top-Octave Generator

We got a question from [DC Darsen], who apparently has a broken electronic organ from the mid-70s that needs a new top-octave generator. A top-octave generator is essentially an IC with twelve or thirteen logic counters or dividers on-board that produces an octave’s worth of notes for the cheesy organ in question, and then a string of divide-by-two logic counters divide these down to cover the rest of the keyboard. With the sound board making every pitch all the time, the keyboard is just a simple set of switches that let the sound through or not. Easy-peasy, as long as you have a working TOG.

I bravely, and/or naïvely, said that I could whip one up on an AVR-based Arduino, tried, and failed. The timing requirements were just too tight for the obvious approach, so I turned it over to the Hackaday community because I had this nagging feeling that surely someone could rise to the challenge.

The community delivered! Or, particularly, [Ag Primatic]. With a clever approach to the problem, some assembly language programming, and an optional Arduino crystalectomy, [AP]’s solution is rock-solid and glitch-free, and you could build one right now if you wanted to. We expect a proliferation of cheesy synth sounds will result. This is some tight code. Hat tip!

Squeezing Cycles Out of a Microcontroller

Let’s take a look at [AP]’s code. The approach that [AP] used is tremendously useful whenever you have a microcontroller that has to do many things at once, on a rigid schedule, and there’s not enough CPU time between the smallest time increments to do much. Maybe you’d like to control twelve servo motors with no glitching? Or drive many LEDs with binary code modulation instead of primitive pulse-width modulation? Then you’re going to want to read on.

There are two additional tricks that [AP] uses: one to fake cycles with a non-integer number of counts, and one to make the AVR’s ISR timing absolutely jitter-free. Finally, [Ag] ended up writing everything in AVR assembly language to make the timing work out, but was nice enough to also include a C listing. So if you’d like to get your feet wet with assembly, this is a good start.

In short, if you’re doing anything with hard timing requirements on limited microcontroller resources, especially an AVR, read on!

Continue reading “Ask Hackaday Answered: The Tale Of The Top-Octave Generator”

FCC Filing Reveals Tasty Hardware McSecrets

If you’ve visited a McDonald’s recently, you might have noticed something of a tonal shift. Rather than relying on angsty human teenagers to take customer orders, an increasing number of McDonald’s locations are now using self-serve kiosks. You walk up, enter your order on a giant touch screen, and then take an electronic marker with you to an open table. In mere minutes your tray of nutritious delicious cheap food is brought to you by… well that’s still probably going to be an angsty teenager.

Thanks to a recent FCC filing pointed out to us by an anonymous tipster, we now know what kind of tech Ronald has packed into the electronic table markers (referred to as “tents” in McDonald’s parlance). It turns out they are Bluetooth Low Energy beacons powered by the Nordic nRF52832 chipset, and include some unexpected features such as an accelerometer to detect falls.

The Nordic nRF52832 features a 32-bit ARM Cortex M4F processor at 64 MHz with 512 KB flash and 64 KB SRAM. Quite a bit of punch for a table marker. Incidentally, this is the same chip used in the Adafruit Feather nRF52 Pro, so there’s already an easily obtainable development toolchain.

A image of the backside of the PCB shows a wealth of labeled test points, and we imagine figuring out how to get one of these table markers doing your own bidding wouldn’t be too difficult. Not that we condone you swiping one of these things along with your Quarter Pounder with Cheese. Though we are curious to know just why they need so much hardware to indicate which table to take a particular order to; it seems the number printed on the body of the device would be enough to do that.

This isn’t the first time we’ve taken a peek behind the Golden Arches. From reverse engineering their famous fries to hacking the toys they give out with Happy Meals, there’s more to do at the local McDonald’s than get thrown out of the ball pit again.

Turning Everything Into A Tap Controller

Our entire life is staring at glowing rectangles, and all our surroundings are hard, flat surfaces. [Ben] had the idea to turn those flat surfaces into a generic tap interface controller, and his project for the Hackaday Prize might just do that.

Some of the prior art that went into this project includes Ping Pong Plus Plus, an augmented-reality-ish implementation of ping pong that puts projected light wherever a ping pong ball hits the table. The game does this by mounting piezos to the bottom of a table and just a slight bit of math to determine where on the table the ball hit. There’s also MicLoc, a door lock that responds to knocking.

With this prior art, it’s all about microcontrollers and peripherals, and for that, [Ben] turned to the STM32F303RE, which sports four very fast ADCs and op-amps. There’s a lot of DMA usage on there, and the code is using a ton of signal processing. The important bit here is finding the difference between whatever the tabletop equivalent to an earthquake’s P-waves and S-waves are — [Ben] only wants the first bit of a waveform that travels through the table longitudinally, not the much louder vibrations of the entire table.

If [Ben] manages to put this together, an entire wall could be a light switch or a dimmer. You could add a secret knock to your door, and your desk could control your computer. It’s a promising idea, and the engineering that’s going into this project is just fantastic.

ARM Programming With Bare C

We confess. When starting a microcontroller project, we often start with the last one we did for that environment, copy it, and just make changes. And the first one? It — ahem — might have been found on the Internet. There’s a lot more than just your code that goes into this. If you want  to do (and understand) absolutely everything yourself on an ARM development project, you could use an all-in-one walkthrough. It just so happens [Jacob Mossberg] has a from scratch guide of what you need to do to get your C code running on ARM.

Starting with an ARM Cortex M3, he writes a simple C program and gets the assembly language equivalent. What follows is a detailed analysis of the machine code, exploring what the compiler assumed would be set up. This leads to understanding of what the start up code and linker script needs to look like.

It is a great approach and reminded us of the old saying about “teach someone how to fish.” He even devotes a little time to talking about getting debugging working with OCD. Of course, the exact details are specific to the chip he’s using, but most of it would apply to any ARM chip. Even if you don’t use ARM, though, the thought process and methodology is itself quite interesting.

This post would be just the thing if you are using Blue Pills and ready to move away from the Arduino ecosystem. Of course, if you want to veer away from the Arduino system, but don’t want to go all the way to bare metal, there’s always mBed.