One Shot IR Helper Is A Great Beginner Project

Sometimes you need a little utility device to do a very simple job, and do it well.This one-shot IR helper from [Gregory Sanders] is just that. 

[Gregory] had a TV that didn’t support automatically turning on when the power was applied. This is frustrating when you like to leave devices switched hard off when not in use to save on standby energy draw. Thus, there needed to be a way to send the screen an on signal when his multi-monitor setup was powered on.

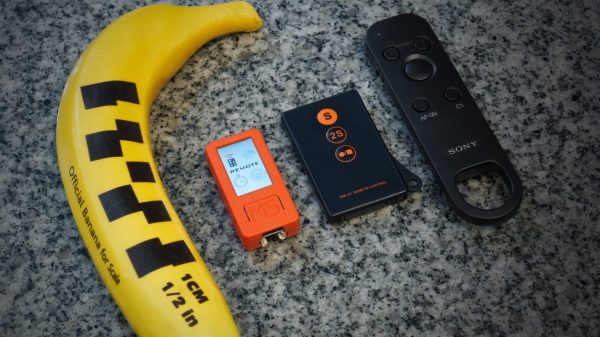
A simple circuit paired with a Pi Pico was pressed into service. The Pico flashes an IR LED, squirting out the requisite code to tell the TCL branded TV to switch on. [Gregory] figured out the codes by using an Arduino to read the output of the TV’s remote with an IR sensor. The hook here is the code is written in MicroPython, using IR libraries from [Peter Hinch].

Now, when [Gregory] powers up his rig, the IR sender will trigger the TV to switch on. It’s a little frustrating that the auto-on function wasn’t available in the factory, but regardless, now everything’s working as it should. If you want to do this in reverse, consider building a TV-B-Gone or a silencer for the boomboxes used by dancing grandmas!

GCore: Make Portable Devices With Less Frustration

[Dan Julio]’s gCore (short for Gadget Core) is aimed at making GUI-based portable and rechargeable gadgets much easier to develop. gCore is the result of [Dan]’s own need for a less tiresome way to develop such hardware.

A touchscreen is great, but high-quality power control and charging features are what really make a portable device sing.

[Dan] found that he seemed to always be hacking a lot of extra circuitry into development boards just to get decent power management and charge control. To solve this, he designed his own common hardware platform for portable gadgets and the gCore was born.

While the color touchscreen is an eye-catching and useful addition, the real star of his design is the power management and charging features. Unlike most development hardware, the gCore intelligently shares load power with charging power. Power on and power off are also all under software control.

Sound intriguing? That’s not all the gCore has to offer, and you can learn more from the project page at hackaday.io (which has a more in-depth discussion of the design decisions and concept.) There are also some additional photos and details on [Dan]’s website.

[Dan] is no stranger to developing hardware. The tcam-mini thermal imager (and much more) is his work, and we have no doubt the gCore’s design and features are informed directly by [Dan]’s actual, practical development needs.

Part of a picture showing all kinds of different CAN devices in a car

CAN Peripheral For RP2040, Courtesy Of PIO

[Kevin O’Connor] writes to us about his project, can2040adding CAN support to the RP2040. The RP2040 doesn’t have a CAN peripheral, but [Kevin] wrote code for the RP2040’s PIO engine that can receive and send CAN packets. Now we can all benefit from his work by using this openly available CAN driver. This library is written in C, so it’s a good fit for the lower-level hackers among us, and in all likelihood, it wouldn’t be hard to make a MicroPython wrapper around it.

The CAN bus needs a peripheral for the messages to be handled properly, and people have been using external chips for this purpose until now. These chips, [Kevin] tells us, have lately been unavailable due to the chip shortage, making this project more valuable. The documentation is extensive and accessible, and [Kevin] details how to best use this driver. With such a tool in hand, you can now turn your Pico into a CAN tinkering toolkit, or wire up some CAN devices for use in your own projects!

[Kevin] says this code is already being used in Klipper, a framework powering 3D printers and other machines like them. As for your own purposes, you can absolutely use such a CAN tool to hack on your car – here’s a treasure trove of car hacking documentation, by the way! Thanks to the PIO engine, there seems to be no end to the RP2040’s versatility – you can even drive HDMI monitor with this PIO-based DVI code.

Continue reading “CAN Peripheral For RP2040, Courtesy Of PIO”

Badges Of 2022: BornHack

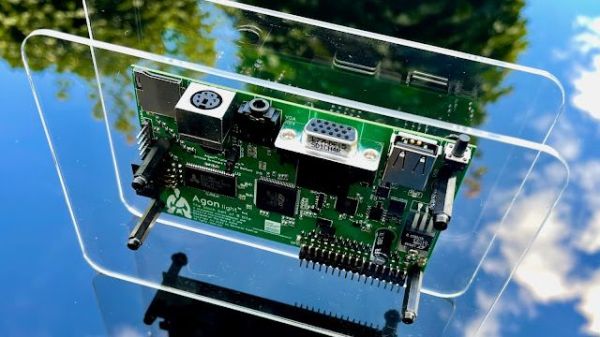
While the rest of the world’s hacker camps shut their doors through the pandemic there was one which managed through a combination of careful planning and strict observation of social distancing to keep going. The Danish hacker community gather every August for BornHack, a small and laid-back event in a forest on the isle of Fyn that has us coming back for more every year. They always have an interesting badge thanks to the designs of [Thomas Flummer], and this year looks to be no exception as they’ve dropped some details of the upcoming badge.

In short, it’s a beautifully designed hand-held games console with a colour screen, powered by the ubiquitous-in-the-chip-shortage RP2040 microcontroller. On board are the usual interfaces and a prototyping area plus CircuitPython for easy coding, and we expect it to sprout some addictive and playable gaming action. It’s the sort of PCB that we could imagine coming as a product from the likes of Pimoroni, but for now the only way to get your hands on one is to go to the event. We’ll being you a review when we have one. Meanwhile you can take a look at a previous year’s badge.

ESP32 Powers Fresh Take On An IoT Geiger Counter

Over the years we’ve covered many projects aimed at detecting elevated radiation levels, and a fair number of them have been Internet connected in some way. But as they are often built around the Soviet-era SBM-20 Geiger–Müller tube, these devices have generally adhered to a fairly conservative design. With the current situation in Europe heightening concerns over potential radiation exposure, [g3gg0] thought it was a good a time as any to revisit the idea of an Internet-connected Geiger counter using more modern components.

Now to be clear, even this modernized approach still makes use of that same SBM-20 tube. There’s such an incredible wealth of information floating around out there about how to work with them that you’d almost put yourself at a disadvantage to chose something else to base your design on. Put simply, it’s hard to go wrong with a classic.

An unfortunate bug was discovered in the HV circuit.

That said, [g3gg0] decided early on that the design would use as many SMD components as possible, a considerable departure from many of the SBM-20 counters we’ve seen. That meant coming up with a new high-voltage power supply capable of providing the tube with the necessary 400 V, which from the sound of things, took a few attempts to complete. The final result is perhaps the smallest and cleanest looking board we’ve ever seen play host to this particular tube.

To run the show, [g3gg0] selected the ESP32-PICO-D4. You certainly don’t need such a powerful microcontroller to read the impulses from the SBM-20 tube and publish them via MQTT, but to be fair, the chip has a number of other duties. It’s handling the WS2812 RGB LEDs that go off in response to detected particles, running the (apparently optional) 2.9 inch WaveShare electronic paper display, and also pulling data from a BME280 environmental sensor as well as a CCS811 VOC sensor — so it’s keeping fairly busy.

As impressive as this build is, we do hate that it had to be built. From certain world leaders dropping casual comments about the strength of their nuclear arsenal to foolhardy attempts to capture the Chernobyl power station, having access to a reliable Geiger counter isn’t an unreasonable precaution right now. For everyone’s sake, let’s hope the fancy RGB LEDs on this particular build remain as dark as possible.

Continue reading “ESP32 Powers Fresh Take On An IoT Geiger Counter”

Pico Makes Capable Logic Analyzer

A common enough microcontroller project is to create some form of logic analyzer. In theory, it should be pretty easy: grab some digital inputs, store them, and display them. But, of course, the devil is in the details. First, you want to grab data fast, but you also need to examine the trigger in real time — hard to do in software. You may also need input conditioning circuitry unless you are satisfied with the microcontroller’s input characteristics. Finally, you need a way to dump the data for analysis. [Gusmanb] has tackled all of these problems with a simple analyzer built around the Raspberry Pi Pico.

On the front and back ends, there is an optional board that does fast level conversion. If you don’t mind measuring 3.3 V inputs, you can forego the board. On the output side, there is custom software for displaying the results. What’s really interesting, though, is what is in between.

The simple PCB is completely optional.

The Pico grabs 24 bits of data at 100 MHz and provides edge and pattern triggers. This is impressive because you need to look at the data as you store it and that eats up a few instruction cycles if you try to do it in software, dropping your maximum clock rate. So how does this project manage it?

It uses the Pico’s PIO units are auxiliary dedicated processors that aren’t very powerful, but they are very fast and deterministic. Two PIO instructions are enough to handle the work for simple cases. However, there are two PIOs and each has four separate state machines. It still takes some work, but it is easier than trying to run a CPU at a few gigahertz to get the same effect. The fast trigger mode, in particular, abuses the PIO to get maximum speed and can even work up to 200 MHz with some limitations.

If you want to try it, you can use nothing more than a Pico and a jumper wire as long as you don’t need the level conversion. The project page mentions that custom software avoids using OpenBench software, which we get, but we might have gone for Sigrok drivers to prevent having to reinvent too many wheels. The author mentions that it was easier to roll your own code than conform to a driver protocol and we get that, too. Still, the software looks nice and even has an SPI protocol analyzer. It is all open source, so if you want other protocols before the author gets to them, you could always do it yourself.

If you do want a Pico and Sigrok, we’ve covered a project that does just that. Most of the logic analyzers we use these days we build into our FPGA designs.

GGWave Sings The Songs Of Your Data

We’re suckers for alternative data transmission methods, and [Georgi Gerganov]’s ggwave made us smile. At its core, it’s doing what the phone modems of old used to do – sending data encoded as different audio tones. But GGwave does this with sophistication!

It splits the data into four-bit chunks, and uses 16 different frequency offsets to represent each possible value. But for each chunk, these offsets are added to one of six different base frequencies, which allows the receiving computer to tell which chunk it’s in. It’s like a simple framing concept, and it makes the resulting data sound charmingly like R2-D2. (It also uses begin and end markers to be double-sure of the framing.) The data is also sent with error correction, so small hiccups can get repaired automatically.

What really makes ggwave shine is that it’s ported to every platform you care about: ESP32, Arduino, Linux, Mac, Windows, Android, iOS, and anything that’ll run Python or JavaScript. So it’ll run in a browser. There’s even a GUI for playing around with alternative modulation schemes. Pshwew! This makes it easy for a minimalist microcontroller-based beeper button to control your desktop, or vice-versa. An ESP32 makes for an IoT-style WiFi-to-audio bridge. Write code on your cell phone, and you can broadcast it to any listening microcontroller. Whatever your use case, it’s probably covered.

Now the downside. The data rate is slow, around 64-160 bits per second, and the transmission is necessarily beepy-booopy, unless you pitch it up in to the ultrasound or use the radio-frequency HackRF demo. But maybe you want to hear when your devices are talking to each other? Or maybe you just think it’s cute? We do, but we wouldn’t want to have to transmit megabytes this way. But for a simple notification, a few bytes of data, a URL, or some configuration parameters, we can see this being a great software addition to any device that has a speaker and/or microphone.

Oh my god, check out this link from pre-history: a bootloader for the Arduino that runs on the line-in.

Continue reading “GGWave Sings The Songs Of Your Data”