Big fizzing electrical arcs are fun, and handled properly, not too dangerous either. The Jacob’s Ladder is one such piece of arc-generating equipment, one that featured heavily in vintage sci-fi films. It remains a charming demonstration of high-voltage electrical principles, and you can easily build your own mini version at home.
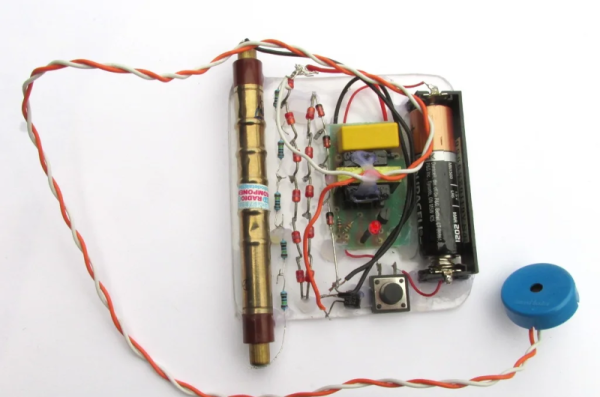
The build starts with a basic high-voltage step-up kit that turns 4V DC into 15 kV at the output. At this voltage level, it’s possible to generate an arc in air. To create the Jacob’s ladder, the kit is wired up to a pair of closely-spaced electrodes that slowly get farther apart as they go up vertically. When an arc jumps from one electrode to the other, it ionises the air, and the voltage sags due to the current flow. The flowing current heats up the air, which begins to rise, taking the current path with it, causing the familiar climbing arc we all know and love. As the distance between the electrodes increases towards the top, the arc can eventually no longer be sustained. With no current flowing, the voltage rises again, and a new arc forms at the bottom of the device, repeating the process.
It’s a fun build that would make an excellent desk toy, albeit best shown under glass to avoid accidental electric shocks. You can even build a larger one out of microwave parts if you’re so inclined. Video after the break.
Continue reading “A Tiny Jacob’s Ladder You Can Build At Home”