Making A Concrete Pinhole Camera

A pinhole camera is a simple device that can be built out of virtually any simple closed chamber, and is a great way to learn about the basic principles of photography. [amuu] has created a version that can be readily made out of concrete, of all materials!

The photos captured by the camera featured some artifacts from light leaks and grit, but the results are enjoyable for their lo-fi, homebrew aesthetic!

The build starts with the creation of a mold for the concrete, using laminated sheets of foam. The foam is assembled with cut-up pieces of a ballpoint pen serving as cores in the mold. This provides a space for the film winders in the final product. The concrete is then mixed and poured into the mold, and allowed to set. Tapping or vibrating the mold is key to getting all the air bubbles out of the mixture.

Once set, the foam is mechanically removed from the concrete and the camera can be finished off. The internals are given a lick of black paint to improve the camera’s light-tightness. The shutter, pinhole, and film winder are then also fitted to allow the camera to function.

[amuu]’s first attempt to take photos with the camera lead to some results that were pleasingly lo-fi. There are overscan issues on the film and some other artifacts, but overall, the results are esoteric and fun. If you’re not a fan of the concrete camera, though, you can always consider making a 3D-printed pinhole camera instead!

Easy Network Config For IoT Devices With RGBeacon

When you’re hooking up hardware to a network, it can sometimes be a pain to figure out what IP address the device has ended up with. [Bas Pijls] often saw this problem occurring in the classroom, and set about creating a simple method for small devices to communicate their IP address and other data with a minimum of fuss.

[Bas] specifically wanted a way to do this without adding a display to the hardware, as this would add a lot of complexity and expense to simple IoT devices. Instead, RGBeacon was created, wherin a microcontroller flashes out network information with the aid of a single RGB WS2812B LED.

In fact, all three colors of the RGB LED are used to send information to a computer via a webcam. The red channel flashes out a clock signal, the green channel represents the beginning of a byte, and the blue channel flashes to indicate bits that are high. With a little signal processing, a computer running a Javascript app in a web browser can receive information from a microcontroller flashing its LEDs via a webcam.

It’s a neat hack that should make setting up devices in [Bas]’s classes much easier. It needn’t be limited to network info, either; the code could be repurposed to let a microcontroller flash out other messages, too. It’s not dissimilar from the old Timex Datalink watches which used monitor flashes to communicate!

Number Like It’s 1234 AD With This Cistercian Keypad

Don’t feel bad if you don’t know what Cistercian numbers are. Unless you’re a monk of the Order of Cistercia, there’s really no reason for you to learn the cipher that stretches back to the 13th-century. But then again, there’s no reason not to use the number system to make this medieval-cool computer number pad.

If you haven’t been introduced to the Cistercian number system, it’s actually pretty clever. There are several forms of it, but the vertical form used here by [Tauno Erik] is based on a vertical stave with nine glyphs that can be attached to or adjacent to it. Each glyph stands for one of the nine numerals — one through nine only; there’s no need for a zero glyph. There are four quadrants around the stave — upper right, upper left, lower right, and lower left — and where the glyph lies determines the multiplier for the glyph. So, if you wanted to write the number “1234”, you’d overlay the following glyphs into a single symbol as shown.

[Tauno]’s Cistercian keypad, admittedly more of an art and history piece than a useful peripheral, somehow manages to look like it might have been on the desk of [Theodoric of York, Medieval Accountant]. Its case is laser-cut birch plywood, containing a custom PCB for the 20 keyboard switches and the Xiao RP2040 MCU that runs the show. Keycaps are custom made from what looks like oak combined with a 3D-printed part, similar to his previous wooden keycap macro pad. Each of the nine Cistercian glyphs is hand-carved into the keycaps, plus an imaginary glyph for zero, which wasn’t part of the system, as well as operators and symbols that might have baffled the medieval monks.

The native Cistercian system is limited to numbers between 1 and 9,999, so we’ll guess that the keypad just outputs the Arabic numeral corresponding to the Cistercian key pressed and doesn’t actually compose full Cistercian numbers. But the code to do that would be pretty easy, and the results pretty cool, if a bit confusing for users. Even if it’s just for looks, it’s still a cool project, and we doff the hood of our monkish robe to [Tauno] for this one.

Flexures Make This Six-DOF Positioner Accurate To The Micron Level

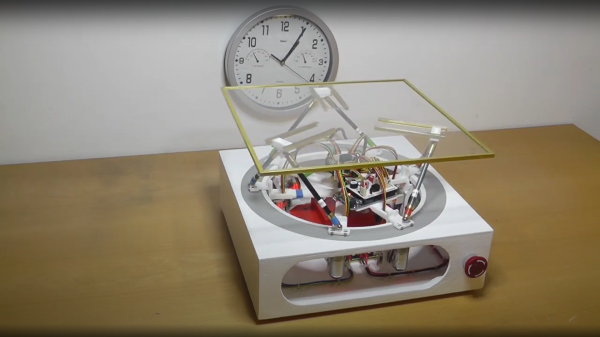
It’s no secret that we think flexures are pretty cool, and we’ve featured a number of projects that leverage these compliant mechanisms to great effect. But when we saw flexures used in a six-DOF positioner with micron accuracy, we just had to dig a little deeper.

The device is known as the Hexblade, and it comes to us from the lab of [Jonathan Hopkins] at UCLA. We have to admit that at times, the video below feels a little like the “Turbo Encabulator” schtick — “three identical decoupled actuation limbs arranged in an axisymmetric configuration” may be perfectly descriptive, but it does not flow trippingly from the tongue. Hats off to [Professor Hopkins] for nailing the narration, though, and really, once you get a handle on the jargon, it all makes perfect sense. The platform is supported by a total of six flexures, which look like bent pieces of sheet metal but are actually cut from a solid block of material using wire EDM. Three of the flexures are oriented in the plane of the platform, while the other three are perpendicular to it. The far end of each flexure is connected to a voice-coil actuator that is surrounded by another flexure, this one in a parallelogram arrangement. The six actuators can move the platform smoothly through three linear translations (X, Y, and Z) and three rotations (roll, pitch, and yaw).
The platform’s range of motion is limited, but the advantages of using flexures as bearings are clear — there’s no backlash or hysteresis, and the voice coils can control the position of the stage to micron accuracy. Something like the Hexblade would be an ideal positioner for microscopy, and we can imagine an even smaller version, perhaps even a MEMS-fabricated one for nanomanufacturing applications. The original concept of the Hexblade serving as the print head for a fabrication robot for space applications is pretty cool, too, and we’d venture to say that a homebrew version of this probably isn’t out of reach either.

Continue reading “Flexures Make This Six-DOF Positioner Accurate To The Micron Level”

Backyard with a squirrel maze

Fort Knutz – Squirrels Go All Mission Impossible

[Mark Rober] has a bird feeder in his back yard. Also, squirrels who eat the seed. So, as one does, he built a nine part squirrel obstacle course with a reward of walnuts at the end, and filmed them beating the course.

(Spoiler – this is all much better in the video, which we’ve placed below the break).

His four backyard squirrels enter a ‘Casino’ and avoid the plushie ‘security’.  From there it’s across a rod mounted on bearings, leap into a crate under a helicopter, which zip-lines to a brick wall with randomly moving bricks, and into their hideout.

A squirrel at a model buffet in a casino
Security is about to get him.

The hideout elevator shaft leads to a sewer, which leads to the famous room from Mission Impossible where [Tom Cruise] has to avoid the floor, but to get to the hatch in the top they have to lower a ladder by ‘hacking into’ the control system (by pushing a keyboard shaped button) and lowering a rope ladder.

Next they go through a tube maze to a room full of laser beams (3D printer filament) and finally they can jump onto the platform with Fort Knutz. If they get the vault door open, they’re rewarded with a shower of walnuts.

Continue reading “Fort Knutz – Squirrels Go All Mission Impossible”

3D Printed Turbo Pump Hopes To Propel Rockets To The Sky

There are plenty of rocket experimenters toying with various liquid-fueled contraptions at the moment, and [Sciencish] is one of them. He grew tired of using air-pressurized fuel delivery systems in his experiments due to safety reasons, and decided to create something approximating more grown up rocket designs. The result was a 3D-printed turbopump for fuel delivery.

The design is not dissimilar from a turbocharger in a car. On one side, a turbine wheel is turned by compressed air supplied from a tank or compressor. This turbine wheel is affixed to the same axle as an impeller which draws up fuel and pumps it out, ideally into a rocket’s combustion chamber. It’s all made out of resin-printed parts, which made creating the fine geometry of the turbine and impeller a cinch.

Running on compressed air at 80 psi, the turbopump is able to deliver 1.36L of water or rubbing alcohol fuel a minute. However, unfortunately, this first pass design can only deliver 20 psi of fuel pressure, which [Sciencish] suspects will not be enough to counteract combustion chamber pressures in his rocket design. More work is required to up this figure. Paired with a nozzle and ignition source, though, and it does make for some great flames.

Overall though, the safety benefit of this turbopump comes from the fact that the fuel is kept separate from the oxidizer until it reaches the combustion chamber. This comes with far less chance of fire or explosion versus a system that stores fuel pressurized by air.

While the design isn’t yet up to scratch for rocket use, it nonetheless works, and we suspect with some improvement to tolerances and fin design that the project should move along at a quick pace.

If solid rockets are more your thing though, we’ve featured plenty of those too. Video after the break.

Continue reading “3D Printed Turbo Pump Hopes To Propel Rockets To The Sky”

Calculating Pi On The 4004 CPU, Intel’s First Microprocessor

These days we are blessed with multicore 64-bit monster CPUs that can calculate an entire moon mission’s worth of instructions in the blink of an eye. Once upon a time, though, the state of the art was much less capable; Intel’s first microprocessor, the 4004, was built on a humble 4-bit architecture with limited instructions. [Mark] decided calculating pi on this platform would be a good challenge. 

It’s not the easiest thing to do; a 4-bit processor can’t easily store long numbers, and the 4004 doesn’t have any native floating point capability either. AND and XOR aren’t available, either, and there’s only 10,240 bits of RAM to play with. These limitations guided [Mark’s] choice of algorithm for calculating the only truly round number. Continue reading “Calculating Pi On The 4004 CPU, Intel’s First Microprocessor”